I accidentally emptied the Trash on my Mac and deleted important files I still need for work and personal documents. I didn’t realize they were in the Trash until after it was cleared, and now I’m trying to find the best way to recover deleted files on Mac before anything gets overwritten. What recovery options should I try first?
If you already emptied the Trash, stop using the MacBook now. I mean it. Don’t install stuff. Don’t save files. Quit apps you don’t need. If it’s open and writing in the background, shut it down.
Here’s the ugly part. Emptying Trash on macOS usually does not erase the file data right away. The system drops the pointers to those files and marks the space as free. The data often still sits there for a bit. The problem starts when macOS writes something new into those same blocks. Then your old file gets replaced, piece by piece, and recovery drops off fast.
With newer MacBooks, this gets worse because of SSD behavior and TRIM. TRIM tells the drive which deleted blocks it can wipe in the background. Good for speed. Bad for you when you need deleted files back. On some systems it happens fast enough that waiting around hurts your odds.
What I’d check first, before messing with recovery tools:
-
Time Machine snapshots
If you use Time Machine, look there first. Even without the backup drive plugged in, macOS often keeps local snapshots for roughly the last day. Open Time Machine, go to the folder where the files lived before you trashed them, then scroll back. I’ve seen files show up there after people swore they were gone. -
Cloud trash bins
If those files were in iCloud Drive, Dropbox, or Google Drive, leave the Mac alone and check the account from your phone or another computer. A lot of cloud services keep their own deleted-items area for around 30 days. Your local Trash being empty doesn’t always touch the cloud copy. -
App-specific deleted folders
Photos and Notes are the common ones. Apple keeps a “Recently Deleted” section inside those apps, often for 30 to 40 days. People miss this all the time.
If none of those hit, then you’re down to recovery software.
What those tools do is scan the raw storage and try to rebuild files from data still sitting on the drive. On older Macs, lots of apps sort of worked. On newer ones, not so much. Apple Silicon models and Macs with the T2 chip are tougher because of encryption and drive access limits.
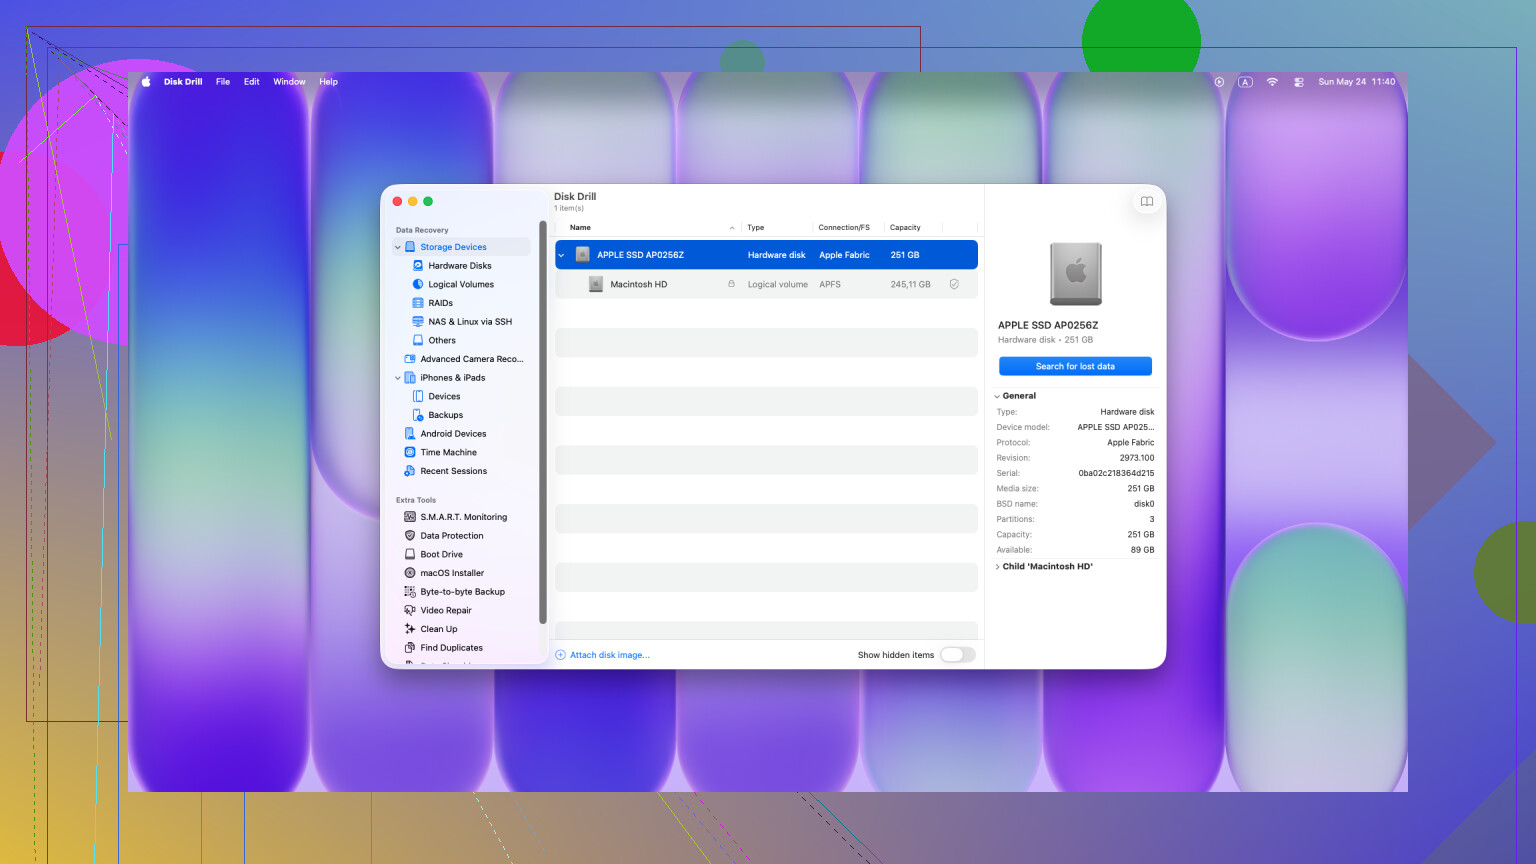
From what I’ve seen, Disk Drill tends to do better on recent Macs than the random older tools people keep recommending in old threads. The reason matters. Newer Macs lock things down harder, and some recovery apps don’t cope well with that.
Big thing here. Do not install recovery software onto the same internal drive if you can avoid it. That write activity is the exact thing you’re trying to prevent. Better move is this:
- Use another computer
- Download the recovery app onto a USB drive
- Plug the USB into the MacBook
- Run it from there if possible
Once it’s open, run a Universal Scan. The scan itself is free, and you get previews of what it finds. That matters more than people think. If you see proper thumbnails or files opening in preview, you know the recovery has a shot before spending money. If you recover anything, save it to an external drive. Don’t write it back onto the Mac’s internal storage.
If the scan returns nothing useful, then you’re at lab territory. A data recovery shop can work below the operating system with specialized hardware. Sometimes they pull off stuff software misses. The bill is rough though. I’ve seen numbers from about $300 up to $3,000, sometimes more if the case is ugly. Makes sense only if the files are tied to work, taxes, legal stuff, or family photos you can’t replace.
Also, skip the Terminal folklore. A bunch of commands floating around forum posts deal with a Trash folder that still contains items. They do not resurrect a Trash you already emptied. Once it’s emptied, commands like that won’t help.
So, short version:
- Stop using the Mac
- Check Time Machine
- Check iCloud, Dropbox, Google Drive
- Check Photos and Notes “Recently Deleted”
- If needed, scan with Disk Drill from a USB setup
- Recover files to an external drive
- If nothing shows up, decide whether the files are worth lab pricing
If you move fast, sometimes you get lucky. If you keep using the machine, your odds slide fast.
14 Likes
If the Trash is already empty, your best move is to work from backups and other copies first, not from the Mac itself.
I agree with most of what @mikeappsreviewer said, but I’m a little less bullish on file carving from modern internal SSDs. On newer Macs, recovery from the internal drive often fails fast. So I’d spend 10 minutes on these checks before sinking time into a deep scan:
-
Recent exports and autosaves.
Look in app folders, not Trash. Word, Excel, Preview, Pages, Adobe apps, and many editors leave temp or autosave versions in Library containers. Search your Mac for the file name, file type, or part of the content with Spotlight if indexing is still there. Sometimes the deleted original is gone, but a duplicate survived. -
Mail and messages.
If someone emailed you the doc, or you sent it through Messages, Slack, Teams, or WhatsApp Desktop, pull a copy from there. Work docs get recovered this way all the time. -
Shared drives and office systems.
Check OneDrive version history, SharePoint, company NAS snapshots, Synology recycle bins, and Google Workspace file history. A lot of people forget their “local” file started from a synced source. -
Temporary internet copies.
For PDFs, images, and downloads, your browser download history sometimes points back to the source. You might be able to re-download in 30 seconds and save your self a headache.
If you do move to software, Disk Drill is one of the few Mac recovery tools I’d still bother trying. Not because recovery apps are magic. They aren’t. It’s useful because the scan and preview tell you fast if anything recoverable still exists. If previews are broken or file names are gone, your odds drop a lot.
One more thing people miss. If FileVault was on and the Mac has been rebooted a few times after deletion, chances get worse. So speed matters.
Also, for anyone searching this later, this guide title is clearer:
Mac emptied Trash recovery tutorial, how to recover deleted files after emptying Trash on Mac
And if you want a walkthrough, here’s a decent video:
watch this Mac Trash recovery walkthrough
Short version. Check surviving copies first. Then try Disk Drill. If the files are business-critical and worth money, skip DIY sooner rather then later and talk to a lab.

One thing I’d add to what @mikeappsreviewer and @viajantedoceu said: don’t trust Finder’s search results too much right now. Spotlight can still show “ghost” results for files that are already gone, and that wastes time when you’re panicking. Use it to hunt for duplicates, sure, but verify by actually opening the file.
Also, I sorta disagree with the idea that a long DIY effort is always worth it on newer Macs. If this is an internal SSD on a recent MacBook, sometimes you can burn hours scanning and get basically nothing because TRIM already did its thing. That’s just the annoying reality.
A few extra places to check that people forget:
- Your Downloads folder. Sounds dumb, but a lot of “important docs” were never moved.
- “Recents” in Finder, which can point to copies in weird app folders.
- Print dialog history or exported PDF folders if you printed/saved versions before.
- External drives you plugged in before. Sometimes apps save to the last used location and people forget.
- Office app recovery panes when reopening Word/Excel/PowerPoint.
If you do try software, Disk Drill is still a reasonable Mac deleted file recovery option because you can at least scan and preview before throwing money at it. I would not install it on the same drive if you can avoid it. That part matters more than people think.
Also worth skimming this Apple Support discussion on recovering files after emptying Trash on Mac since a few people there mention backup-related saves people overlook.
Short version: check surviving copies, temp saves, exports, synced folders, then try Disk Drill if the files are actually worth the hassle. If it’s mission critcal, skip the hero stuff and call a recovery shop. Time matters alot here.
One angle not covered enough by @viajantedoceu, @vrijheidsvogel, and @mikeappsreviewer is app-internal history.
A lot of “deleted” work files still exist as:
- Word autorecovery
- Pages document versions
- Adobe recovery copies
- Preview’s duplicated exports
- ZIP attachments re-saved by Mail
Also check macOS Versions if the file lived in an app that supports it. Right click the parent document or open the app and look for Browse All Versions. That can rescue content even when the original file path is gone.
I slightly disagree with the “shut down immediately” advice in every case. If the missing files were in iCloud Drive/Desktop/Documents sync, sometimes staying booted just long enough to inspect web copies from another device is safer than repeated power cycles.
If DIY scanning is needed, Disk Drill is fine for Mac emptied Trash recovery.
Pros:
- good preview system
- simple interface
- handles APFS better than many old tools
Cons:
- not magic on TRIMmed SSDs
- deep scans can return messy filenames
- paid recovery if you actually want to save results
If the files matter and the Mac uses a modern internal SSD, I’d set a hard limit: 1 scan, then decide on a lab. Hours of rescanning usually changes nothing.