I accidentally formatted the SD card from my camera and realized too late that all my vacation photos were on it. I haven’t copied them anywhere else and some of the pictures are really important to me. Is there any safe way to recover images from a formatted SD card without making things worse, and what tools or steps should I try first?
I formatted a card during a wedding once and my stomach hit the floor so hard I still remember the feeling.
Here is what I learned the hard way.
Stop using the card
Pull the card out and leave it alone.
No more shots.
No chimping.
Do not let the camera write a single new file.
A standard format on a camera wipes the index, not the photo data itself. The photos stay on the card until new data gets written over the same spots. Once that happens, recovery turns into a lottery.
Use a card reader, not the camera
I stopped plugging cameras straight into the computer after that day.
Use a USB card reader instead and read the SD card like a normal drive. I get fewer connection issues and more stable behavior with recovery tools that way.
Most cameras do a quick format. That is good for you, because it usually resets the file system structure without doing a full overwrite of the storage area.
If you are fuzzy on how these things even store data, this short definition helps:
https://glossary.7datarecovery.com/what-is-an-sd-card/
Knowing that the files are often still there under the surface makes it easier to stay calm.
Make a full image of the card first
This is the step I skipped early in my career and regret.
Before you run any recovery software, create an image of the whole card to your computer. A sector-by-sector copy. Then do all your recovery attempts on that image instead of the real card.
Why this matters:
• If a tool glitches or you pick the wrong option, the original card stays untouched.
• You can try multiple recovery programs on the same image file without degrading the source.
• If you mess up, you delete the image and start again from the original card.
Since I started doing this, the stress level dropped a lot. I know I have a frozen snapshot of the mistake.
Recovery expectations
From my own jobs:
• Freshly formatted, no new shots taken: success rate has been high for me.
• Formatted, then someone kept shooting: mixed results. New photos often overwrite older ones in chunks. You end up with half-recovered sets or corrupted frames.
• Formatted multiple times or low-level formatted in-camera: odds go down fast.
So, if you are still early in the disaster, your best move is simple:
- Eject the card.
- Put it in a card reader on a computer.
- Make a full image backup of the card.
- Run recovery attempts only on that image.
- Do not write anything to the original card until you are done.
I have pulled full weddings, family shoots, and travel work back from “formatted” cards with this process. Not every time, but enough that I now treat a format mistake as a problem to work, not an automatic loss.
4 Likes
Short answer, yes, there is a decent chance your photos are still there if you stopped using the card right after the format.
@mikeappsreviewer already covered the big emergency rules. I agree with “stop using the card” and “use a card reader”. I do things a bit differently after that, so here is a practical path.
-
Check the type of format you did
Camera “format” is usually quick format.
Quick format erases the file table, not the data blocks.
Low level format or “overwrite” options write zeros. If your camera did that, recovery success drops a lot. -
Use proper recovery software
Do not browse the card in Finder or Explorer more than needed. That sometimes triggers writes, thumbnails, or hidden files.
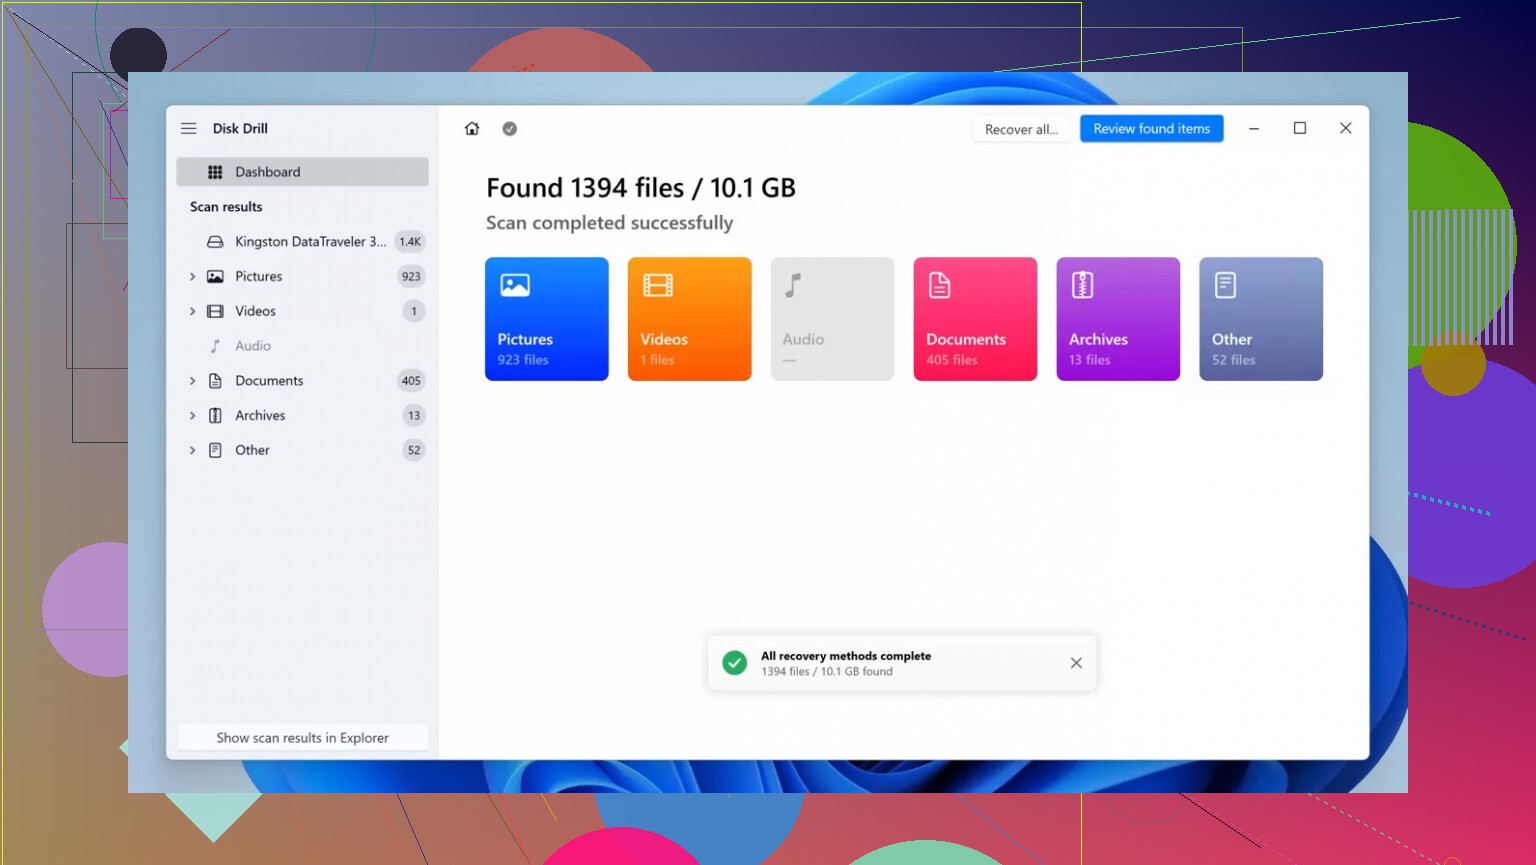
On Windows or macOS, I had solid results with Disk Drill for formatted SD cards. It handles raw photo formats from Canon, Nikon, Sony, etc, and it lets you preview files before you recover them. That helps you avoid saving junk or corrupted clusters.
Other tools exist, but Disk Drill tends to be easier for non tech users and supports deep scans on SD, microSD, and CF cards.
- Do a read-only scan first
Here is where I mildly disagree with @mikeappsreviewer. Imaging the card first is ideal, but many people have no idea how to do a sector image and no spare disk space.
If you do not feel comfortable with imaging tools, at least choose a recovery tool that reads the card without writing to it. Disk Drill and similar tools read the card and write output only to your computer drive.
Key points when you start the scan:
• Select the SD card, not individual folders.
• Use the “deep scan” or equivalent mode.
• Be patient. 32 GB or 64 GB cards take time.
-
Save recovered photos to a different drive
Never save the recovered files back to the same SD card.
Use your internal drive or an external HDD or SSD.
Writing recovered files to the SD risks overwriting other photos that are still recoverable. -
Expect some damaged files
From formatted cards with no new photos taken, I often see:
• 80 to 100 percent of JPEGs intact.
• Some RAW files with partial corruption at the end of the image.
• A few totally unreadable files.
If you shot more after the format, success rate drops. New photos take the same storage blocks, so old ones turn into half images or weird colors.
-
When to involve a lab
If the photos have high emotional or legal value and software fails, stop DIY attempts.
Data recovery labs use direct access to the flash storage chips.
Price range is often 300 to 1000 USD, sometimes more.
Success is not guaranteed, but they do better when the card has no extra writes after the incident. -
Avoid future heart attacks
Once you get through this, change your workflow.
• Back up cards to a laptop or external drive each day on trips.
• Use two cards in cameras that support dual slots, set to “backup” mode.
• Rotate cards instead of reusing a single one all the time.
For your SEO bit, a better title for your topic is:
How to Recover Photos from a Formatted SD Card Safely
If you want a clear walkthrough for new users, this guide on recovering photos from a formatted SD card step by step explains the process in a simple way, from connecting the card, through using software like Disk Drill, to saving the images in a safe location.
Act fast, avoid writing to the card, and focus on read-only tools. Your odds are still decent.

Short version: yes, you might get them back, but it depends what kind of format you did and what you’ve done with the card since.
Couple of points that haven’t really been stressed by @mikeappsreviewer or @cazadordeestrellas:
-
Check what the camera actually did
Camera “Format” is usually a quick format, but not always. Some brands quietly enable options like:- “Low level format”
- “Erase data”
- “Overwrite” or “secure erase”
If you had one of those boxes checked, the controller may have actively overwritten blocks. In that case, software recovery is often dead-on-arrival, and sending it to a pro lab is basically your only real shot.
-
Wear leveling can be your silent enemy
Flash controllers shuffle data around internally (wear leveling), so even if you did a quick format, some blocks might have been recycled in the background if you kept shooting or deleting before the format. That’s why:- Two people can do “the same” mistake
- One recovers 99%
- The other gets a bunch of half-gray, glitchy frames
So if you see weird torn images in recovery previews, that isn’t the software, it’s overwritten clusters.
-
Disk Drill vs “free magic tools”
People love to throw every free utility at a card. That can waste the very limited “read life” of a failing SD. I’d actually start with one decent tool that is good at formatted-card recovery.
This is where Disk Drill really shines:- Handles RAW formats from most DSLRs and mirrorless cams
- Deep scan works well specifically on quick‑formatted media
- Lets you preview before recovery so you’re not restoring 10k useless fragments
If that one fails to find much, then yeah, try others. But randomly scanning with five different sketchy tools first isn’t helping.
-
Don’t rely only on “undelete” style scans
Many tools default to “simple” or “quick” recovery that just rebuilds the old file table. After a camera format, that table is gone or reset. Make sure you:- Run a deep / signature-based scan
- Look under “Found files” or “Reconstructed” folders in the results
It’s normal that filenames and folders are gone. You might get things back asfile001.jpg,file002.cr2, etc. That’s not a bug, that’s just how raw, signature-based recovery works.
-
Watch your expectations by card size and usage
Rough rule of thumb from lots of recoveries:- 16–32 GB card, formatted right after a trip, almost full: odds are actually decent because the data layout was relatively stable.
- 128–256 GB card, barely half used, then formatted, then a bunch of test shots: data is more spread out and partially overwritten. Expect many broken frames.
So the “I didn’t shoot after formatting” detail matters more than people think. If you did shoot more, look carefully at previews; don’t just mass recover everything and get disappointed later.
-
When “doing nothing” is better than trying “everything”
If these photos are truly irreplaceable and you’re not comfortable with any of this:- Stop fiddling with the card
- Do not run random utilities you barely understand
- Power the card down and talk to a professional data recovery lab
Every panicked “experiment” on the live card chips away at your odds, especially if the card has any physical issues.
-
About “Fix Corrupted SD Card Without Formatting” type advice
A lot of online guides tell you to run chkdsk / fsck or “repair disk” right away. For your situation (formatted card with valuable photos) that’s often the wrong first move. Those tools can:- Modify the file system structures
- Make later photorecovery harder
They’re fine once you’ve saved what you can, not before.
If you later end up with a corrupted SD card (not formatted, but unreadable) and need to repair it with minimal risk, there’s a solid walkthrough here:
How to repair a damaged SD card without losing data
That’s more about fixing a bad card safely than about your current “oops I formatted it” situation.
For now: don’t write to the card, use a card reader, pick one good tool like Disk Drill, run a deep, read‑only scan, and judge your chances based on what the previews show, not on hope.
Short version: you might get them back, but here are a few angles that haven’t been covered much yet.
1. Before touching anything: check the card’s health
Everyone focused on “don’t write to the card” (correct), but there’s a second risk: a dying SD that silently spits out read errors. If the controller is failing, endless deep scans just chew through what life is left.
On a computer, check for basic signs of trouble read‑only:
- Does the card randomly disconnect while just browsing it in the OS?
- Do you hear the reader cycling or see the mount / unmount dance?
- Does the capacity shown match what is printed on the card? Huge mismatch can indicate a fake card, and recovery success is usually worse.
If you see weird behavior like that, keep total scans to a minimum and strongly consider a pro lab instead of trying 5 different tools.
2. About imaging the card: be practical, not perfect
@cazadordeestrellas and @mikeappsreviewer are right that a sector‑by‑sector image first is the gold standard. I agree in principle, but in practice:
- Many “normal” users do not have
ddrescueor similar tools set up. - A bad attempt at imaging (wrong target drive, wrong options) can be more dangerous than running a straightforward recovery on the card once.
So if you are not comfortable with disk imaging tools, I would not insist on “image or nothing.” The hierarchy I suggest:
- If you know how to clone a disk properly, image the card and work only on that clone.
- If you do not, pick a recovery program that can be set to read‑only and do a single deep scan directly on the card.
- If at any point the card starts acting flaky, stop and get professional help.
Perfect workflow is great. A simple, safe one you can actually execute is better than a theoretical best practice you might mess up.
3. Tool choice: pros and cons of Disk Drill vs others
You do not need to throw twenty utilities at the card. Every full deep scan is hours of nonstop reading.
Disk Drill is a solid first choice for a formatted camera card, but it is not magic. Here is a neutral view:
Pros of Disk Drill
- Very good at deep scans on quick‑formatted media.
- Recognizes many RAW formats (Canon, Nikon, Sony, FUJIFILM, etc.), which a lot of generic tools treat as unknown data.
- File preview is helpful so you can visually confirm which photos are intact before recovering.
- Interface is less confusing than some classic data recovery tools, which lowers the risk of a wrong click writing to the card.
Cons of Disk Drill
- Best recovery features are not free, and the cost can sting if you are using it only once.
- It can find a huge volume of fragments and old junk; sorting through them is still manual work.
- On badly damaged or heavily overwritten cards, it will not do better than a more specialized pro‑lab solution.
- Like any deep scanner, it can take a very long time and puts sustained read stress on a marginal card.
If Disk Drill does not show promising previews, there is usually limited value in then trying five more scan passes with different programs. One or two alternatives are reasonable:
- A classic utility such as PhotoRec can sometimes pull out files that a more GUI‑driven tool misses.
- A brand‑specific tool from your camera manufacturer can occasionally understand the card layout a bit better, although that is not guaranteed.
@ombrasilente is right to point out that signature‑based recovery means you lose original filenames and folder structure. Expect recovered files named something like f123456.jpg or img_00001.cr2 in big “reconstructed” folders. That is annoying, but normal, not a failure.
4. Where I slightly disagree with the previous advice
- I would not automatically tell everyone to avoid all system tools like
chkdskforever. They are a bad first move for photo rescue on a formatted card, but once you have your images safely copied elsewhere, they can still be useful later if you decide to keep using the card. - I also do not think every formatted‑card case justifies mailing the card to a pro lab. For very recent accidental formats with no new shooting since, software success is often good enough that a 3‑ or 4‑figure lab bill is overkill unless the photos are truly irreplaceable.
5. How to judge whether it is worth pushing further
After a single deep, read‑only scan with a tool like Disk Drill:
- If previews show most images complete and only a few glitches, go ahead and recover them to your computer. Then back them up twice.
- If many previews are half gray, torn, or show as corrupted, that usually means block overwrites have already happened. Running more scans with other tools rarely fixes that.
- If you see nothing at all, double‑check:
- That you are scanning the right device.
- That the camera did not do a full “low‑level” or “secure erase” format. If it did, software recovery is nearly always a dead end.
@cazadordeestrellas, @ombrasilente and @mikeappsreviewer already gave you the core survival rule: stop writing to the card, use a reader, and do recovery from a computer. Building on that, the most realistic path forward is:
- Decide if you are willing to pay for lab‑level recovery if software fails.
- If not, pick one serious tool like Disk Drill, do a single deep scan, and base your decisions on the previews.
- If the previews look bad and the photos are critical, do not keep experimenting. That is the point to talk to professionals, not after ten more failed attempts.