My external hard drive suddenly became corrupted and now my computer either doesn’t recognize it or asks me to format it. It has years of personal photos, work documents, and project files that I never backed up anywhere else. I’m desperate to recover as much data as possible without making things worse. What steps, tools, or services should I try first, and how can I tell if the drive is too far gone to save my files?
Last year I nuked a 2 TB Seagate external without even touching it. One day it worked, next day Windows kept popping up the “You need to format this drive before you can use it” message. Heart rate went straight up.
The one thing that kept me from freaking out more was the sound, or lack of it. No clicks, no grinding, no weird beeps. It spun up like normal. That made me think the file system went bad, not the actual drive internals.
At first I did what most people do. Plug, unplug, different USB port, same thing again. That was a mistake. After a few minutes it hit me that every time I poked it, I was risking more damage. So I stopped touching it and moved to an actual plan.
I hooked it up to a different PC and opened Disk Management. The drive showed up with the right size, but the file system said RAW instead of NTFS. That usually means the partition table or file system got corrupted, not that the drive turned into a brick.
Here is what I tried and what worked
- First pass with Disk Drill
I started with Disk Drill because the interface looked less hostile than most recovery tools. I installed it on the system drive, not on the broken one. Important detail. Never put anything new on the drive you want to recover.
Disk Drill scanned the RAW drive and showed me a bunch of files. It let me preview photos and documents before recovering them, which helped filter out junk. It pulled a decent chunk of data, but there were gaps. Some folders I knew existed were missing, some filenames looked scrambled.
- Second pass with DMDE
Next I went for DMDE. If you have not seen it before, it looks like software from 2004 that never got a designer. I had to poke around menus and random buttons for a while before anything made sense.
Once I got it to scan the disk, it found the original partition and showed the folder tree more or less how I remembered it. Not perfect, but close. Seeing my old directory names show up felt like a small win.
From there I did this:
- Selected the main partition DMDE found, the one that matched the size of the old NTFS volume.
- Browsed through the folders and spot checked some files.
- Recovered the important stuff to a completely different external drive, not the broken Seagate, not the system drive.
I focused on photos, work documents, and a few project folders. The rest I did later, lower priority.
What went wrong for me so you do not repeat it
Here is what I messed up or almost messed up:
- Installing tools on the bad drive
First instinct was to throw whatever recovery software I found straight at the drive. If I had installed anything on it, some of the deleted or corrupt data would have been overwritten. Once that happens, it is gone.
Rule:
Install all recovery tools on a different drive. Preferably your main OS drive or another external. Never the one that is failing.
- Writing recovered files back to the same drive
It feels tempting to “fix” the broken drive by writing the recovered files back onto it. That risks overwriting other stuff you have not recovered yet, or making a later professional recovery harder.
Rule:
Always recover to another physical drive. Not a different partition on the same disk. A different actual disk.
- Ignoring warning signs
Mine was quiet. No clicking. If yours starts clicking, stalling, or drops off during scans, that is a bad hardware sign.
Rule:
If the drive clicks, grinds, or disconnects during scan, stop right away. More scanning means more wear. At that point, home recovery turns into gambling.
When to stop DIY and hand it to pros
If the data on the drive is important to the point that losing it would cost you real money or family history, then DIY tools are a risk.
I would consider stopping and calling a lab if:
- The drive was dropped or got hit.
- It makes periodic clicking or scraping sounds.
- It appears for a second then keeps disconnecting.
- You tried one or two tools and things look worse or the drive got slower.
Professional recovery is not cheap. On the other hand, every experiment you run at home can lower the success rate if you end up sending it in later. In my case, no physical damage, so software recovery worked out. That was luck, not skill.
What I ended up with
After running Disk Drill and then DMDE, plus a bunch of manual checking:
- I recovered around 85 to 90 percent of the data.
- Most photos and documents opened fine.
- A few random videos were corrupted.
- Some folder names were weird or duplicated, but the content was usable.
Once I pulled everything important off, I wiped the Seagate and threw it out. No second chance for a drive that corrupted itself once. Cheap storage is not worth doing this whole dance again.
What I would tell you to do, step by step
If your external drive suddenly shows RAW, wants to be formatted, or stops opening in Windows, I would do this:
- Stop plugging and unplugging it over and over.
- Listen. If it clicks or scrapes, power it down and think about pro recovery.
- Plug it into a different PC or port and check Disk Management. See if it shows as RAW or without a file system.
- Install recovery software on another drive, not the broken one.
- Try a user friendly tool first like Disk Drill to see if it can list and preview your files.
- If the first tool does not show much, try something more advanced like DMDE and look for your original partition and folder structure.
- Recover only to a separate physical drive.
- After you get what you can, retire the suspect drive. Do not trust it for anything important.
I walked away from that whole mess with most of my stuff back and a new backup routine. Now anything important lives in at least two places, usually three, and at least one of those is not always plugged in.
If this saves you a few hours of panic and random guessing, it did its job.
6 Likes
First thing. Do not format. Do not run CHKDSK. Those two ruin a lot of recoveries.
Quick structure for you:
-
Triage the drive
-
Decide DIY vs lab
-
Use the right tools once, not twenty random ones
-
Triage
Unplug the drive. Plug it in once.
• If it clicks, buzzes, or spins up then stops, power it off. Hardware issue. Software tools will stress it and lower lab success.
• If it spins quietly and shows in Disk Management as RAW or with no file system, you likely have logical damage like @mikeappsreviewer described. That is where software helps.
On a different note, if you want a short explainer on what these things are and why they fail, this is decent:
how a USB external drive works and fails
- Decide DIY vs pro
I suggest pro data recovery if:
• The drive was dropped, got wet, or overheated.
• It makes any repeating click.
• The data loss would cost you more than about 500 to 1500 dollars. Typical lab range for a single external.
• You already ran CHKDSK, “Quick format”, or vendor repair tools and the drive now looks empty.
If none of that fits and the drive is quiet, DIY is reasonable.
- DIY path, without repeating what @mikeappsreviewer did
They covered Disk Drill and DMDE pretty well. I agree with most of it, but I would not start with multiple tools back to back unless you have a full sector clone.
My suggestion:
Step A. Clone first, then scan
Do not scan the failing drive for hours if you can avoid it. Use a cloning tool that handles bad sectors, like:
• HDD Super Clone (Linux, stronger, less friendly)
• HDDSClone or similar tools that support “skip bad sectors” and multiple passes
Clone source is the failing drive. Target is a healthy drive of equal or larger size. Different physical disk, not a partition.
If the cloning tool hangs or the drive drops, stop repeating the clone over and over. That is where I disagree a bit with the “keep trying” mindset some people push. Each pass stresses weak heads.
Once you have a clone that reaches at least 80 to 90 percent, work only on the clone.
Step B. Scan the clone with one primary tool
Here I like a two stage approach:
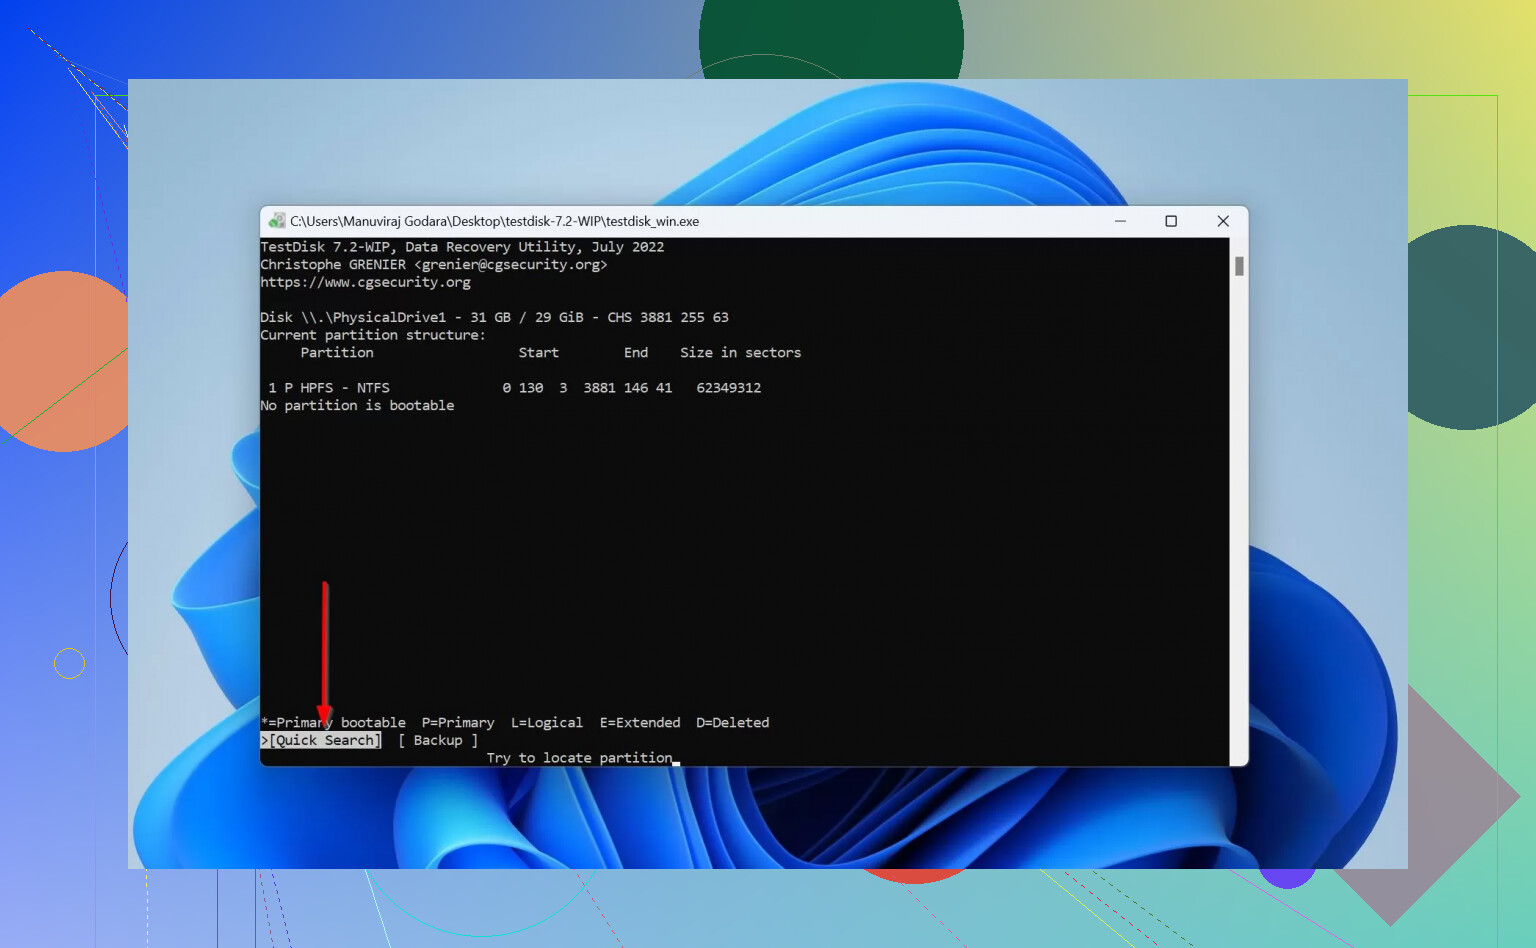
• Stage 1. Partition level scan. Use something like TestDisk. Often it can rebuild the partition and file system without needing massive file level search. That keeps filenames and folder tree intact.
• Stage 2. If Stage 1 fails, then run a file carver.
You already heard about Disk Drill. Disk Drill is strong at photo and document recovery from USB drives and external HDD. It recognizes a lot of file types by signature, and the preview feature makes it easier to pick the right stuff.
I suggest:
• Install Disk Drill on the internal system drive.
• Point it only at the clone.
• Start with a deep scan.
• Use filters. Photos first, then documents, then project files.
Recover data to another external disk, or an internal disk with plenty of free space. Never to the clone, never to the original.
Step C. Prioritize what you pull
External USB drives often fail again during long scans. Do not try to get “everything” first round.
Do this order:
- Family photos and videos.
- Work documents and work projects.
- Any unique project data.
- Everything else later.
If Disk Drill shows corrupted previews for many videos or RAW images, try an alternative like R-Studio or UFS Explorer on the same clone. Do not touch the original again.
- If the drive does not show at all
If Windows or macOS does not see the storage at all, not even in Disk Management or Disk Utility:
• Try a different USB cable and port.
• If it is a 3.5 inch desktop enclosure, try a different power adapter.
• If the actual disk is SATA inside a cheap enclosure, remove it from the casing and plug directly into a SATA port on a desktop or a USB to SATA adapter.
If direct SATA also fails to detect it in BIOS, that is a firmware or PCB or head issue. Software will not fix that. That is lab territory.
- What to avoid
Short list:
• No CHKDSK on a RAW or failing disk. It rewrites metadata and makes future recovery harder.
• No full format. Quick format is bad for metadata. Full format is worse.
• No “USB fix” tools from random sites.
• No writing recovered files to the same physical disk.
• No repeated replugging during scans.
- After you recover
If you get your data back, retire the drive. On this I agree 100 percent with @mikeappsreviewer. Once a USB external drive corrupts once, using it again for anything important is asking for a repeat.
Then set up backups:
• One local backup drive.
• One cloud backup.
• Automatic schedule.
• Verify restores once in a while by opening random files from backups.
You get less drama that way next time something fails.
First thing: do nothing destructive. Don’t format, don’t run CHKDSK, don’t let any “repair” wizard touch it.
@mikeappsreviewer and @andarilhonoturno already nailed the classic playbook: don’t install tools on the bad disk, don’t recover data back to it, listen for weird noises, etc. I’ll try not to rehash their whole flow.
I’ll focus on what I’d do differently and where I slightly disagree.
1. Make a decision in 5 minutes, not 5 hours
You can figure out your path really fast:
- Plug the drive in one time.
- Check:
- Does it spin quietly, no clicks or grinding?
- Does it show up in Disk Management / Disk Utility with the right size, maybe as RAW or “unallocated”?
If:
- It’s noisy, was dropped, or vanishes during use ⇒ skip DIY. Every extra minute you run it is like trying to finish a book while the pages are literally on fire.
- It’s quiet and visible as RAW / no file system ⇒ logical damage. This is where software like Disk Drill actually makes sense.
Where I slightly disagree with @andarilhonoturno: you don’t always need to do a full sector clone first. If the drive is behaving decently and the data is “emotionally important but not 4-figure-money important,” jumping straight to a non-destructive scan on the original can be acceptable. Just accept you’re gambling a bit.
2. Before any deep scanning, change one simple thing
Most people skip this:
- If the drive is in a cheap USB enclosure, take the drive out and connect it directly via SATA or a quality USB–SATA adapter.
Reason: those little USB boards fail constantly and can make a perfectly fine disk look “dead.” Sometimes the “corruption” is the bridge board, not the drive.
So:
- Try different USB cable / port first.
- If that fails, pop the drive out and connect directly.
- If it suddenly shows up normally on SATA, copy data immediately and treat it as a warning shot.
If it’s still RAW / asking to format on SATA, then it’s real file system damage.
3. One tool first, not twenty
Big mistake I see: people shotgun 5 recovery tools in a row and wonder why things get worse.
Pick one primary tool first. I’d go:
- Disk Drill for most users: very good at photos/docs, nice previews, relatively simple. Make sure:
- It’s installed on another drive.
- You only scan the bad drive / clone.
- You restore to a completely different physical disk.
Where I differ slightly from @mikeappsreviewer: I would not start with super advanced tools like DMDE unless Disk Drill or a similar “friendly but powerful” tool fails or gives a clear mess. DMDE is great, just not the first thing you want to stare at when you’re in panic mode and half your life is on that disk.
If Disk Drill shows:
- Realistic folder names + good previews of photos / docs ⇒ recover your top priority stuff first.
- Tons of files with random names, broken previews ⇒ stop, don’t keep hammering the drive with scans. Consider cloning and/or a pro lab.
4. Don’t aim for 100% recovery on the first pass
This part trips a lot of people.
You said you’ve got years of:
- Personal photos
- Work docs
- Project files
Do not try to “get everything” in one huge recovery job. Typical better order:
- Photos and irreplaceable family media.
- Key work docs and active project folders.
- Old junk, downloads, random archives last.
Reason: long recoveries take hours, sometimes days, and flaky drives tend to get worse mid-process. If it dies after 4 hours, you’ll be glad you pulled photos first instead of 80 GB of Linux ISOs and temp files.
5. A few “do NOTs” that are not negotiable
Some overlap with what’s already been said, but these are the ones that really kill recoveries:
- Do not:
- Run CHKDSK on a RAW or obviously damaged drive.
- Hit “Format” even if Windows nag screen is yelling at you.
- Use random “USB fix” / “HDD repair” tools you found on page 4 of Google.
- Write anything new to that disk, including recovered data.
I know you’re tempted to “fix” the drive so it works again. Forget that. Right now the drive is a read-only source of possible data, not a thing to repair and reuse.
6. When to absolutely stop and call a lab
Here I’m fully aligned with both of them, maybe even more strict:
Stop DIY and look at pro recovery if:
- Drive clicks, grinds, or stops spinning after a second.
- System freezes or reboots when you plug it in.
- It disappears during scans repeatedly.
- The data includes:
- Legal / work-critical stuff.
- Only copies of certain creative projects.
- One-of-a-kind family history.
Yeah, labs are expensive (often 500–1500+), but every DIY scan on a mechanically failing drive is like running tires to shreds before taking the car to a mechanic. By the time you hand it over, there might not be much left to save.
7. After recovery: retire the patient
On this point I full-on agree with both @mikeappsreviewer and @andarilhonoturno.
Once a drive has done the “suddenly RAW / please format me” trick on you, stop trusting it with anything important. You can wipe it and use it as a toy drive for nonessential stuff if you really want, but not as actual storage for family memories or work.
Instead:
- Get a new, larger external.
- Set up:
- Automated local backup (File History, Time Machine, or good backup software).
- A cloud backup for the photos and critical files.
And at least once in a while, test that your backups actually open.
8. Extra help & better “find data recovery tips” info
If you want more structured breakdowns, real-world examples, and nerdy deep dives on drives dying in weird ways, reading through discussions here helps a lot:
practical guides to recovering lost files and drives
There’s a bunch of people there in the exact “drive suddenly RAW / wants format” situation comparing tools like Disk Drill, TestDisk, etc., with screenshots and outcomes.
TL;DR version:
- Don’t format or run CHKDSK.
- If it’s noisy or was dropped: stop and strongly consider a lab.
- If it’s quiet and RAW: connect via SATA if possible, then run Disk Drill from another drive and recover only to a separate disk.
- Pull most important stuff first, don’t chase 100% recovery on the first try.
- Once done, retire the bad drive and fix the backup situation so this is a one-time horror story, not a recurring season.
