So, How Do You Actually Connect to an FTP Server on Mac?
Let’s cut through the fluff—connecting to an FTP server on a Mac is not rocket science, but there’s more than one way to skin this cat. If you’re wondering, “Do I really have to shell out for some complicated third-party app?”…not at first! But let’s dig in like you’re scrolling through a popular tech thread.
The Simple Approach — Doing It All in Finder
You know how Mac people love saying, “It just works!”? Sometimes, it actually does. Here’s the move:
- Open up Finder (seriously, where you see all your files).
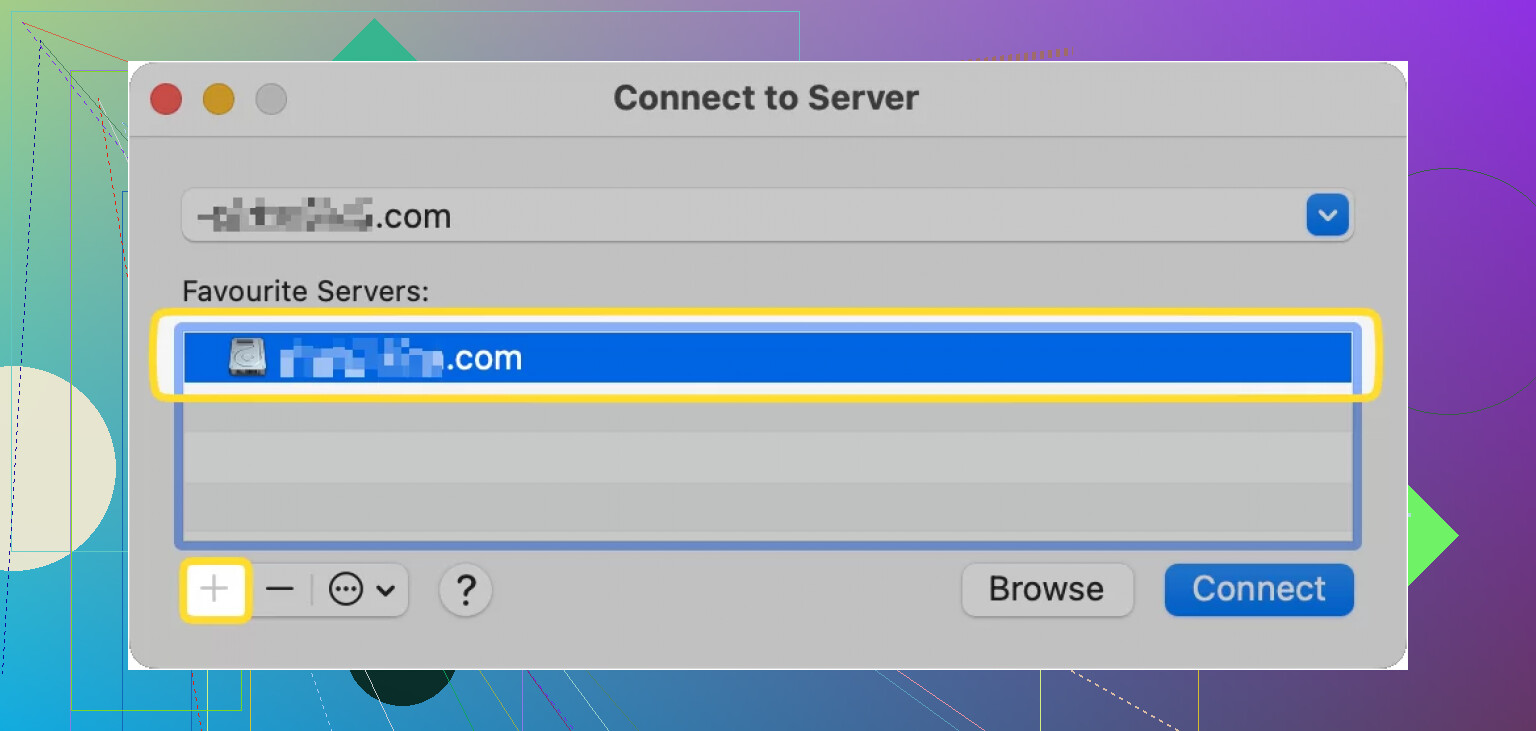
- At the top, hit Go → Connect to Server….
- Punch in the FTP address (think:
ftp://your.server.address). - Want to be lazy next time? Hit the little plus (
+) to SAVE it as a favorite. No more hunting for the address! - Slam that Connect button.
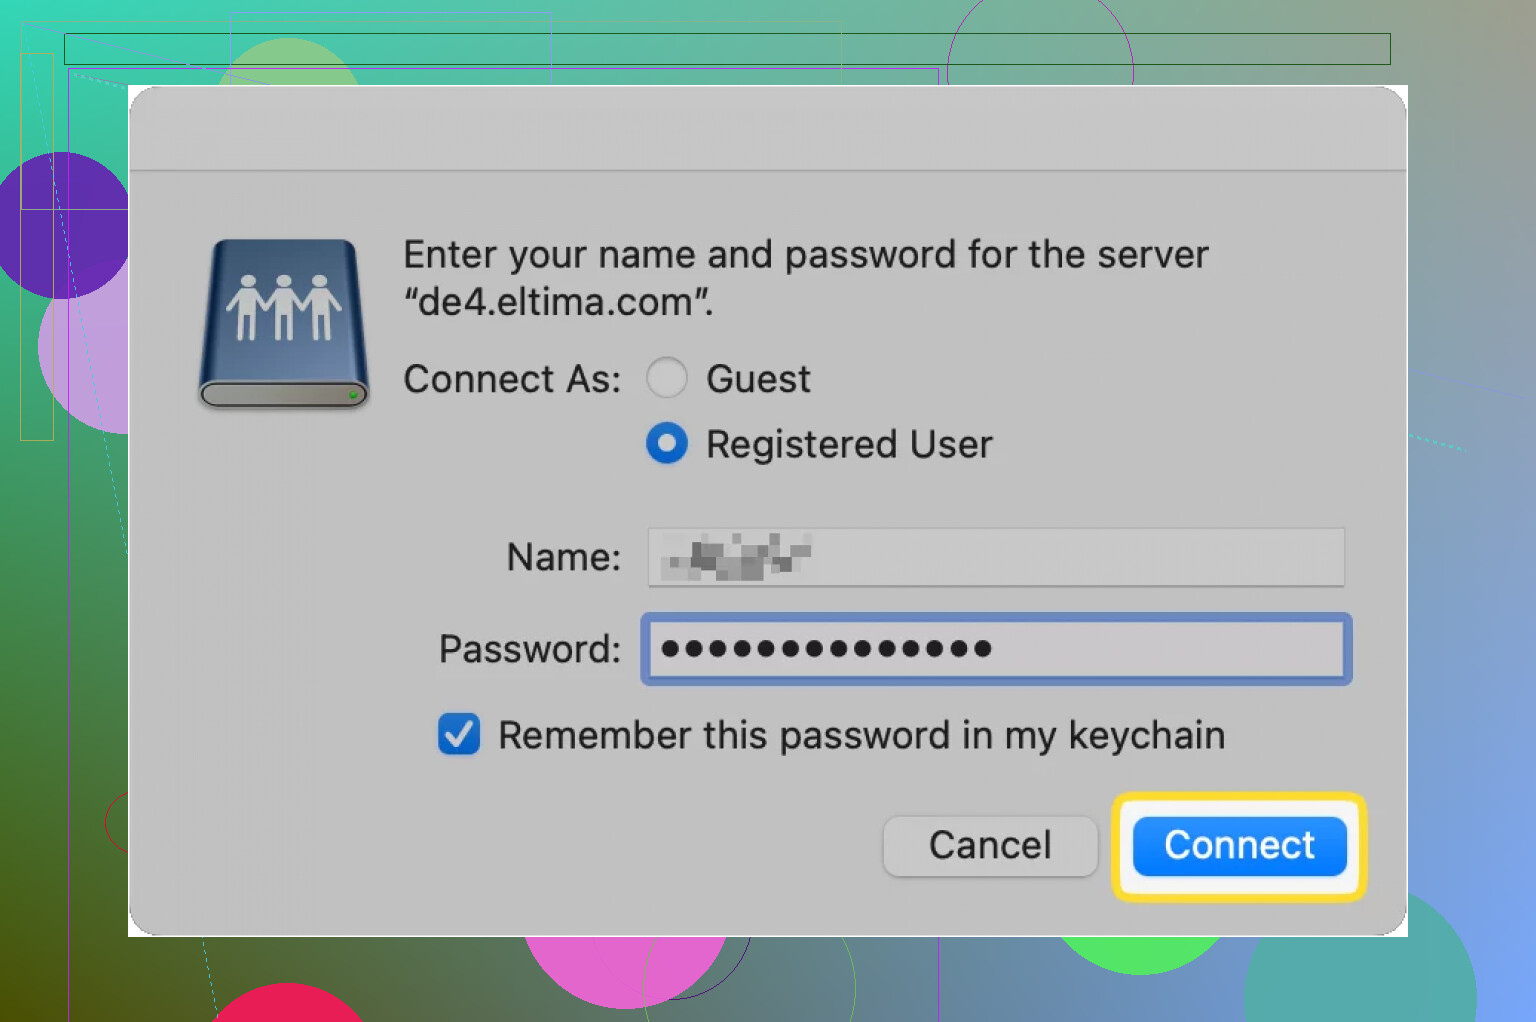
- When prompted, type in your username and password. Bonus: check “Remember” to skip logging in each time.
- Boom—you see the remote folders right in Finder. Drag and drop away.
- Use Finder as if your server were just another folder.
The Fine Print: Finder Isn’t the Hero Some Need
Alright, public service announcement: connecting this way is like reading the news through a keyhole. You can transfer files, but fancy stuff—editing files on the server, duplicate management, syncing back versions, or getting alerts when stuff changes—no dice.
Let’s be real, if you’re juggling websites or dev projects, Finder feels like using a butter knife to saw wood.
Want More Than Basic? Time for Third-Party Power Tools
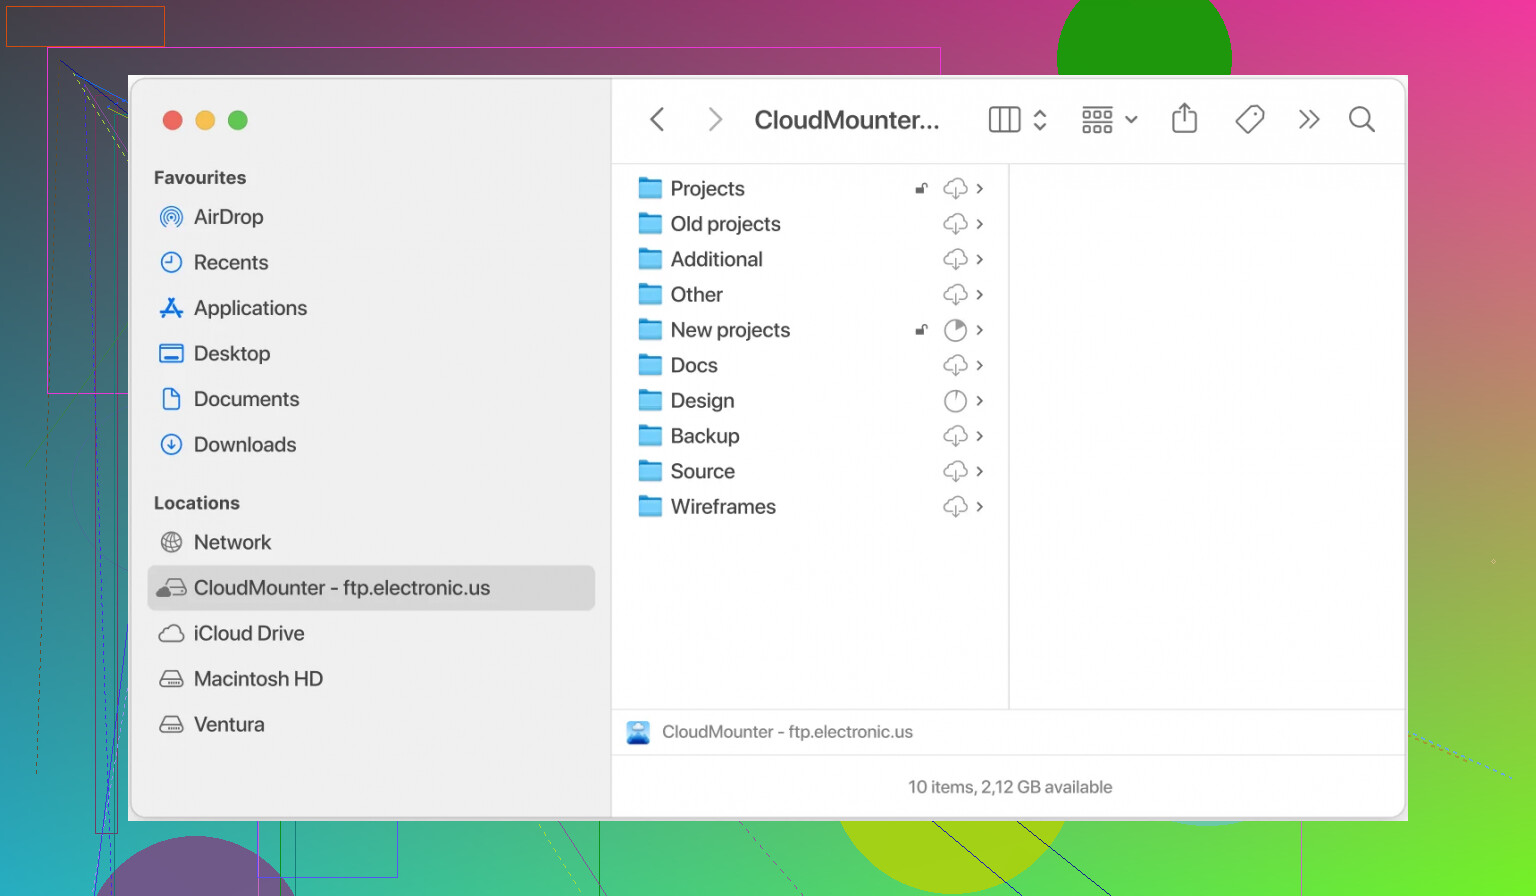
If you want more muscle, the Mac universe has you covered with dedicated FTP apps. I’ve been burned a few times with clunky interfaces, but one I keep circling back to is CloudMounter. This thing’s like duct tape for your digital life. Not only does it stick your FTP remote server into Finder like it belongs there, but you can also mount all your cloud drives (Google Drive, Dropbox, etc.) as local drives.
Here’s How You Get Rolling With CloudMounter:
- Fire up the app, and pick “FTP & SFTP” as your storage type.
- Fill in the details they ask you for:
- Choose between FTP, FTP with TLS/SSL (FTPES), or FTP with Implicit SSL (FTPS).
- Type in the server’s name or address and port (defaults: 21 for FTP/FTPES, 990 for FTPS).
- Credentials: your usual username/password, or go incognito with anonymous if you must.
- Decide—Active or Passive mode?
- Tell it exactly which folder to look at on the server (the remote path gets you there faster).
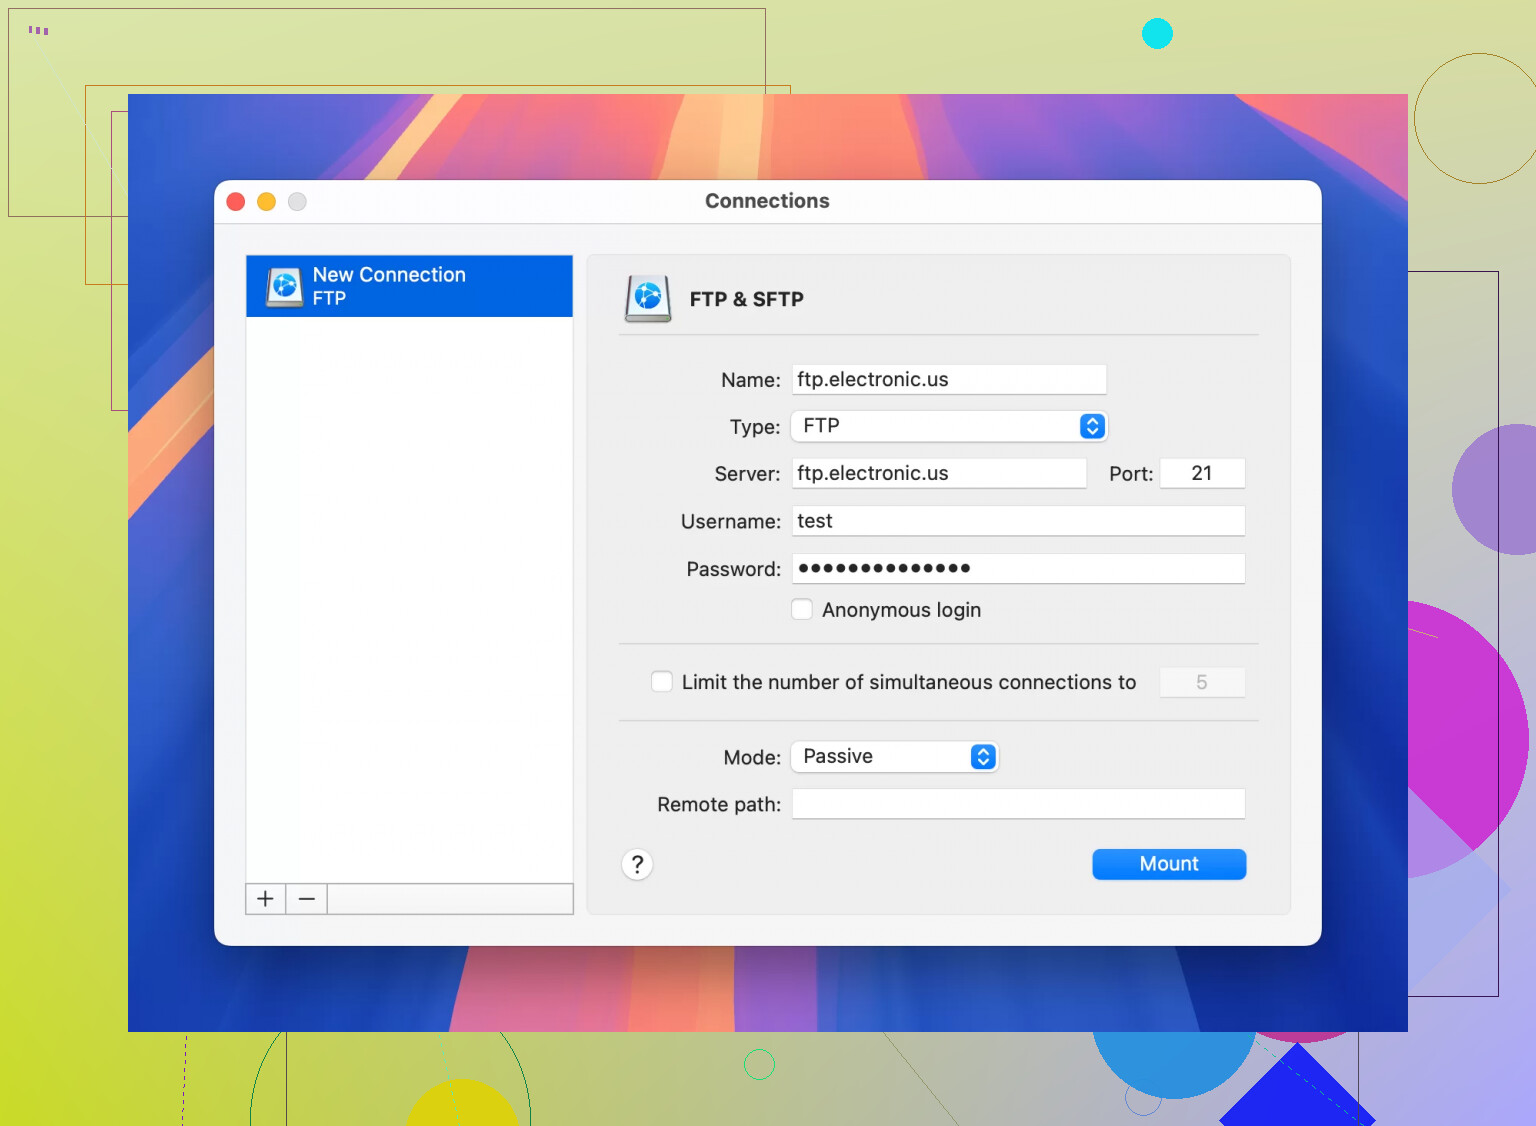
- Click “Mount.” Now, voilà, your FTP server pops up in Finder like local storage.
Other Cool Tricks With CloudMounter
- Runs on both Windows and Mac (no platform drama).
- Puts all your cloud/remote storage spots in one tidy spot.
- No limit on the number of accounts you tack on.
TL;DR (For The Scroll-Scroll-Next Folks)
- Finder works if you want dead-simple, read-only FTP. No edits or server-side tweaks.
- Want more features/automation? Try third-party apps like CloudMounter.
- Like everything on a Mac, you’ve got options—pick your poison.
Is it as smooth as you want? Not always, but it beats shouting your files across the room or emailing them to yourself!