My hard drive started making odd noises and now it’s showing bad sectors. I have important photos and work files on it, and I’m afraid using it more could make things worse. I need help figuring out the safest way to recover data from a failing hard drive without causing more damage.
Hard drive with bad sectors, what I did first
I ran into this once with an old 2 TB laptop drive. The first mistake I almost made was leaving it on while I searched for fixes. Don’t do that. If the drive is failing, every extra read or write adds wear. If it’s external, unplug it. If it’s internal, leave the machine alone and use another computer to look stuff up.
What bad sectors usually mean
There are two common cases.
Soft bad sectors. These are logic errors. The data in a sector no longer matches its error-check info. Sometimes a scan repairs this.
Hard bad sectors. These come from physical damage or wear on the disk surface. If you hear clicking, grinding, or odd beeps, I’d stop there. I’ve seen people keep retrying reads and make a bad drive worse. At that point, a recovery lab is the safer move.
If the drive still shows up in the system and it’s only throwing read errors or freezing during access, your odds are better.
What I’d do before any recovery scan
I would not scan the failing disk directly. File recovery scans hit the drive hard, and a weak drive tends to fold under repeated reads.
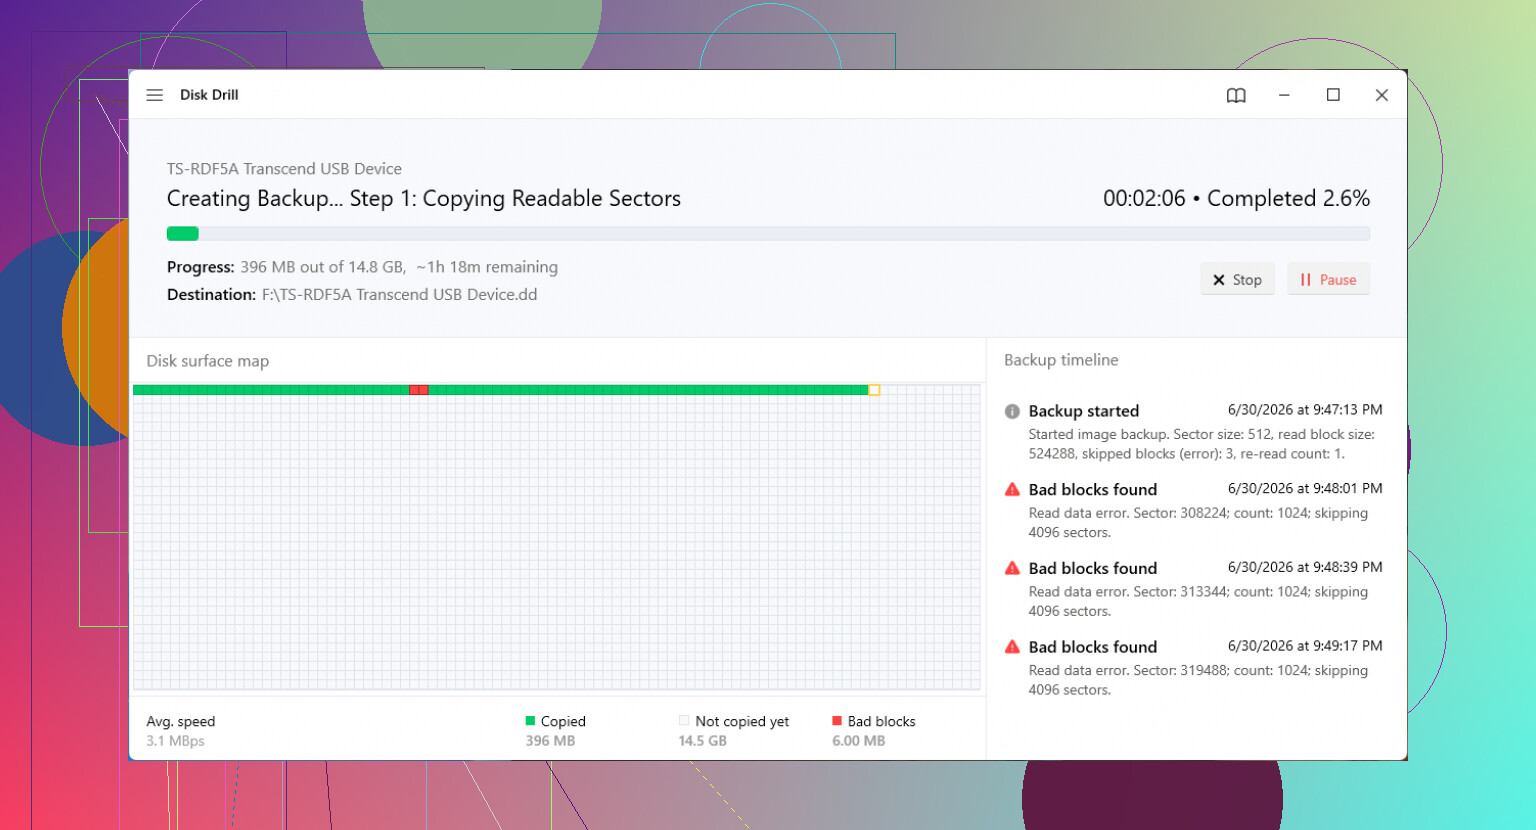
The safer path is a full byte-to-byte image first. That gives you a raw copy of the disk, sector by sector, onto a healthy drive. Then you work from the copy and leave the original powered off.
I’ve pointed people to Disk Drill for this because its byte-to-byte backup feature is built for unstable drives. One useful bit is how it deals with unreadable areas. It skips trouble spots, then retries with smaller block sizes. On drives with bad blocks, that matters. A lot.
It also works with common file systems like NTFS and FAT32, so you’re not boxed into one setup.
The short version
- Install the recovery tool on a healthy computer, not on the machine with the bad disk.
- Connect the failing drive and another healthy drive with enough free space.
- Create a byte-to-byte backup image.
- Unplug the failing drive after imaging.
- Scan the image file, not the original disk.
If you want to test the drive later
After your files are safe, you can try to mark bad areas so the OS avoids them. On Windows, I used chkdsk /r in PowerShell before, and it did flag damaged sectors. A full format, not quick format, also forces a sector check.
I wouldn’t trust the disk after this. Not for photos, docs, work files, nothing you care about. Once bad sectors start showing up, I treat the drive as borrowed time. Fine for throwaway data, maybe. Anything important, no shot.
When software stops helping
If the drive doesn’t appear at all, or the image gives you nothing useful, then it turns into a money question. Lab recovery gets expensive fast. I’ve seen quotes from $500 up to $3,000, sometimes more if parts are damaged. What you’re paying for is specialized equipment and a clean environment to open the drive.
What I changed after getting burned
I stopped pretending one copy was enough. Use 3-2-1 backup.
3 copies of your data.
2 different storage types.
1 copy off-site.
It feels excessive right up until a drive starts making noises at 1:14 a.m. Then you stop arguing with the rule.
8 Likes
Odd noises changes the math. If the drive clicks, grinds, or spins down, I would skip home recovery and send it to a lab. That part I agree with from @mikeappsreviewer. Where I differ a bit, I would not spend much time testing soft vs hard bad sectors first. Noise plus bad sectors is enough reason to stop poking it.
Best low-risk move at home is this.
Use a different computer.
Connect the bad drive read-only if your adapter or dock supports it.
Check SMART once with CrystalDiskInfo or smartctl. Look at Reallocated Sectors, Current Pending Sector, and Uncorrectable Sector Count. If those numbers are rising, stop.
Keep the drive cool. Heat speeds failure.
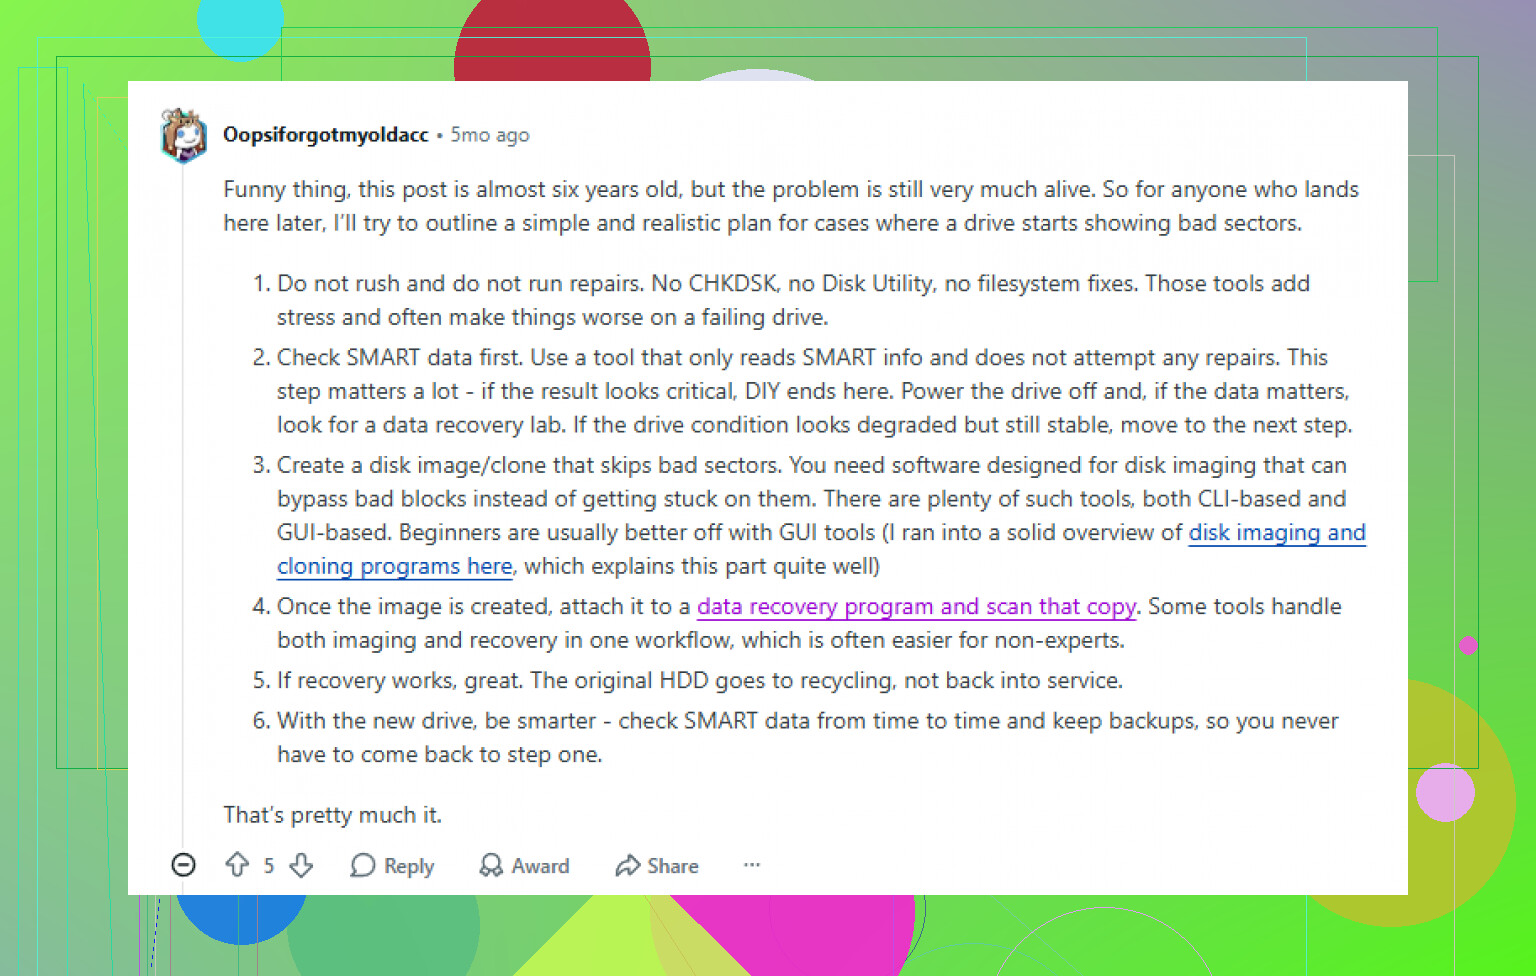
Do not run CHKDSK before recovery. It writes to the disk and sometimes makes file recovery worse. This is where I flat out disagree with people who run repair tools early.
If the drive stays detected long enough, make one image pass and then stop using the original. Disk Drill is fine for working from the image after that. The key is minimizing reads from the source drive, not trying five diffreent repair tools on it.
Priority order matters.
- Family photos and irreplaceable work.
- Small folders first if imaging the full disk keeps failing.
- Large media files last.
If you want a second opinion, this thread on recovering data from a hard drive with bad blocks has some solid discussion.
If the drive drops offline, starts clicking louder, or slows to a crawl, power it off. At taht point, every retry hurts your odds.
Odd noises + bad sectors is the part that worries me more than the bad sectors alone. On that point, I’m closer to @jeff than @mikeappsreviewer: I would not spend much time trying to diagnose the drive while it’s still limping along. If it’s clicking, scraping, or doing the sad little spin-up/spin-down thing, every extra minute powered on is a gamble.
One thing I’d add that neither really leaned on enough: check the connection path before blaming everything on the disk. I’ve seen flaky USB cables, bad enclosures, and underpowered docks cause disconnects and fake-looking read chaos. That does not explain weird internal drive noises, but if this is an external HDD, try a different cable and direct port once. One clean attempt, not an afternoon of messing around.
Also, don’t chase the “bad sectors” with repair tools first. CHKDSK, fsck, whatever, can wait. If the files matter, recovery comes before repair. Repairs are for later, or never.
My order would be:
- Stop normal use immediately.
- If it’s making mechanical noise, consider pro recovery first. Seriously.
- If you’re doing DIY, use a healthy machine and a healthy destination drive.
- Try to copy the most irreplaceable small folders first if full imaging keeps failing. Photos, documents, project files. Not your movie collection.
- Then make an image and work from that image only.
That’s where Disk Drill makes sense. Not because magic software fixes dying hardware, becuase it lets you recover from a backup image instead of hammering the original disk over and over. That’s the real win. If the drive stays online long enough, image first, scan second.
If you want a simple explainer on how Disk Drill handles recovery workflows, this is decent: see how Disk Drill helps recover data from a failing hard drive.
One more unpopular opinion: if the data is truly business-critical or family-only-no-backup important, don’t “practice” on this drive. Home recovery is fine right up until it isn’t, and then the lab quote gets worse. That’s the annoying truth.
One small disagreement with @jeff and @sognonotturno: if the drive is still stable enough to stay mounted for a few minutes, I’d try a targeted grab of the most irreplaceable tiny stuff before committing to a full image. Not a deep browse, not opening files, just copy the must-have folders first. Sometimes a dying drive gives you one decent window and then falls off a cliff.
What I would not do:
- no CHKDSK yet
- no defrag
- no SMART stress testing over and over
- no repeated rescans
If you can, clone or image through a tool that handles read errors gracefully, then recover from the copy. That’s where Disk Drill is useful.
Pros of Disk Drill:
- easy imaging workflow
- can scan the image instead of the failing disk
- beginner-friendly
Cons:
- not magic for mechanical failure
- imaging a very unstable drive can still fail
- deeper recovery tools exist for advanced users
So my order is:
- Stop using the drive.
- If noises are serious, consider a lab immediately, like @mikeappsreviewer suggested.
- If DIY, copy tiny critical folders first only if the drive is momentarily stable.
- Then image the disk.
- Run recovery on the image, not the original.
And if the noise is getting worse, stop. That’s the point where “one more try” usually becomes the expensive mistake.