I’m trying to organize my files in Google Drive and need to create a specific folder to keep everything in order. However, I’m not sure where to find the option to add a new folder. Could someone guide me through the steps or explain where I might be going wrong?
Hey there! Google Drive tends to spark quite the love-hate relationship. Most folks think they’ve got the hang of it, but if creating a folder on Drive still feels elusive, I got you covered. Let’s hash this out, step by step, and boost your productivity superpowers along the way.
Creating a Folder in Google Drive: The Basics
Alright, here’s the lowdown on folder creation. Whether you’re on your browser or using the app, it’s as straightforward as microwave mac ‘n’ cheese.
- Sign in First: Head to drive.google.com or open the app. Log into your Google account.
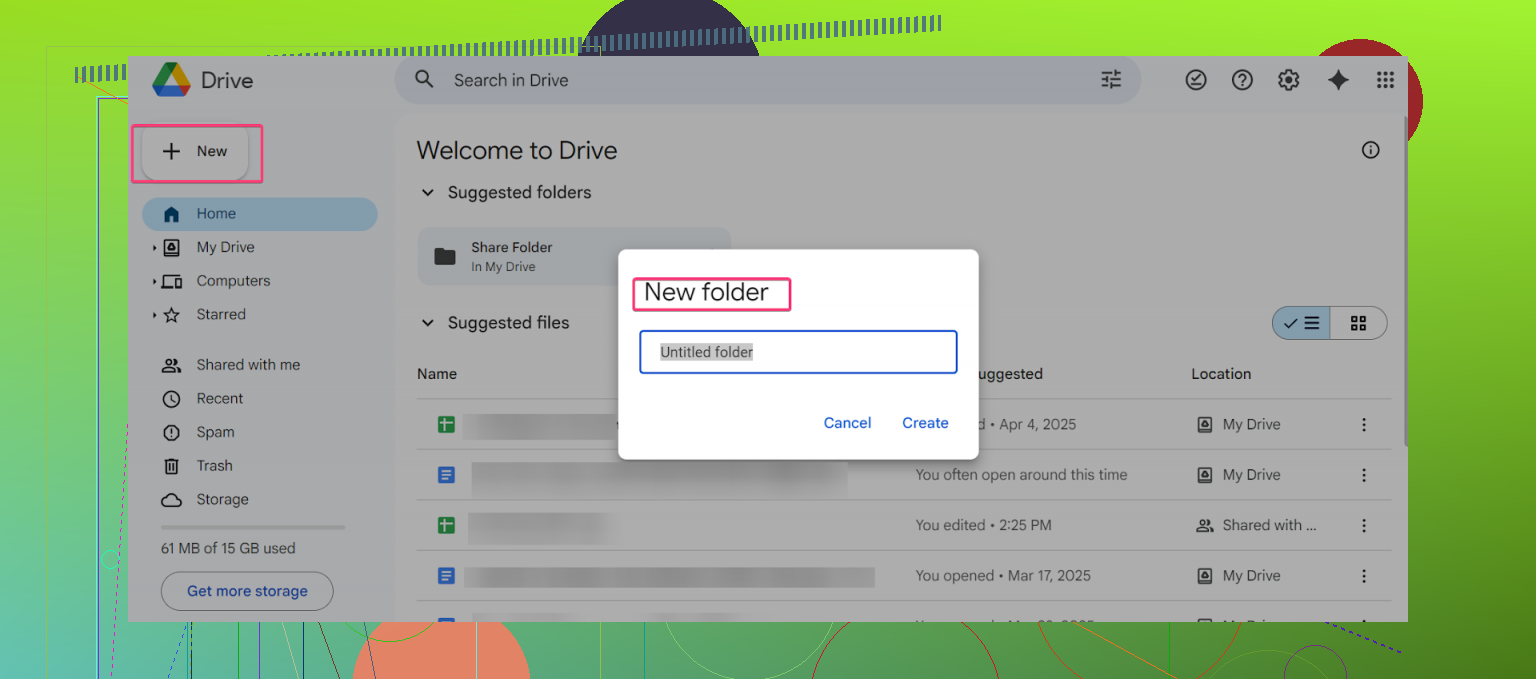
- Find the Big “+ New” Button: Right in the spotlight of your Drive interface, you’ll see this button on the left. Click it.
- Pick “New Folder”: The very first menu option says ‘New Folder.’ Voilà! A small pop-up window will show up.
- Name Your Folder: Let’s give this folder an identity it deserves—type the name you fancy. Maybe “Vacation Plans” or “Netflix-Passwords” (don’t do that, though).
- Hit “Create”: Boom, instant folder. It shows up in your main directory right away like magic.
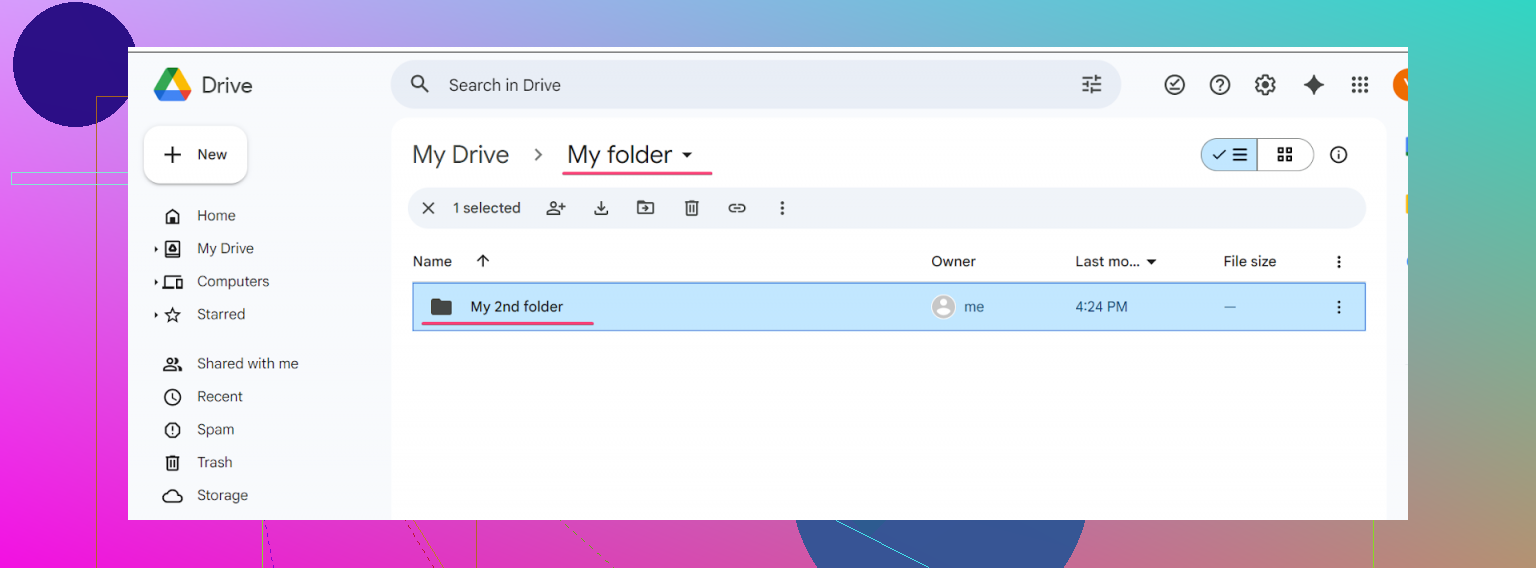
Let’s dial it up a notch because you, my friend, deserve ultimate organization vibes – folder inside a folder?
- Get into Your Main Folder: Double-click your newly created folder.
- Repeat the Process: Hit “+ New,” then click “Folder,” and type in your sub-folder’s name.
- Create the Sub-Folder: Now, you’re leveling up. You bet your workspace will feel organized and under control.
Next-Level Productivity: Meet the CloudMounter App
So you’re already vibing with Google Drive? Let’s supercharge things further. Imagine having your Drive work like a local folder on your desktop—no constant browser hopping. That’s where the CloudMounter app earns its spotlight.
What It Does:
CloudMounter is like the cool friend you never knew you needed. It lets you mount Google Drive, along with other cloud services, directly onto your Mac as if they were local drives. Imagine Finder seamlessly managing your files without extra fuss.
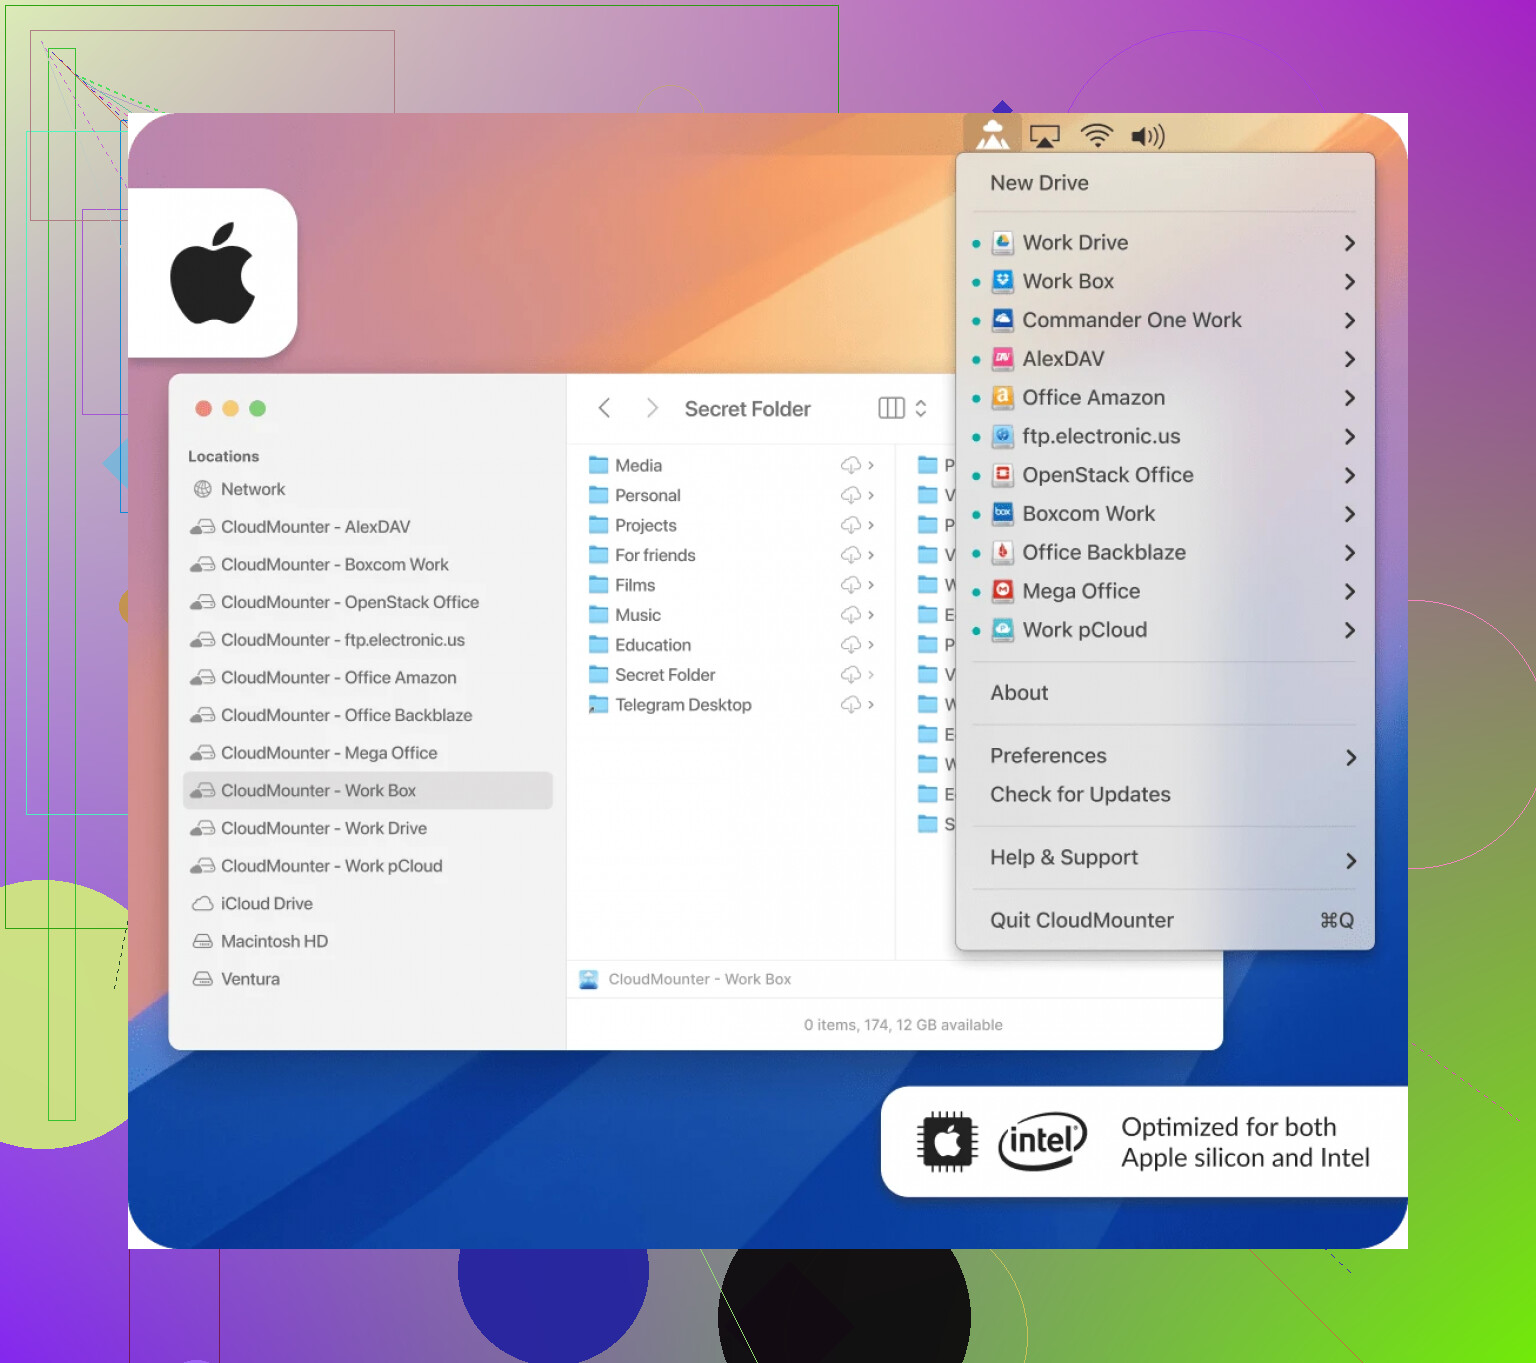
Here’s why this app might make you wonder how you survived without it:
- Handle Shared Files Like a Pro: Access shared folders or files sent via link like a breeze, saving you from endless downloads.
- Transfer Between Cloud Accounts: Move files across storage services directly. No middleman required.
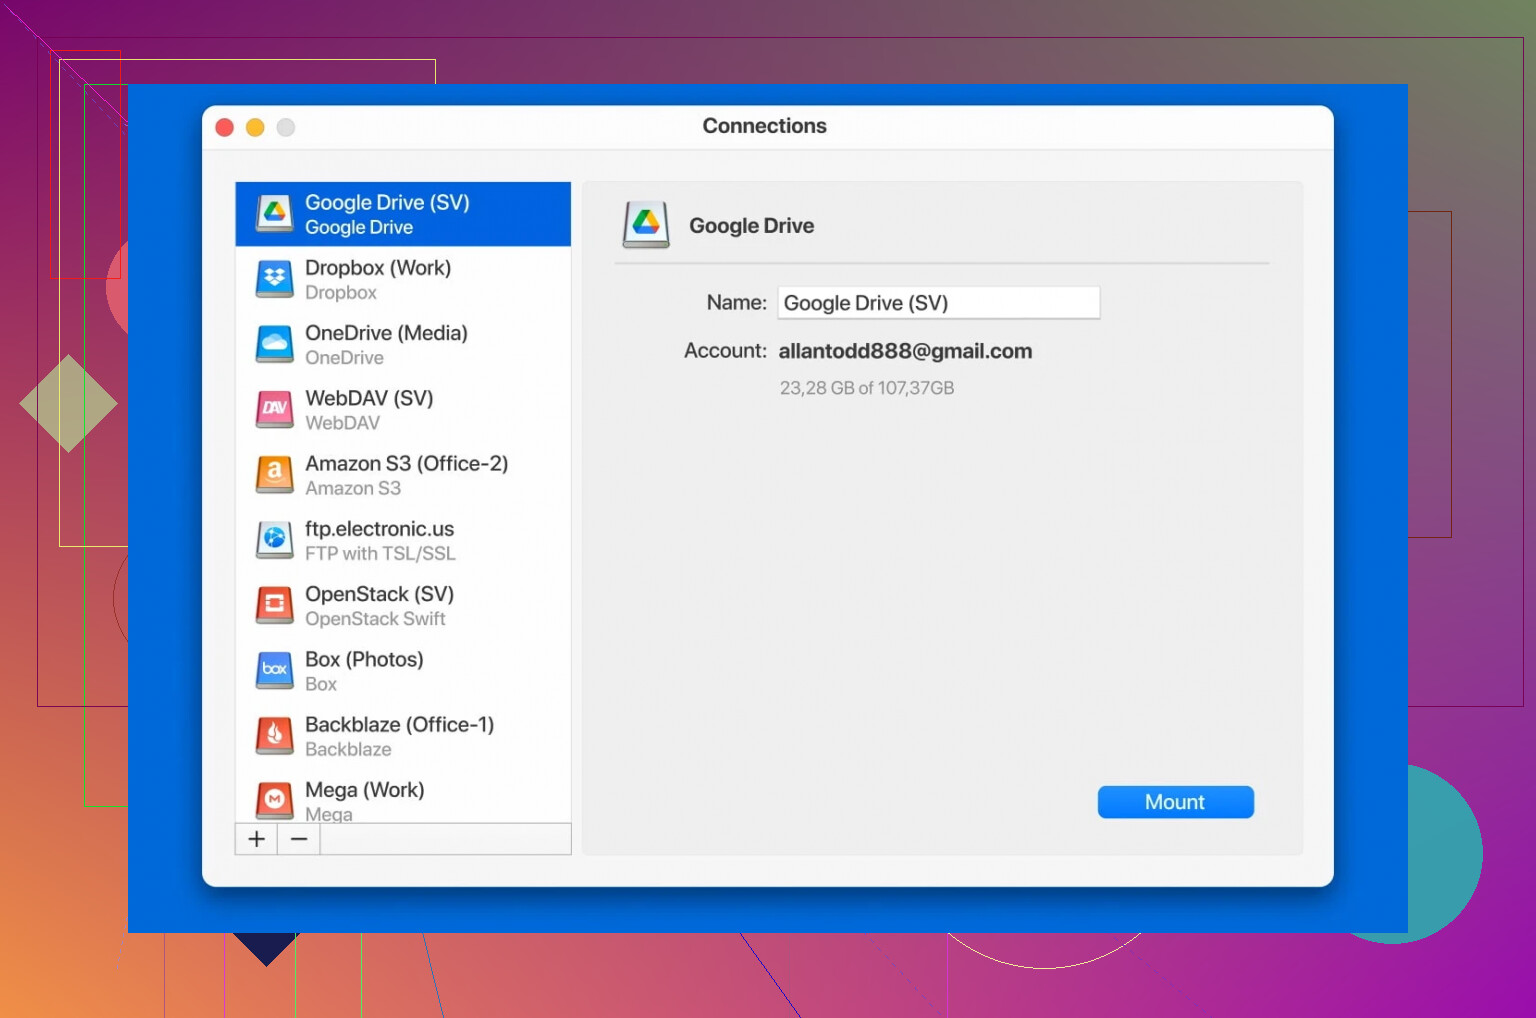
- Juggle Multiple Accounts: Got two Google Drive accounts? Or three? CloudMounter lets you sync and use them all at once, hassle-free.
Example: Store your college assignments in one account and the 200GB of memes in another. Nobody has to ever know.
The Finder + CloudMounter Duo
CloudMounter integrates seamlessly with Finder (your Mac’s file management tool). That means you can:
- Quickly upload, edit, download, copy, or delete files directly from Finder.
- Organize Drive content in a way that feels natural and user-friendly.
- Skip digging through your browser tabs like an archaeologist hunting for fossils.
Here’s the icing on the cake—CloudMounter doesn’t stop at Drive. It supports other services like Dropbox, OneDrive, and more.
So go ahead, organize your files like a pro, impress your team, and coast through your workflow like a smooth operator. Productivity, unlocked. ![]()
4 Likes
If you’re struggling to find where to create a folder in Google Drive, don’t worry—it’s not exactly a labyrinth. To cut through the noise, here’s another perspective that gets the job done without turning it into rocket science.
First, skip all the fluff. Open up Google Drive either through your favorite web browser (head to drive.google.com) or on the Drive mobile app. Once you’re in, locate that glaringly obvious “+ New” button on the left-hand side. It’s begging for attention. Click it, then select the ridiculously aptly-named “New Folder” option. Boom, a pop-up appears asking, “What do you want to call this creation?” Type in whatever sparks joy (but maybe rethink naming it “Stuff”). Hit “Create,” and voilà—your folder is proudly strutting around the main menu. Easy-peasy.
Okay, now here’s where we might differ from @mikeappsreviewer’s advice. While those sub-folder suggestions are swell, I’ve found it’s just as efficient to use color coding or naming conventions if you’re not constantly inside every directory. Why waste time nesting twelve folders deep when labels and colors can make browsing a breeze?
Also, not to sidestep their CloudMounter endorsement—it sounds cool—but I’ll just throw this out there: sometimes less is more. Do you need yet another app, or can you streamline Drive with browser extensions or even Google Drive’s desktop app? If the answer’s flexibility, though, check out the ultimate cloud integration tool. It’s like turning cloud storage into part of your local files on your computer. Convenient, right?
That’s it. No dramatics, no extras. Create that folder, get organized, and save some brain power for tasks that don’t have step-by-step buttons staring at you.
Click the “+ New” button and hit “New Folder”—seriously, it’s that simple and staring you in the face. Done. Folder created. Move on to bigger problems, like deciding what files SHOULD go in it. But, hey, @mikeappsreviewer went all “productivity guru” mode with sub-folder explanations, which sure, are nice, but does everyone really need folders inside folders inside folders? Sounds like a digital Russian nesting doll.
And @techchizkid’s suggestion to do some color coding or labels is def solid. Let’s be real, no one has time to click into twenty folders just to find a file named “taxes_final_FINAL2.copy.”
So: Make folders, use colors, save hours =)