I’m trying to get a legacy device to communicate with a VirtualBox guest over a serial port, but I can’t figure out the correct settings or cabling method. I’m not sure if I should use host device, host pipe, or file, and my guest OS never seems to detect the COM port. Can someone explain the proper configuration steps and any common pitfalls so I can reliably use a physical or virtual serial port in VirtualBox?
For talking to a real legacy serial device from a VirtualBox guest, you basically have three paths, and only one of them usually works cleanly.
1. Use the host’s physical COM port
If your host actually has a hardware serial port (or a USB to RS232 adapter):
- Shut down the VM.
- VM settings → Serial Ports.
- Check “Enable Serial Port.”
- Port Number: COM1 (or whatever the guest expects).
- Port Mode: “Host Device.”
- On Windows host, put
COM3or whatever your adapter shows up as. On Linux, something like/dev/ttyS0or/dev/ttyUSB0. - Set IRQ / I/O base to something that matches what the guest OS is configured for (often default 0x3F8 / IRQ 4).
Physically, you usually need a null‑modem cable if you are connecting PC to another DTE (like another PC or some old device that expects a modem on the other side). Straight cable vs null‑modem is a common “it’s not working” culprit. Check the docs of the legacy device: if it is DCE, straight cable is fine, if DTE, you want null‑modem.
2. Use “Host Pipe” only for virtual / software devices
“Host Pipe” is for stuff like:
- Connecting the VM serial port to a TCP server via some extra tool.
- Debugging, logging, or linking two VMs together.
It does not magically talk to your real COM port by itself. You’d need something on the host side that opens a named pipe and forwards data to the real device. At that point most people just use a direct host device instead.
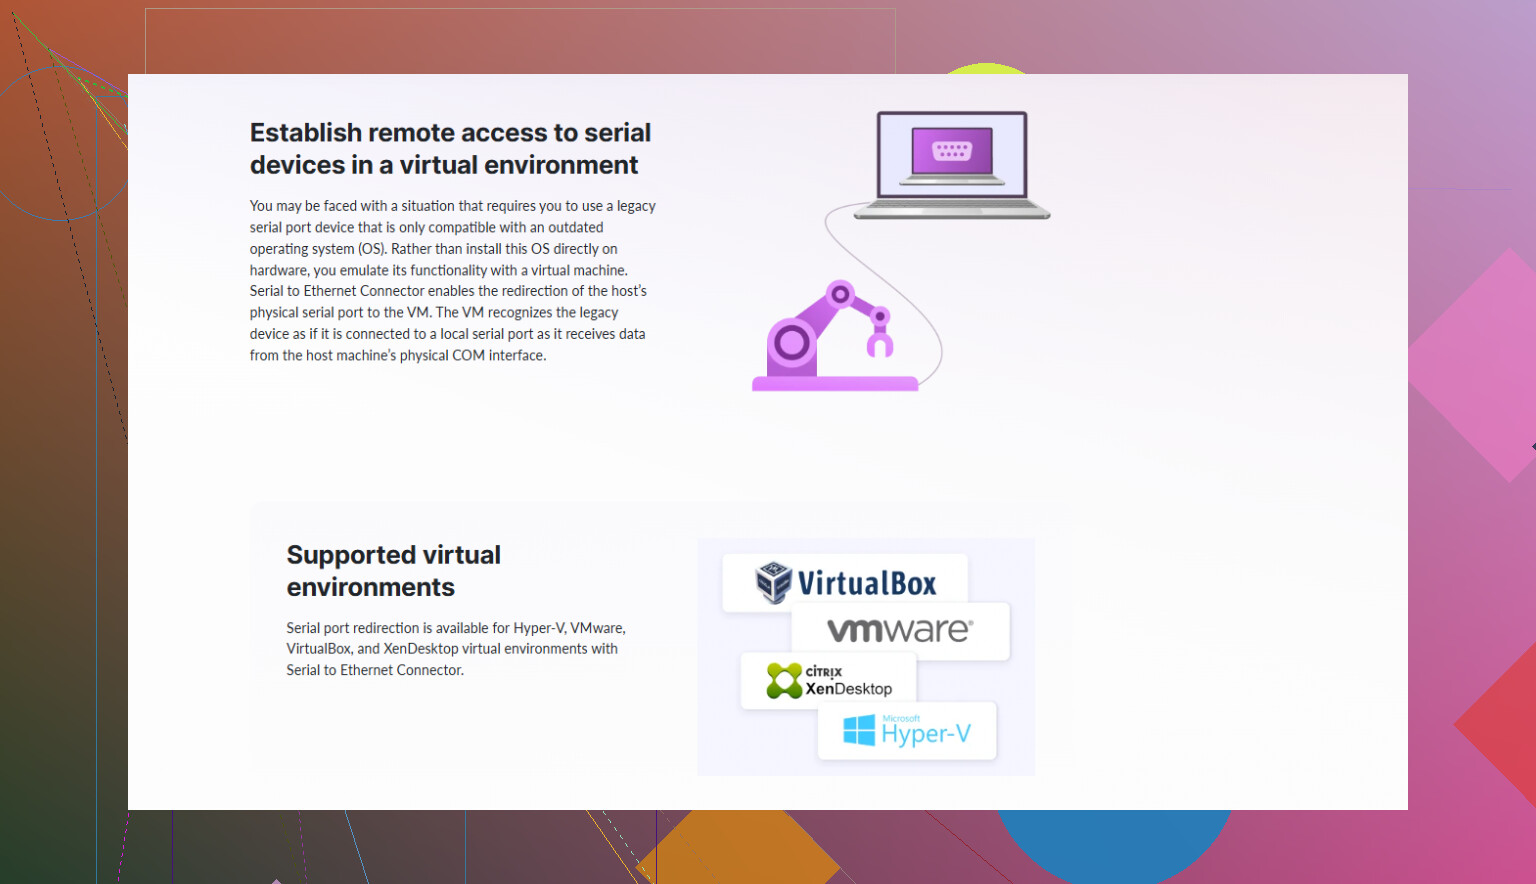
3. Serial to Ethernet / network solutions
If the legacy hardware is remote or you do not want to deal with weird USB passthrough, network based serial is often easier.
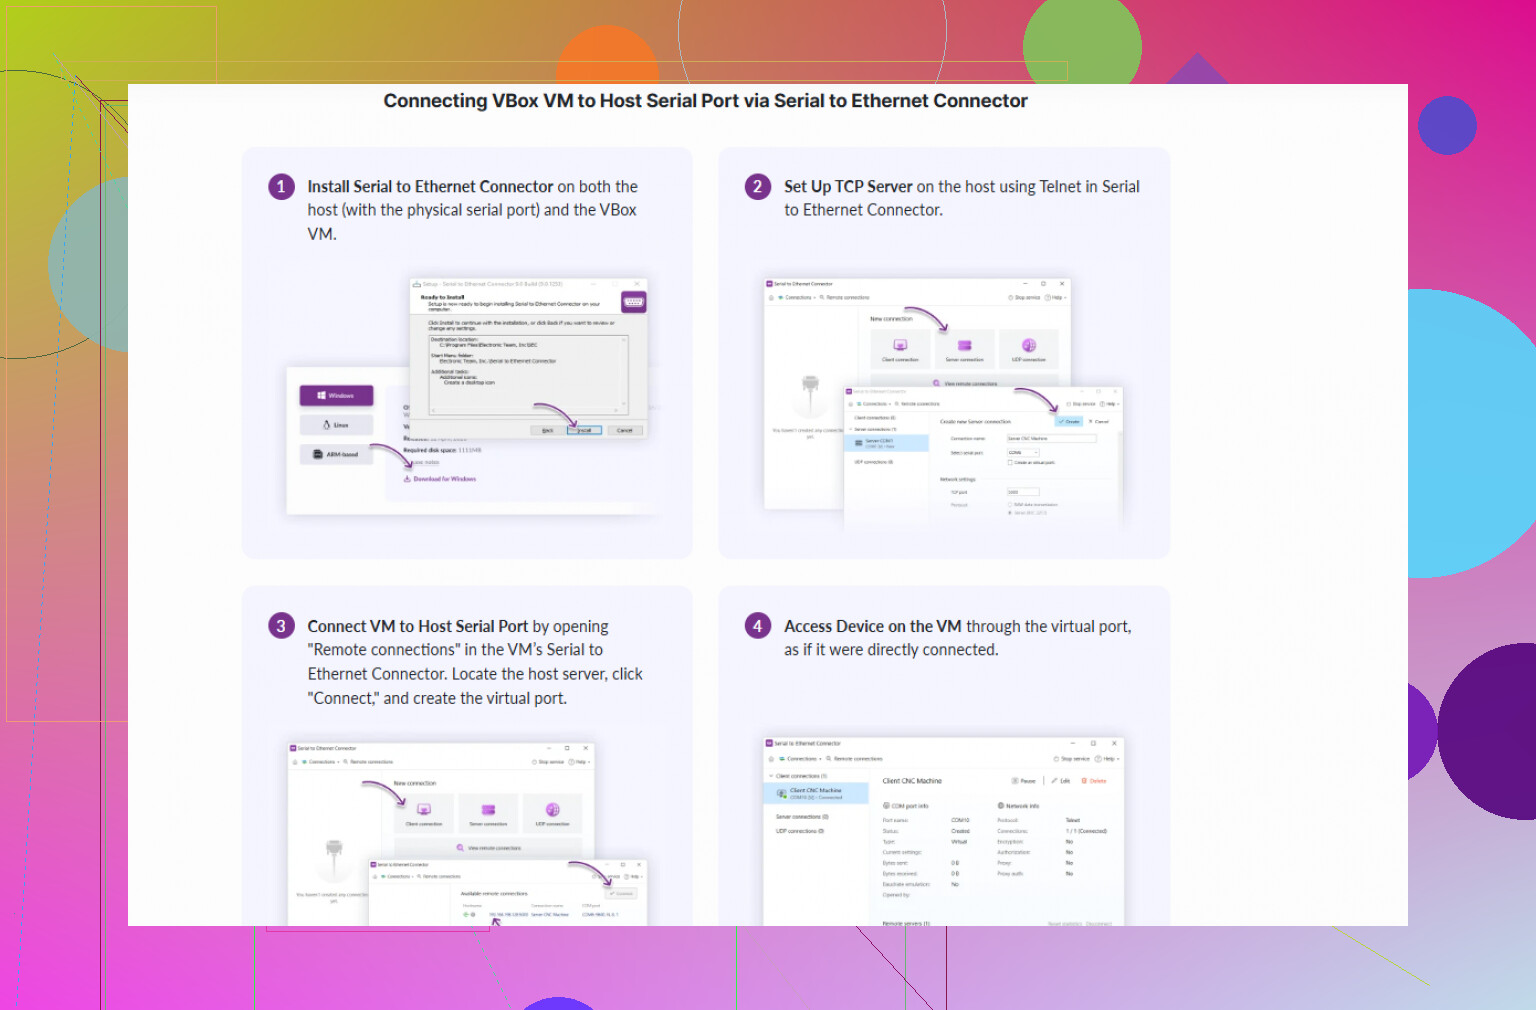
This is where tools like Serial to Ethernet Connector come in handy. It creates a virtual serial port in your host OS and redirects it over TCP/IP to a serial server or another machine. Then in VirtualBox you just:
- Set the VM serial port to “Host Device” and point it at the virtual COM port created by Serial to Ethernet Connector.
- Inside the guest, it looks like a normal COM1 / COM2.
- On the physical side, Serial to Ethernet Connector handles the real RS232 device over the network.
If you want a more detailed walkthrough on configuring a VirtualBox serial port setup that works with real hardware, there’s a solid guide here:
Step by step VirtualBox serial port configuration
So, quick rule of thumb:
- Real COM / USB RS232 on same machine → “Host Device.”
- Two VMs talking to each other or to a local daemon → “Host Pipe.”
- Logging only → “Raw File.”
- Remote or tricky hardware, or host without direct COM port → use Serial to Ethernet Connector on the host, then point VirtualBox to the virtual COM it creates.
If it still refuses to talk, check:
- Correct COM number inside guest.
- Matching baud rate, parity, stop bits.
- Proper cable type (null‑modem vs straight).
- Guest OS hasn’t grabbed IRQ / address for something else.
12 Likes
You’re overthinking the “host device vs host pipe vs file” part a bit. For a real legacy box on a real cable, 99% of the time you want Host Device, not pipe, not file.
Let me attack this from the “what are you actually plugging into what” angle instead of repeating what @suenodelbosque already covered.
1. Figure out what your legacy device is (DTE vs DCE)
Skip this and you’ll be chasing ghosts.
- Old PCs, terminals, CNC controllers, lab gear: usually DTE
- Modems, some serial converters: usually DCE
If you connect:
- DTE → DTE (PC → old controller, PC → PC): you normally need a null modem cable or adapter.
- DTE → DCE (PC → modem-like thing): usually a straight-through cable.
If you’re not sure:
- Try a null modem first. Wrong cable type is honestly more common than wrong VirtualBox settings.
- Also watch out for those USB‑RS232 adapters that are wired weirdly or have broken RTS/CTS.
2. Decide where the real serial port lives
You basically have three real-world layouts:
A. Serial port is on the host machine
Example: USB‑RS232 dongle plugged into the host.
In that case:
- VirtualBox Serial Port → Enable Port 1
- Port Mode → Host Device
- Port path:
- Windows host:
COMxthat matches your adapter - Linux host:
/dev/ttyS0,/dev/ttyUSB0, etc.
- Windows host:
- Guest: talk to it as COM1, COM2, whatever you mapped it to
No need for pipes, raw files, sorcery, or fragile workarounds.
I slightly disagree with @suenodelbosque on fiddling with IO base/IRQ unless you are running something really old like DOS apps that hardcode 0x3F8 / IRQ 4. For most modern OS guests (Win2k+ / Linux), just let VirtualBox keep the defaults and configure the COM port inside the guest OS.
B. Serial port is on a different machine or remote device server
If the real RS‑232 port is on another box or you want to put the legacy gear somewhere else in the room, fighting with USB passthrough is usually more annoying than it’s worth.
This is where Serial to Ethernet Connector is actually handy and not just marketing fluff:
- On the host (or another machine), install software that:
- Creates a virtual serial port (e.g. COM10)
- Tunnels it over TCP/IP to your hardware or serial server
- In VirtualBox:
- Serial Port → Host Device → point to that virtual COM (e.g.
COM10or/dev/ttyV0)
- Serial Port → Host Device → point to that virtual COM (e.g.
Inside the guest, it just looks like a normal COM port, but all the actual RS‑232 is handled by the network layer.
If you want a tidy Windows host setup, tools like Serial to Ethernet Connector do exactly that: they expose hardware or remote serial ports as if they were local, then VirtualBox just thinks it’s talking to a regular host device.
C. You want to test without real hardware
This is the only time you should be touching the other two modes:
-
Host Pipe:
- Use it to connect:
- Two VMs to each other (VM A pipe ↔ VM B pipe)
- VM to a local userspace program that opens a named pipe and emulates the device
- It does not talk to the host COM port by magic. You need a bridge program.
- Use it to connect:
-
Raw File:
- This just logs serial traffic to a file.
- Helpful for debugging, completely useless for real-time communication with a live device.
If you were thinking “host pipe to talk to my USB‑RS232 dongle directly,” that’s where people get stuck. Use Host Device instead.
3. Check the obvious stuff people skip
Once you wire it and pick Host Device, verify:
-
Matching settings on both ends
- Baud rate (9600 / 19200 / 115200 etc.)
- Data bits (usually 8)
- Parity (None/Even/Odd)
- Stop bits (1 or 2)
- Flow control (None / RTS/CTS / XON/XOFF)
-
Only one thing opens the port
- Host must not have some background thing grabbing
COM3or/dev/ttyUSB0(serial console, modem manager, UPS daemon, etc.). - If the host opens the port, the guest cannot.
- Host must not have some background thing grabbing
-
Guest sees the same COM number you think it does
- Windows guest: check Device Manager under Ports
- Linux guest:
dmesg | grep ttySorsetserial -g /dev/ttyS*
If nothing is working, do a super simple sanity test:
- On the host, use
screen,minicom, or PuTTY to talk to the device directly first. - Once you confirm the cable and settings are correct there, then insert VirtualBox into the chain.
4. About “serial port software”
If you’re looking for something more flexible than bare VirtualBox settings, dedicated serial communication software for Windows and Linux can help you:
- Create virtual COM ports
- Share a single physical COM port between multiple apps
- Redirect serial data over TCP/IP to remote hosts or virtual machines
- Log and monitor all serial traffic for debugging
You can check out tools in this category here:
advanced serial connectivity and monitoring tools
Pairing that type of tool with VirtualBox (using Host Device pointing at the virtual COM) is often the cleanest way to keep crusty legacy hardware talking nicely with a modern VM.
Quickly building on what @caminantenocturno and @suenodelbosque already covered, here are a few extra angles that tend to trip people up.
1. Don’t blindly trust “COM1 in VBox = COM1 in guest”
They both hinted at this, but it is worth stressing: the “Port Number: COM1” in VirtualBox is only the virtual label. Inside the guest, especially Linux, that might end up as /dev/ttyS1 or /dev/ttyS2 depending on drivers and ACPI. On old DOS or Win9x guests, some software hardcodes COM1 at 0x3F8 / IRQ 4 and ignores whatever the OS says.
So for really old guests:
- Match I/O port and IRQ in VirtualBox to what the legacy software expects.
- Avoid using COM3/COM4 in the guest unless you understand legacy IRQ conflicts.
This is where I partially disagree with the “don’t touch IO/IRQ unless DOS” idea: even some early NT and industrial apps still care.
2. USB passthrough vs Host Device
Both previous replies focus on “Host Device” at the VM serial level, which is usually right. One thing they did not spell out:
- If your RS232 is a USB adapter, you have two choices:
- Let the host own the adapter and expose it as a host device (COMx,
/dev/ttyUSB0) to the guest. - Use USB passthrough and give the entire USB dongle to the VM, then install its driver inside the guest.
- Let the host own the adapter and expose it as a host device (COMx,
Option 1 is usually simpler and matches what they described, but in some flaky Windows driver situations, option 2 actually behaves more predictably because the guest owns the driver stack instead of sharing it with the host.
So if “Host Device → COMx” is unreliable or locks up, try:
- Remove the VirtualBox serial mapping.
- Add the USB device to the VM’s USB filter list.
- Handle COM port entirely inside the guest OS.
You lose the nice “host sees it too” aspect, but gain stability.
3. Host Pipe can be powerful with the right bridge
Both earlier posts basically say “Host Pipe is for developers and weird setups,” which is mostly right, but it can be a lifesaver for odd hardware:
- Use a host side bridge program that:
- Opens the named pipe.
- Forwards to
/dev/ttyUSB0orCOM5. - Optionally logs, filters or simulates quirky timing.
This is handy if your legacy device is very strict about timings, CTS/RTS behavior or needs scripting. The VM just sees a COM port, and the host-side bridge (Python with pyserial, socat, etc.) deals with the ugly bits.
4. When “Serial to Ethernet Connector” actually makes sense
Both responses mention network serial as the third path. The product Serial to Ethernet Connector is actually useful when:
- The real device is in a cabinet across the shop.
- Multiple VMs or physical PCs need to share very limited serial ports.
- You want to keep the hardware on a stable, dedicated machine and let VMs come and go.
Pros of Serial to Ethernet Connector:
- Creates virtual COM ports that VirtualBox can treat as standard Host Device targets.
- Lets you centralize the real RS232 hardware on one machine or a device server.
- Helps in multi‑VM labs: each VM mapped to its own virtual COM, all talking to the same or different remote serial servers.
- Often provides logging and reconnection that basic OS drivers lack.
Cons:
- Extra layer to troubleshoot. If it breaks, you now have: guest → VBox → virtual COM → connector → network → hardware.
- Licensing cost if you only need a single simple local port.
- More complexity for low‑latency or real‑time scenarios, especially if your network is noisy.
- Misconfiguration is easy (wrong TCP port, wrong side acting as client/server, etc.).
If you do go that route, treat it as:
“Host sees a normal COM port. VM sees a normal Host Device. All the network funkiness lives inside Serial to Ethernet Connector.”
5. Classic “why is nothing coming through” checklist that people miss
Some of this was touched on before, but condensed:
-
Verify on the host first
- Talk to the device from the host with
screen,minicom, PuTTY or similar. - If it fails here, VirtualBox is not the problem.
- Talk to the device from the host with
-
Fight the cable, not the config
- If it is DTE to DTE, use real null‑modem wiring (TX/RX crossed, proper handshakes if needed).
- Check for cheap USB‑RS232 adapters that ignore RTS/CTS if your device uses hardware flow control.
-
Watch for host services stealing the port
- On Linux: serial console,
ModemManager, UPS daemons. - On Windows: vendor tools, monitoring services.
Only one process can own the port at a time.
- On Linux: serial console,
-
Buffering & latency
- Some legacy devices are incredibly sensitive to small bursts and timing. Enabling FIFO buffers at max on Windows can sometimes break old protocols. Test with reduced buffer sizes on the guest if data seems to arrive in “clumps.”
6. How I’d choose between all options, very bluntly
-
Host has a reliable RS232 or USB‑RS232, device is local:
Use VirtualBox Host Device mapped to that port. -
Host has flaky USB drivers, guest must own the adapter:
Use USB passthrough and manage COM only inside guest. -
Device is remote or shared:
Put it behind a serial server or a PC running Serial to Ethernet Connector, then point VirtualBox at the virtual COM that connector creates. -
You need scripting, protocol mangling or advanced logging:
Use Host Pipe with a custom bridge program on the host, forwarding to the real COM or a virtual one.
That fills the gaps around what @caminantenocturno and @suenodelbosque already laid out and should help you decide which exact path fits your legacy box and wiring.