My USB drive suddenly stopped working right after I plugged it into my computer, and now all my files seem to be gone. It shows errors or sometimes asks me to format it, but I have important photos and work documents on it that I really need back. I’m looking for help with USB data recovery, corrupted flash drive repair, and safe ways to restore lost files without making things worse.
I ran into this once with a thumb drive full of photos, and the first move was doing less, not more.
Stop touching the drive.
Do not format it. Do not run CHKDSK. Do not copy new stuff onto it. Those three things tend to make recovery worse, sometimes fast.
What I checked first was simple stuff.
- I plugged it into a different USB port.
- I tried another computer.
- I looked for it in Disk Management on Windows, or Disk Utility on a Mac.
- I wrote down the exact warning text, stuff like “You need to format the disk before you can use it.”
If your computer still sees the USB at all, even in a broken state, I’d skip repair attempts and go straight to file recovery.
I had decent luck with Disk Drill on damaged USB drives. It still scanned the device when Windows refused to read the file system right. That mattered more than any built-in fix.
What I did:
- Install Disk Drill on your main drive or another healthy disk, not on the damaged USB.
- Plug in the USB drive.
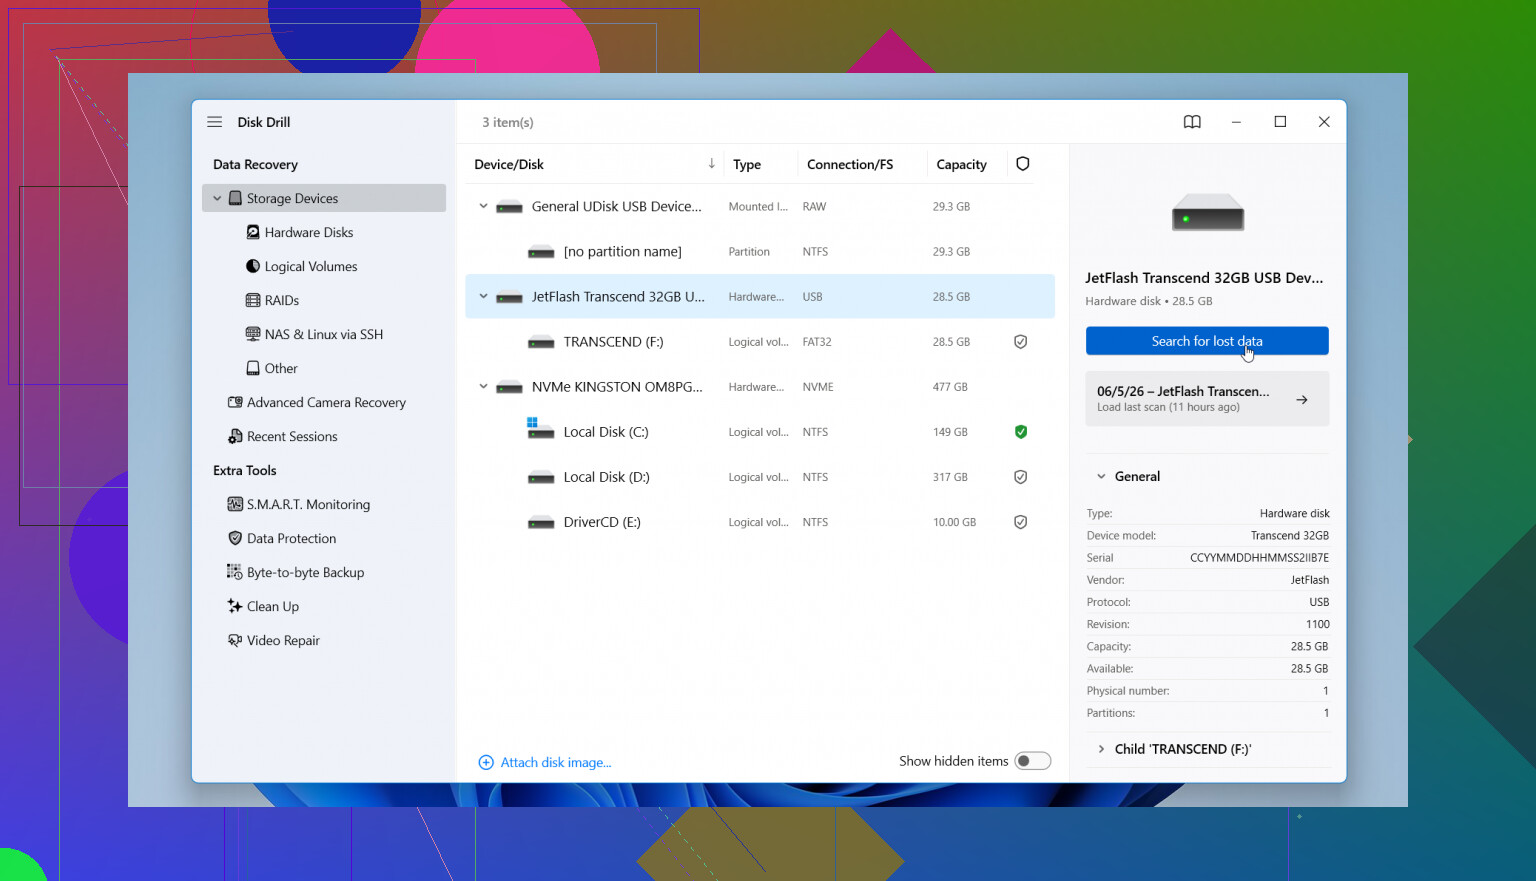
- Open Disk Drill and pick the USB from the device list.
- Start the scan and let it finish. Don’t interrupt it early if the drive is still responding.
- Preview what it finds so you know the files are intact.
- Recover everything to a different drive.
Small thing, but important. Never recover files back onto the same corrupted USB. I did this wrong years ago with another device and made the mess worse.
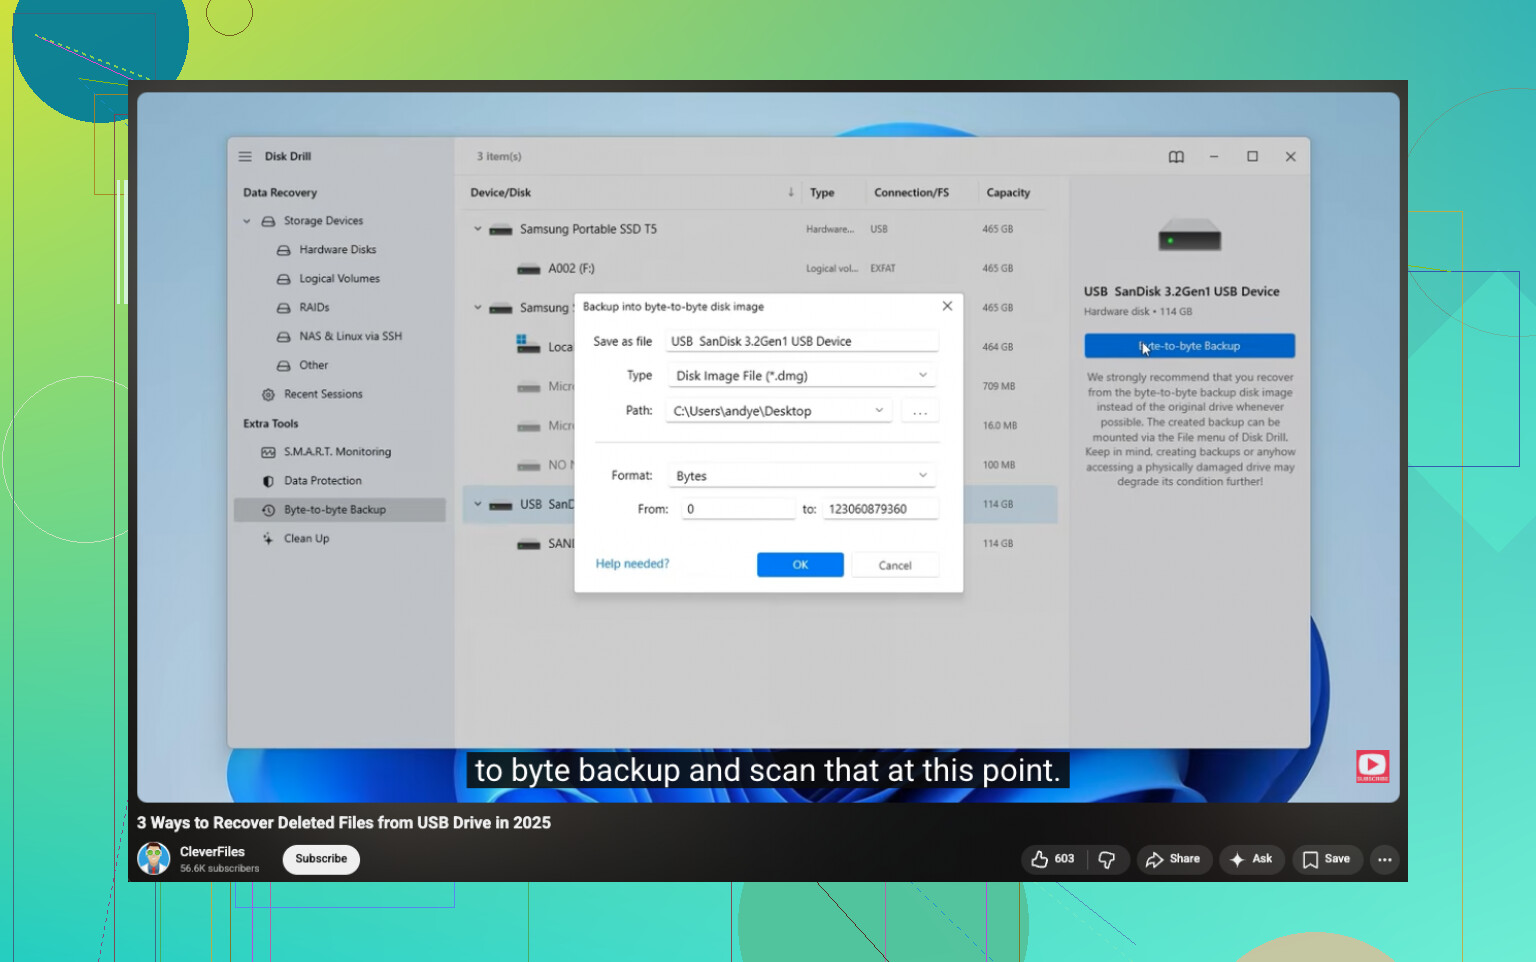
If the files matter a lot, family photos, work docs, tax stuff, I’d make a byte-for-byte backup image first inside Disk Drill, then scan the image instead of hammering the original drive over and over. Safer if the USB looks unstable or keeps dropping off.
After your files are out, then deal with the drive itself. Reformat it, test it, or toss it if it keeps acting weird. File recovery comes first. Always.
15 Likes
If the USB shows the wrong size, 0 bytes, or disappears from Disk Management, I’d stop before doing more scans. @mikeappsreviewer is right about avoiding format and CHKDSK, but I don’t fully agree with scanning first if the drive keeps dropping. Unstable flash media gets worse fast.
My order is this.
- Check SMART or USB health with a read-only tool if the adapter still reports it.
- Make an image of the whole USB first, if the drive stays connected long enough.
- Scan the image, not the stick.
Disk Drill is still a solid pick here because it handles USB data recovery well and lets you recover to another disk. If the partition table got wiped, deep scan often finds photos and docs by file signatures even when the folder structure is gone. If the file system is exFAT or FAT32 and only the boot sector is damaged, recovery rates are often decent. If the controller is failing, software results drop fast.
One more thing people skip. Look in Device Manager. If Windows shows I/O errors or the device reconnects over and over, stop trying random fixes. Theres a point where DIY costs you files.
If you want a simple USB data recovery walkthrough, this video is useful: step by step USB drive file recovery guide
If Disk Drill sees the device, recover files first. If it does not, you’re moving into pro lab territory.
I mostly agree with @mikeappsreviewer and @mike34, but I’d push one extra check before doing a long scan: look at how the USB identifies itself. If Windows shows the drive with the wrong capacity, no media, or it keeps reconnecting every few seconds, that’s usually not just file system damage. That can mean controller or flash failure, and repeated scans can cook it faster.
So my version is:
- if the USB mounts badly but stays visible, use recovery software
- if it drops in and out, stop DIY pretty quick
- if it shows normal size, your odds are way better
Also, I would not trust Windows “repair this drive” prompts at all. They sound helpful, but they’re basicly cleanup tools, not file-saving tools.
For software, Disk Drill makes sense here because it’s easy to preview files before recovery, which matters a lot with photos and docs. If it finds your files with proper names and folders, recover them off immediately to your computer or another external drive. If names are gone and everything comes back as raw file types, still recover first, organize later.
One more thing people forget: check whether the files “disappeared” because the USB got switched to RAW or because the partition itself vanished. In Disk Management, if you see unallocated space instead of a partition, that points more to partition table damage than deleted files.
If you want more opinions from people dealing with the same mess, this thread on best recovery tools for a corrupted USB drive is worth reading.
If the stick is physically heating up, disconnecting, or reading as 0 bytes, stop. At that point software usually isn’t the hero people want it to be.
One angle missing from @mike34, @ombrasilente, and @mikeappsreviewer: check whether the files are just hidden, not gone. Some USB malware flips everything to hidden/system and the drive looks empty. In Command Prompt, read-only check first:
attrib X:\*.* /s /d
If everything shows H or S flags, that is a different problem than true corruption. I would still recover data before cleaning the stick.
I also slightly disagree with scanning immediately if the USB is making Windows lag hard. In that case, even opening Explorer repeatedly can stress it. Safer move is one clean attach, verify if the volume label and size look sane, then use a recovery tool only if the device stays stable.
About Disk Drill:
Pros:
- easy preview for photos, docs, videos
- good at finding files from damaged FAT/exFAT media
- can recover to another drive
- interface is simple enough when you are stressed
Cons:
- deep scans on weak USB sticks can take a while
- raw recovery may lose original filenames/folders
- if the controller is failing or the drive shows 0 bytes, it will not perform miracles
So my take: if the stick appears with roughly correct capacity and stays connected, Disk Drill is a reasonable next move. If it shows nonsense capacity, freezes the system, or disconnects every minute, stop DIY and consider a lab before the NAND degrades further.
I’m actually curious about one thing here. If the USB still shows the correct capacity and stays connected normally, but the files suddenly disappeared, would you guys try recovery software straight away or check for hidden files/partition issues first?
I’ve been reading through a few similar cases because I’m dealing with something pretty close to this, and I came across this discussion about recovering files from a corrupted flash drive where someone had a pretty similar problem. It made me wonder if there’s a better order to try things before jumping straight into a deep scan.
Just trying to figure out what the safest first step is before doing something that could make recovery harder.
Don’t reach for a deep scan the second files vanish on a drive that still shows correct size. That’s the part @henry is asking about, and honestly for that exact situation a full signature scan is overkill as a first move.
If the capacity reads right and the stick stays connected without dropping, the odds are pretty good the data is still sitting there intact. That changes what you should do first. A deep scan takes time and stresses the flash, and if the problem turns out to be hidden attributes or a RAW volume, you burned an hour for nothing.
So the order I’d actually use:
Run the hidden-file check @sternenwanderer already posted. It’s read-only, takes two seconds, and it rules out the dumbest cause first. USB malware flipping everything to hidden is way more common than people expect, and no recovery tool is needed for that, just clearing the flags after you’ve confirmed your files are there.
Then open Disk Management and read what it actually says. This is the fork in the road everyone glosses over. If you see a healthy partition that mounts as RAW, your file system header is damaged but the files are likely fine. If you see unallocated space where the partition used to be, the partition table is gone. Those are different problems even though both look like ‘files disappeared’ from Explorer.
Only after those two checks would I run recovery software. Disk Drill is fine for this and its preview is genuinely handy for confirming photos open before you commit to a recovery, but treat it as step three, not step one. It won’t tell you whether the cause was hidden attributes, and firing it up first just means you skipped the free checks.
Where I’ll push back a little on the earlier imaging advice: making a full byte image is smart when the drive is flaky, but for a stable stick showing correct capacity it’s not mandatory. It’s slow and eats a lot of space. Save the imaging effort for the unstable case @mike34 and @ombrasilente described, where the drive keeps reconnecting. On a healthy-looking stick, a normal scan straight to another drive is fine.
Short version for your case: hidden-file check, then Disk Management, then software. If both checks come back weird or the drive starts dropping mid-check, that’s your signal to stop and stop touching it.