My external hard drive suddenly shows up as a RAW partition after I unplugged it during a file transfer, and now I can’t access years of photos and work files. Disk Management detects the drive, but it asks me to format it. I need the safest way to repair a RAW external hard drive without losing data, and I’d really appreciate advice on trusted recovery or partition repair steps.
I ran into a RAW partition once on an external drive, and yeah, it looked bad at first. Windows acted like the drive was empty or needed formatting. My files were still there. The problem was simpler and uglier at the same time. Windows no longer understood the file system, so it treated the partition like nonsense.
What usually causes it, from what I’ve seen:
- power loss during a write,
- a dirty unplug on a USB drive,
- file system damage after a crash,
- bad sectors starting to spread,
- malware messing with partition data,
- a damaged partition table.
The main thing is this. Don’t format it first. If you write new data to the drive before recovery, you make your own life harder.
The order I’d follow:
- Stop using the drive.
- Pull the important files off it.
- Fix the partition, or wipe and rebuild it.
- Put your recovered files back later.
Get the files off before trying repairs
I’d begin with Disk Drill. I used it on a RAW volume before, and it did better than Windows tools because it wasn’t depending only on the broken file system. It scanned the storage directly and found stuff even while Windows kept pushing the format prompt.
- Install Disk Drill on a different drive. Not the damaged one. Typo in the original step aside, don’t do an 'IInstall' on the RAW disk and call it a day.
- Open it, then pick the affected disk or the RAW partition.
- Hit Search for Lost Data. If it’s an external drive, the app might ask for a scan type. I’d pick Universal Scan almost every time. For footage from a camera or drone, Advanced Camera Recovery tends to work better.
- Let the scan finish. Don’t cut it short unless the drive is dropping offline.
- Open Review found items.
- Preview some files. I always test a few photos, docs, or videos before recovering everything.
- Select what you need, then click Recover.
- Save the recovered files to another disk. Not back onto the RAW partition. Ever.
If the drive is acting flaky, slow reads, random disconnects, strange pauses, I’d make a full byte-for-byte image first and scan the image instead. Safer. Less wear on the original drive.
After recovery, deal with the partition
Once the files are safe, then I’d try repair. TestDisk is usually the first thing I reach for when the goal is restoring the old partition layout instead of starting over.
- Download TestDisk and extract it.
- Run testdisk_win.
- Choose Create.
- Select the disk with the RAW partition.
- Use the partition table type it detects.
- Go into Analyse, then run Quick Search.
- If nothing useful shows up, run Deeper Search.
- If it finds the missing or damaged partition, select it and choose Write.
- Restart the PC.
If TestDisk doesn’t bring it back, or if you don’t care about keeping the original partition structure, I’d stop trying to preserve it and rebuild it cleanly.
- Open Disk Management.
- Delete the RAW partition if Windows lets you and if recovery is already done.
- Create a New Simple Volume.
- Format it with NTFS, or another file system if your setup needs something else.
- Copy your recovered files back.
What I would skip
I wouldn’t start with CHKDSK on a RAW partition. Most of the time Windows won’t run it there anyway. And when repair tools do write changes to a damaged file system, they alter the disk state. Sometimes that helps. Sometimes it makes later recovery worse. I learned to recover first, repair second.
When I’d stop and hand it off
If the drive clicks, disappears mid-scan, shows up only sometimes, or won’t appear in Disk Management at all, I’d quit messing with it. Those are the cases where software fixes start turning into wishful thinking. Repeated power cycles on a failing drive can make things worse fast. If the files matter, work docs, family photos, irreplaceable stuff, I’d go straight to a recovery lab instead of squeezing in one more tool and hoping for a miracle.
5 Likes
Do not format it.
First, check the drive’s health before you try any repair. This is where I differ a bit from @mikeappsreviewer. Recovery first is smart, but if the disk has bad SMART stats, long scan sessions can push a weak drive harder than needed. Use CrystalDiskInfo or Hard Disk Sentinel and look at Reallocated Sectors, Pending Sectors, and CRC errors. If health looks bad, clone the drive first with ddrescue or HDD Raw Copy Tool, then work from the clone. Safer.
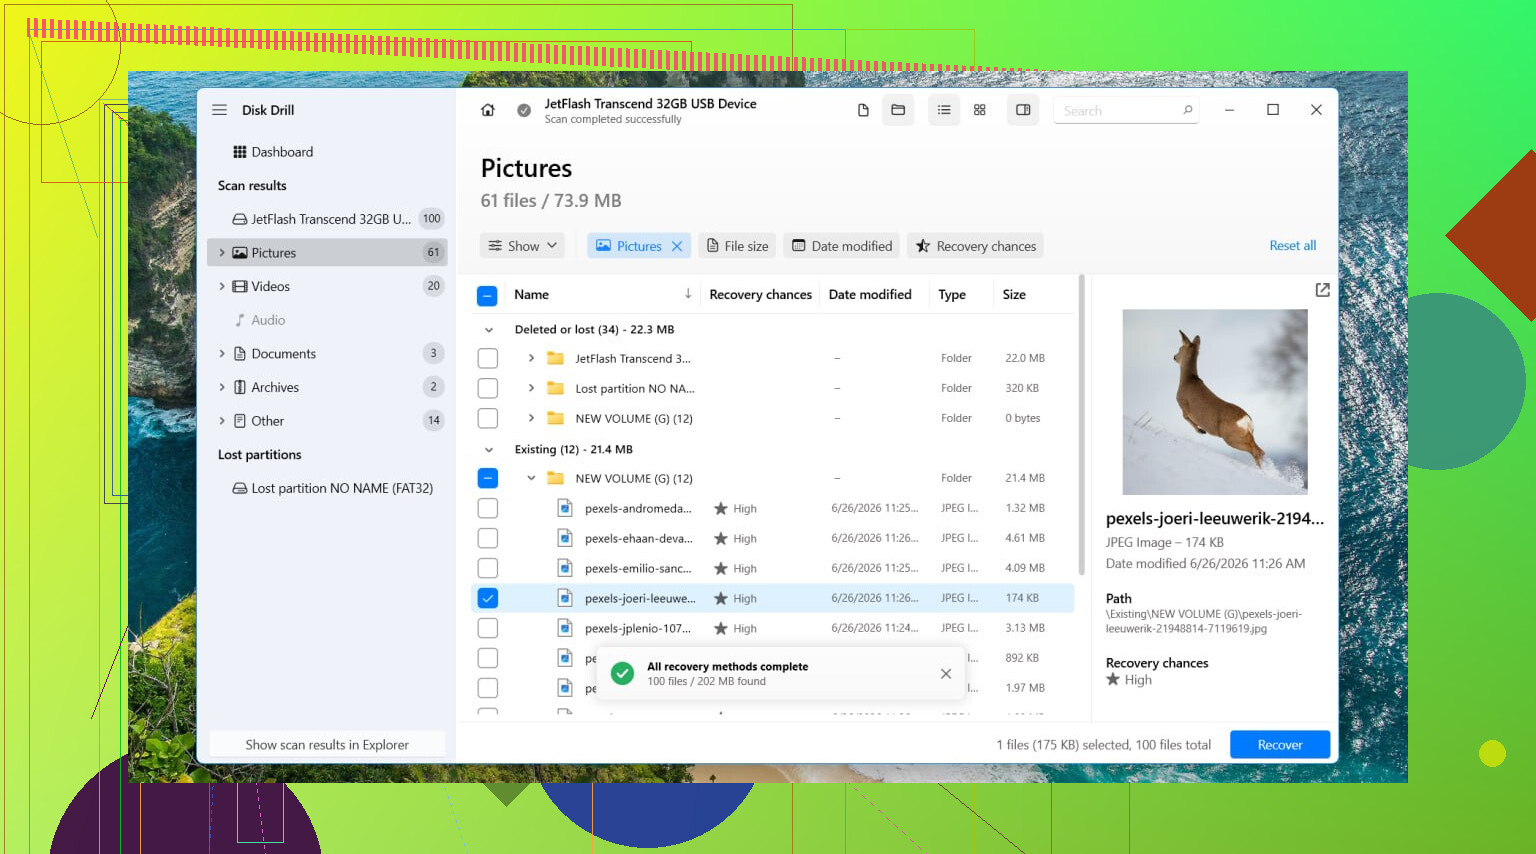
If SMART looks normal, try a read-only partition tool before writing changes. DMDE is good for this. It often shows the old file system structure even when Windows says RAW. If your folders appear normally in DMDE, you can copy out the most important files fast. After that, use Disk Drill for a deeper file recovery pass if names or folders are missing. It’s solid for RAW partition recovery on external hard drives and easier for most ppl to sort through.
A clean order:
- Stop using the drive.
- Check SMART.
- Clone first if health is shaky.
- Use DMDE or similar to inspect the partition in read-only mode.
- Recover priority files to another disk.
- Then test repair options.
- Format only after your data is safe.
I would not write a new partition table early unless you already verified the found partition is correct. One wrong write and the cleanup gets uglier.
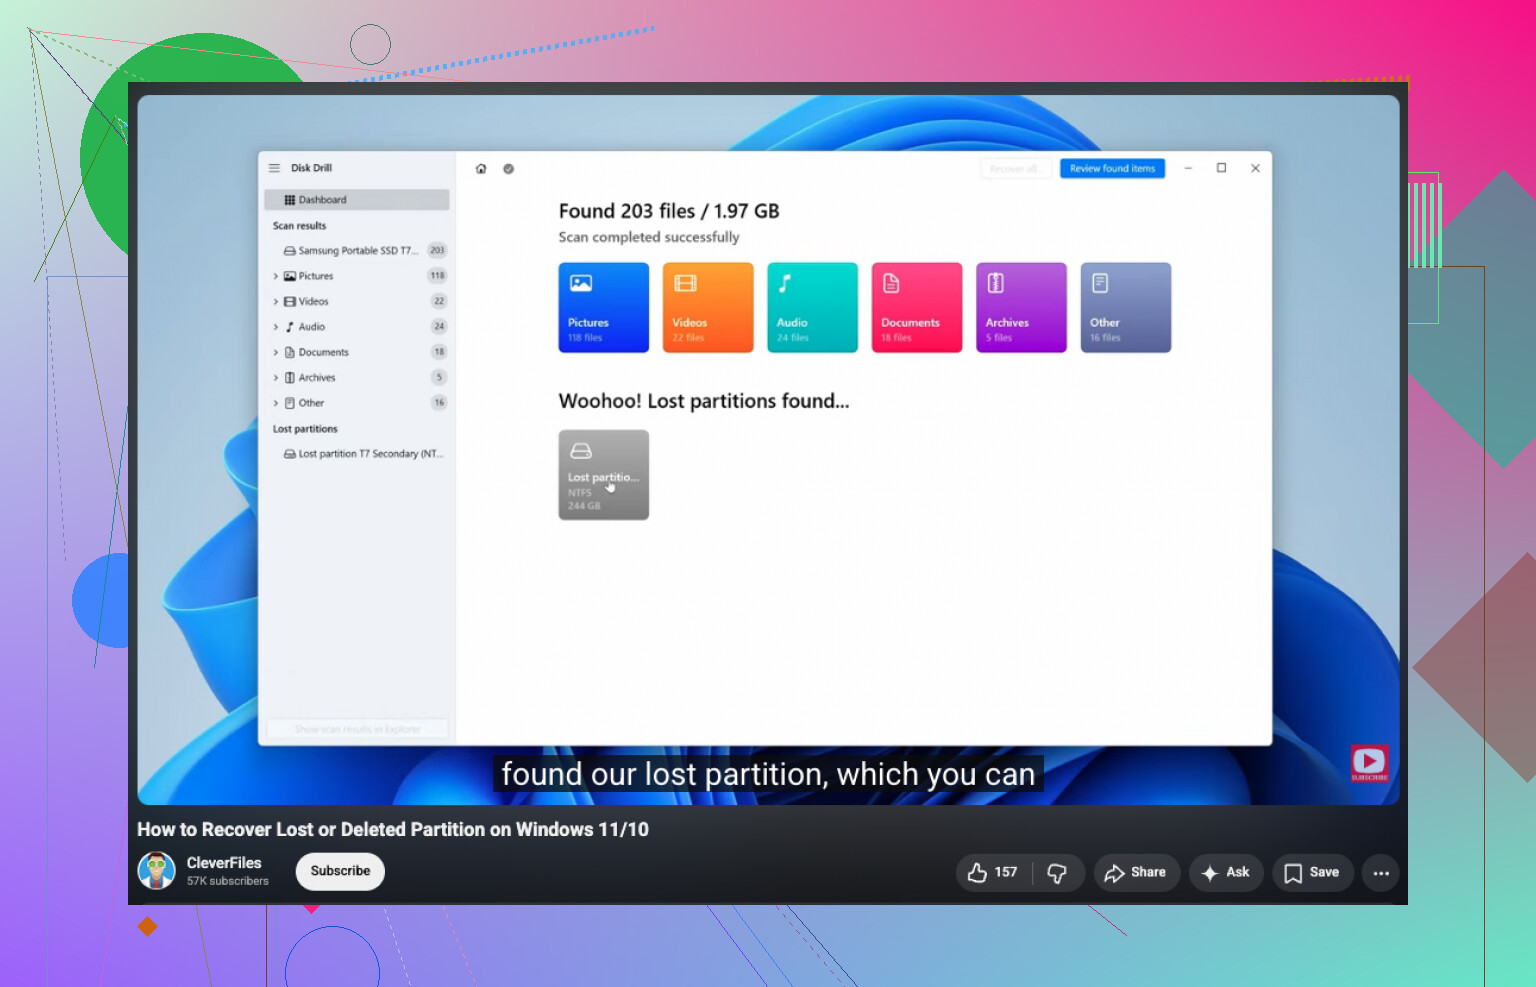
If you want a simple walkthrough on how to restore a missing or damaged partition, this helps:
watch this guide to recover a lost or RAW partition
If the drive clicks, drops offline, or reads at like 1 MB/s with freezes, stop. At tht point software is the cheap gamble, not the safe route.
Don’t “fix” it first. Safest move is to verify whether this is just file system corruption or actual hardware trouble, because those are very different paths.
I agree with @mikeappsreviewer on not formatting, and mostly with @techchizkid on checking health first, but I’d add one thing they kinda glossed over: test the enclosure/cable/port before doing anything heavy. I’ve seen external drives report weird RAW nonsense just because the USB bridge board was acting dumb after a bad unplug.
What I’d do:
- Try a different USB cable and port.
- If it has external power, use that.
- Check if the drive size shows correctly in Disk Management.
- If possible, connect the bare drive directly to SATA or a different enclosure.
If it suddenly mounts normally, stop there and copy everything off asap.
If it still shows RAW, don’t run repair tools yet. Use something that can preview files before recovery so you know the data is actually there. Disk Drill is solid for that on RAW external drives, esp if you need photos/docs back without messing with the partition right away. R-Studio or UFS Explorer are also strong if you want more control, but they’re less beginner friendly.
One thing I do disagree with a little: people jump to TestDisk too fast. Great tool, yes, but writing partition changes to the original disk before you have a safe copy can go sideways real fast. If the files matter, recover first, repair later. boring advice, but less regret lol.
Also, if you want more examples from ppl dealing with this exact mess, this thread has useful external hard drive turned RAW recovery advice.
If the drive clicks, disappears, or gets super slow, stop messing with it. That’s lab territory, not DIY hero mode.
One thing I’d add to what @techchizkid, @cazadordeestrellas, and @mikeappsreviewer said: check whether the drive flipped to RAW because of USB bridge weirdness, not just on-disk corruption. I actually disagree a bit with going straight into long scans on the original device if the enclosure is acting unstable. Sometimes the disk is fine and the USB-SATA board is the liar.
My safest order would be:
- Try a new cable, new port, no hub.
- Check the drive in another PC.
- If possible, remove the drive from the enclosure and connect it directly.
- If it still shows RAW, make an image if the drive is even slightly unstable.
- Work from the image, not the original.
Also, before any repair attempt, look at the partition in a hex viewer or a tool that can read the boot sector and MFT superblock equivalents. If the file system headers are obviously zeroed or shifted, “repair” tools can make a mess fast.
About Disk Drill: good choice for RAW partition recovery if your goal is getting files back with previews and less manual work.
Pros
- easy to use
- good preview support
- decent at pulling files from damaged/RAW volumes
Cons
- deep scans can take forever
- less surgical than pro tools like R-Studio
- recovering huge datasets can get messy if metadata is damaged
So yeah: don’t format, don’t run write-repair first, and don’t assume RAW always means dead partition. Sometimes it just means bad translation between the enclosure and the disk.