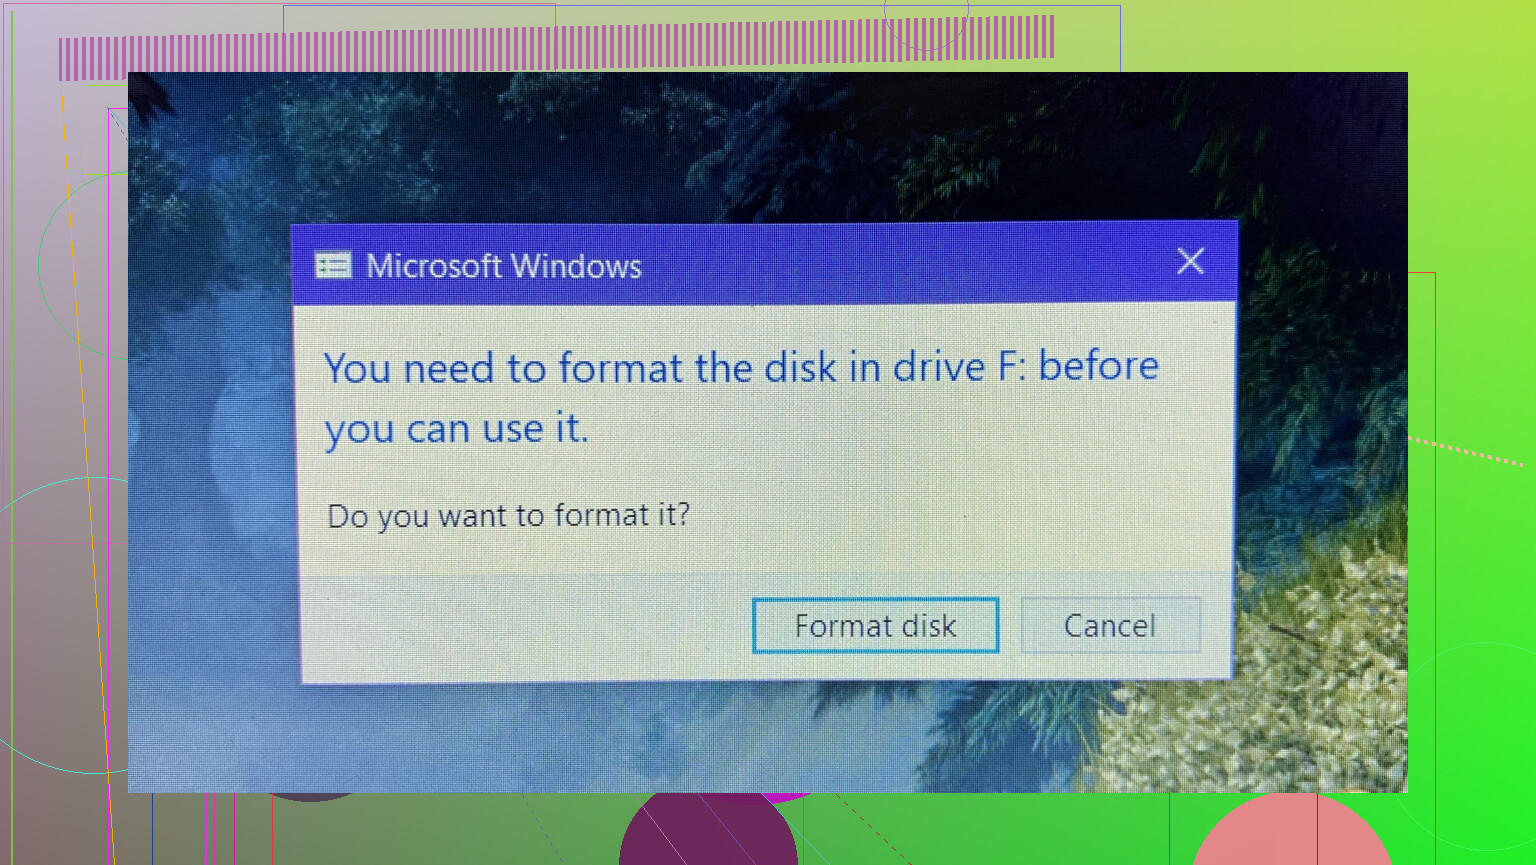
My SD card was working fine in my phone and PC, but now it suddenly shows a message saying it needs to be formatted before I can use it. I have important photos and files on it that I can’t lose. What could have caused this, and is there any way to fix the SD card or recover my data without formatting it?
Been in almost this exact mess before.
Windows popped up, yelled about formatting the card. I hit cancel on instinct. Good thing, because once you hit format, you start losing your odds fast. So yeah, first rule: do not hit format. Close the prompt, pull the card out cleanly, take a breath.
Here is what worked for me step by step.
-
Put the SD card back in the camera
Not a USB reader, not the laptop slot. Straight into the camera it came from.
Then I connected the camera to the PC with a USB cable and let it mount as a device.For reasons I still do not really get, my camera handled the flaky card better than Windows did. Windows saw “broken disk, must format”. The camera saw “slow, broken file system, but still readable enough to serve files over USB”. I was able to browse and copy a chunk of files that way before anything else.
So I would try:
• Turn the camera off
• Insert the SD card
• Turn it on
• Connect by USB and see if your photos show up in Explorer or whatever file manager you useIf it shows up, copy everything you see to your PC. Do not move, only copy.
-
If that fails, do a recovery scan
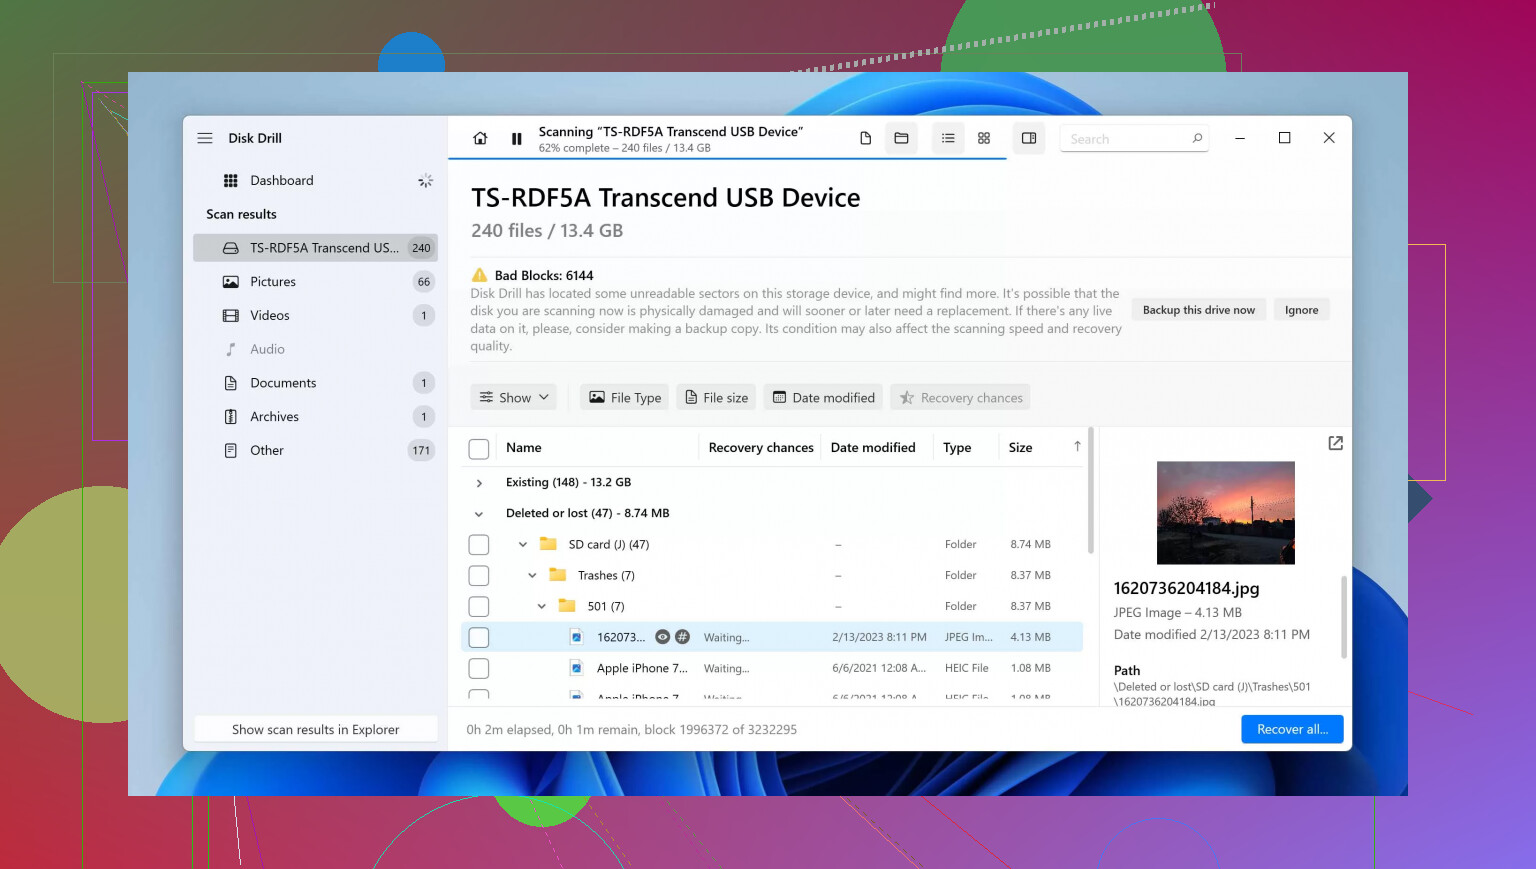
When the camera trick did nothing for me on a second card, I went to recovery software.I used Disk Drill, ran a deep scan on the SD card, and let it run for a long time. On a 64 GB card it took over an hour. It pulled back most of my photos, including ones the file system had “lost”.
I followed a walkthrough someone had posted here:
How Can I Recover Photos From a Formatted SD Card? - Forum | 7 Data Recovery ExpertsThat thread broke the process down step by step. Stuff like:
• Plug in the card, but do not format
• Choose the correct disk in the recovery tool
• Run a deep scan, not a quick one
• Preview files, then recover to a different driveThe “recover to a different drive” bit matters. Do not save anything back onto that SD card.
-
Biggest rule: do not write to the card
This part I learned the stupid way. I shot a few new photos after the card started acting weird, before trying recovery. Those new files wrote over some of the old data, so some older photos came back corrupted.So:
• Do not take new photos on that card
• Do not format it in Windows
• Do not run “repair” tools that write to the disk
• Do not copy stuff onto itOnly read from it for now. If something wants to “fix” or “initialize” it, cancel.
-
Accept when the card is done
After I got my stuff back, I retired the card. It still kind of worked, but errors kept popping up. I did not trust it again for anything important.I pulled about three months of photos off that last bad card. A few were broken beyond repair, but most were fine. For me that was good enough and I pitched the card in the trash box I keep for dead storage.
If you follow roughly this order:
- Try camera + USB
- Deep scan with recovery software, guided by something like that 7datarecovery discussion
- Recover everything to your computer, nothing back to the card
you give yourself the best shot without making it worse.
7 Likes
Short version. Your SD card file system is damaged. The data blocks on it are still there, but the index that tells the phone or PC where things are went corrupt, so Windows screams “you need to format this”.
What usually causes it:
-
Unsafe removal
• Pulling the card out while the phone or PC writes data.
• Yanking the USB reader without “eject”.
Even once is enough to break the file system headers. -
Power loss during writes
• Phone battery dies while recording video or copying files.
• Camera shuts off mid shot.
The card writes partial data, the structure goes inconsistent. -
Cheap or worn out card
• Low quality or fake SD cards use poor flash.
• Flash memory has write limits.
When blocks wear out, you get bad sectors, then file system errors, then “needs to be formatted”. -
Controller failure
Inside the SD card is a controller chip.
If that chip glitches, it reports wrong layout info to the OS.
OS panics and thinks the card is uninitialized. -
File system mismatch
• Card formatted as exFAT or ext by one device, then used by another with buggy support.
• Some phones and cameras mess with partition tables.
One update and your PC no longer understands the structure.
I agree with @mikeappsreviewer on the most important part. Do not format. Do not run tools that “fix errors” if they write to the card. Do not take new photos to it. Any write risks overwriting lost data.
Where I slightly disagree with them is on relying too much on the camera as a reader. Sometimes the camera firmware hides files or uses its own indexing. I would try it, but I would not spend a lot of time if it does not see the files right away.
Practical steps that complement what they posted:
-
Lock the card
Set the little switch on the SD adapter to “lock”.
This prevents normal writes on many readers.
It is not perfect, but it reduces risk. -
Check on another device or OS
• Try a Linux live USB.
• Linux tools likedmesgorlsblkshow if the card has hardware errors or only file system issues.
If Linux mounts it read only and you see files, copy them at once. -
Use recovery software that focuses on photos
Since you care about photos, use something like Disk Drill.
It scans the raw card and looks for file signatures like JPG, MP4, PNG.
Key points:
• Select the SD card itself, not a partition.
• Run a full or deep scan, not quick.
• Save recovered files to your PC drive, never back to the SD card.Disk Drill is solid for SD photo recovery, especially on cards Windows wants to format.
-
If the card is very unstable
Before recovery, try to create a disk image of the SD card with a tool likeddrescueon Linux.
This reads the card sector by sector and retries weak spots.
Then you run Disk Drill or other recovery apps on the image file, not the fragile card. -
Retire the card once you have your data
Even if you manage to fix the file system and format it clean, do not trust it with important stuff.
Use it for non important transfers or throw it out.
As for “How to Unformatted SD Card”, a better way to think about it for search and for your own plan is:
“How to recover files from an SD card that asks to be formatted”
Steps:
- Stop writing to the card and lock it.
- Try reading with the original device or another OS.
- Run a deep scan with a photo recovery tool like Disk Drill.
- Save all recovered data to a different drive.
- Replace the failing SD card.
If you want a short visual walkthrough, this video covers SD card recovery in a clear way:
step by step guide to fixing an SD card that asks to be formatted
Main thing for now. Do not click format. Do not trust the card again once your files are safe.
Do not format and do not “scan and fix” it in Windows. That part @mikeappsreviewer and @himmelsjager already nailed.
I’ll add a slightly different angle instead of repeating their steps.
Why your SD card suddenly wants to be formatted
In plain terms, the operating system is no longer able to read the file system structure on the card, so it assumes it’s “blank” or “raw” and offers to format it. That can happen even if the actual photos are still there.
Most common triggers, building on what’s already been said:
-
Tiny, invisible write failure
Even if you did always eject properly, a single interrupted write can corrupt just the file system metadata.
Example: phone writing thumbnails, you pull the card 0.1s too early or the phone glitches. That can ruin the index without touching most of the photo data. -
Background apps hammering the card
Phones love writing logs, cache, thumbnails, app data. Constant small writes increase the chance of:- Wear on specific blocks
- File system inconsistencies when they crash or freeze
So sometimes it is not the camera at all, it is some random social app caching media.
-
A fake capacity or downgraded card
Cards that report, say, 256 GB but are really 32 GB behave fine until you cross the “real” limit. After that, new writes overwrite earlier sectors and the file system goes crazy.
If your card was suspiciously cheap, this is worth checking with a capacity test tool like H2testw or F3 (but only after you’ve tried to recover data, since those tools write over the card). -
Sudden file system switch confusion
I’ll slightly disagree with relying too heavily on “file system mismatch” in normal use. Modern phones and PCs can handle exFAT and FAT32 pretty well.
The bigger problem I see: some devices sneakily reformat the card in the background or “optimize” it after a firmware update. If that process fails halfway, you end up with a half-changed structure that nothing likes.
Complementary recovery ideas (that don’t repeat the same steps)
You already got the big three: don’t format, try original device, deep scan with recovery software like Disk Drill. Here are a few extra tricks that can sometimes salvage more:
1. Try a different type of reader, not just a different PC
- Cheap USB readers are notorious for causing read errors that look like card failures.
- If you used a laptop slot, try a decent external USB 3.0 reader.
- If you used an adapter (microSD in SD adapter), try another adapter. Those little plastic things fail way more often than people think.
Sometimes the “card is dead” is actually “the adapter is trash”.
2. Let a Linux live system look at it first
Not everyone wants to mess with this, but if you’re a bit techy:
- Boot a Linux live USB (Ubuntu, Mint, etc.).
- Plug the card in.
- See if it mounts read only. If so, copy your DCIM folder straight away.
- If it does not mount, check
dmesgoutput for things like:- “read errors”
- “I/O error”
- “bad sector”
Hardware-level read errors mean the card is really going downhill. In that case, imaging it before heavy recovery scans is safer.
3. Make a full image before serious recovery
This is the one thing many people skip and later regret:
- Use a tool like
ddrescueon Linux to create a full image of the SD card to a file on your hard drive. - Then run Disk Drill or other tools on that image, not on the card itself.
Why it helps:
- The failing card does not have to survive multiple deep scans.
- If a tool crashes or you make a mistake, you still have that frozen-in-time copy to start over with.
It is especially useful if the card is slow, hangs, or disconnects during use.
4. Mix “file system” recovery with “raw” recovery
@himmelsjager mentioned using photo-focused tools. One thing to add:
- First, let your tool (Disk Drill is actually very solid at this) try to rebuild the file system: folders, names, dates.
- If that fails or is incomplete, run a raw or signature-based scan. That looks for JPG, MP4, etc., by their patterns instead of relying on the broken index.
You often end up with:
- A partial “nice” recovery (with filenames & dates)
- A second “messy” recovery (tons of files like file001.jpg, file002.jpg)
Messy is still better than gone.
After recovery: why you should not “trust” the card again
Here’s where I’ll be a bit harsher than @mikeappsreviewer:
If a card has once gone to the “please format me” state unexpectedly and it was not clearly caused by you yanking it mid-write or doing something obvious, you should treat it as unreliable storage from now on. Flash fails in clusters. Once sectors start flaking out, more usually follow.
- If it’s small and cheap, just destroy and bin it.
- If it’s big and you insist on using it:
- Do a full, slow format in the camera or PC.
- Run a full surface test.
- Then only use it for non-important stuff, never your only copy of anything.
What actually happens inside an SD card
If you’re curious “how does sd card work” in a way that helps you avoid this in the future:
An SD card is basically:
- A controller chip that decides where to store each bit of data
- Flash memory cells that physically hold those bits
Every time you take a photo or copy a file, the controller:
- Translates your file system writes into low-level block operations
- Spreads data around to avoid wearing out specific cells
- Keeps a table that maps logical addresses to real chip locations
When:
- Cells wear out,
- Power drops during writing,
- Or the controller bugs out,
the mapping table or file system metadata can get corrupted. That is when Windows suddenly thinks the card is “unformatted”. Your photos often still exist in those memory cells, which is why tools like Disk Drill can scan the raw card and pull them out even if the card “needs formatting.”
If you want a deeper, user-friendly dive into what’s going on under the hood and how SD cards store your photos, this explains it well:
how SD cards really store and manage your data
Short action plan without repeating their whole playbook
- Stop writing to the card completely.
- Try a different reader and, if possible, another OS.
- If the card is flaky, image it first.
- Run a deep scan with something like Disk Drill, using:
- file system reconstruction first
- raw photo/video scan second
- Once you have your files somewhere safe, retire the card from anything important.
You are almost certainly dealing with a damaged file system on a card that is starting to fail, not a “mystical” formatting requirement. The data is often still there if you treat the card gently and avoid any new writes.
Your card asking to be formatted basically means: the file system metadata is broken enough that the OS gives up and assumes “new disk.” The others already nailed the how to recover side, so I’ll focus on angles they did not emphasize and where I mildly disagree.
1. What might have actually happened (beyond the usual “unsafe removal”)
@himmelsjager and @mikeappsreviewer mentioned unsafe removal, power loss, and cheap cards. I’d add a couple of less obvious triggers:
a) Silent firmware / driver bugs
Sometimes a phone or camera update introduces a subtle bug in how it flushes data to the card. You never pulled the card, never lost power, yet one unlucky write corrupts the directory structure. From your perspective it feels “sudden” and unfair.
b) Background write storms
Some Android gallery or social apps constantly rewrite thumbnails and small cache files. One crash during this storm can damage the file system, even if you were not using the camera at all.
c) Fake capacity cards only failing after you fill them enough
If the card was suspiciously cheap or no‑name, it might be a 32 GB chip advertising 128 GB. Once you cross the real capacity, new data overwrites earlier sectors, including file system headers, then Windows suddenly screams “format.” The timing often coincides with “I just shot a lot of video.”
2. Slight disagreement: CHKDSK and “repair” tools
Others warned against repair tools that write to the card. I mostly agree, but with nuance:
- For irreplaceable data, I would still avoid CHKDSK, camera “repair” options, or any auto‑fix until you have a raw copy or have tried read‑only recovery.
- For a card with nothing important, CHKDSK can occasionally make it mountable again.
In your case, with important photos, I side with the conservative view: recovery first, “repairs” later, if at all.
3. Disk Drill vs other recovery tools: pros & cons
They all mentioned Disk Drill, so let me put it in context rather than just repeat “use it.”
Pros of Disk Drill
- Very beginner friendly UI, especially for SD photo/video recovery.
- Does both file system reconstruction and raw signature scan in one workflow.
- Good at recognizing photo formats like JPG, CR2, NEF, MP4, MOV on damaged cards.
- Lets you preview many files before recovering, which is helpful when filenames are gone.
Cons of Disk Drill
- The free version is limited in how much you can recover before paying.
- Deep scans can be slow on badly damaged or large cards.
- On extremely flaky hardware, it may repeatedly stall, which is where imaging the card first is safer.
Competitors & viewpoints already here:
- @himmelsjager leans strong into “lock the card, use Linux, then a photo‑centric tool.” Solid if you are comfortable with multiple tools and a slightly geeky approach.
- @vrijheidsvogel adds good hardware‑side tips like trying different readers and adapters, plus using a disk image as a safety net.
- @mikeappsreviewer’s experience‑based steps (camera as reader first, recovery second, never reuse the card for important data) are very practical if you want minimal technical fuss.
Realistically, Disk Drill plus their advice covers most non‑professional cases. Where I would adjust the order is below.
4. Order of operations I’d use (without rehashing their exact steps)
Not repeating their step lists, just tightening the sequence a bit:
-
Stop all writes immediately
No new photos, no format, no “scan and fix,” no copying to that card. -
Try a different adapter / reader first
Before anything fancy, rule out a flaky SD adapter or cheap USB reader. A surprising number of “dead” cards are just bad adapters. -
If the original device can see it, exploit that window
Here I agree with @mikeappsreviewer but with a time limit:- Put the card back in the original camera / phone.
- Connect via USB.
- If files show up, copy everything off, then stop.
If it hangs, disconnect cleanly and move on, do not keep power‑cycling the camera for hours.
-
If reads are unstable, make an image, then use Disk Drill on that image
This is where @vrijheidsvogel’s approach is golden:- A one‑time pass to image the card reduces further wear.
- Then point Disk Drill at the image file, not the raw card.
This combines the safety of forensic practice with the convenience of a GUI recovery tool.
-
Only after recovery, consider low‑level tests or CHKDSK
Once your data is safe elsewhere, then you can experiment. In many cases the card will fail tests anyway, which tells you to trash it.
5. What to do with the card after this
Here I’m stricter than some:
- If the card went from “fine” to “format me” without a very clear user error (like you know you ripped it out mid‑write), I would not trust it again for important photos, even if it appears “fixed” after formatting.
- You can still use it for temporary files or as a test card, but consider any future data on it disposable.
6. How to avoid a repeat
Quick habits that actually help:
- Always stop video recording and wait a second before powering off the device.
- In phones, avoid setting the SD as the sole storage for every noisy app that constantly writes cache/logs. Keep it mainly for camera data.
- Spend a bit more on cards from known manufacturers and buy from reputable sellers to avoid fakes.
- Occasionally back up your photos before the card is nearly full. Fake or failing cards tend to reveal themselves when heavily filled.
In short: your files are probably still there; the “index” is the part that is broken. Treat the card as read‑only, use a good reader, and let something like Disk Drill work on the card or, better, on an image of it. Once you get your photos back, retire that card from anything you care about.