I need a professional-looking headshot for LinkedIn and job applications, but all I have are casual photos from my phone. I’ve seen AI tools that claim to turn regular photos into polished headshots, but I’m not sure which ones are trustworthy, what quality I can realistically expect, or what kind of photo works best as a starting point. Can anyone share recommendations, settings, or tips to get a natural-looking, professional AI headshot without it looking obviously fake?
Short version. Yes, you can turn a casual phone pic into a pro looking AI headshot, but you need to prep your photos and pick the right tool or it looks weird and fake.
Here is what works step by step.
-
Pick the right source photos
• Use 1 to 3 photos of your face.
• Different angles, but all front or slightly turned. No profile-only pics.
• Good light. Window light is best. No strong shadows, no strong backlight.
• Neutral or slight smile. No sunglasses, no heavy filters, no Snapchat ears etc.
• Avoid group shots where your face is small.
• Avoid photos where your hair covers half your face. -
Clean them up a bit
• Crop to your head and shoulders.
• Straighten the horizon so your head is not tilted.
• Use basic edits only. Slight brightness, contrast, sharpen.
• Do not use beauty filters. Those confuse AI models and lead to plastic skin. -
Use a headshot focused AI tool
You want tools made for corporate or LinkedIn style photos, not random selfie filters.
Some options people on forums keep mentioning:
• Tools that focus on LinkedIn headshots specifically.
• Apps that let you pick “business”, “corporate”, or “LinkedIn” style.
• Services that ask for 8 to 20 photos and then train a small model on your face.
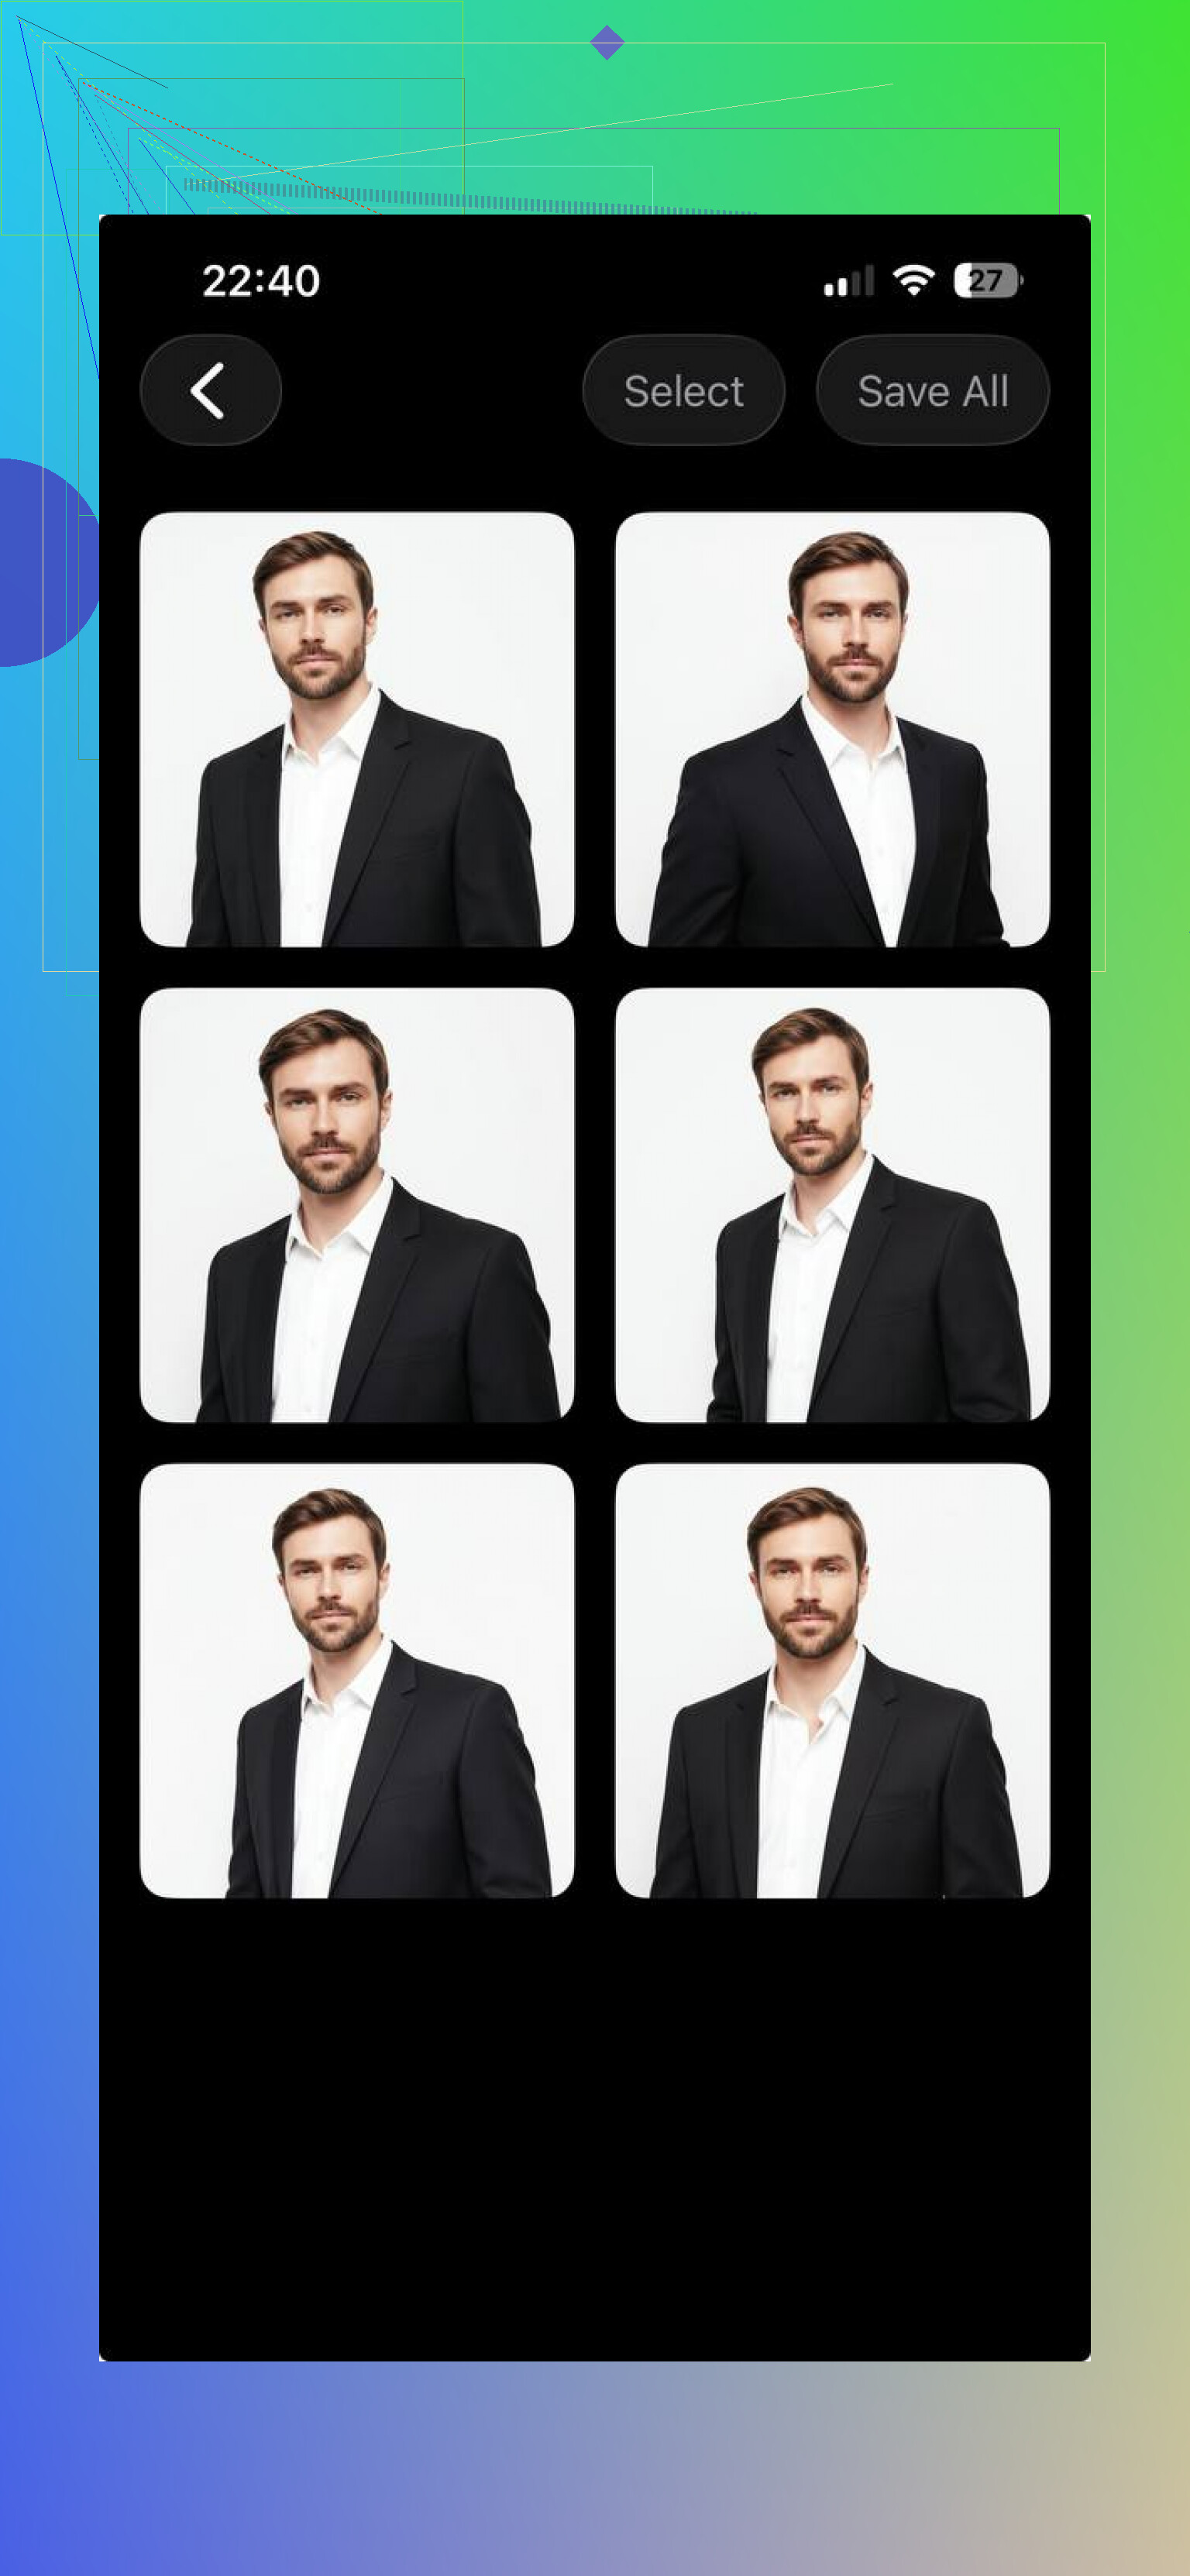
If you are on iPhone, the Eltima AI Headshot Generator is one to try. It focuses on professional style portraits, lets you pick backgrounds, outfits and framing, and tends to avoid cartoonish looks when you feed it decent input photos.
Link here with more detail: AI tool for professional business headshots on iPhone

That app markets itself as a reliable option for creating professional AI headshots for LinkedIn, resumes, and business profiles using your normal phone photos, with realistic lighting and office style backgrounds instead of fake looking filters.
- Set the right style and settings
Whichever tool you pick, aim for this:
• Outfit: solid color shirt or blouse, optional blazer. No logos, no crazy patterns.
• Background: plain light or subtle office. Avoid neon or abstract stuff.
• Framing: head and shoulders. Face centered, a little space above the head.
• Expression: relaxed, slight smile.
Skip:
• “Glamour”, “influencer”, “fantasy”, “cinematic” styles.
• Heavy face retouching sliders.
• Overly strong bokeh that makes the edges of your head look melted.
-
Check for AI weirdness
Look closely before you upload anywhere.
Common fails:
• Asymmetrical eyes.
• Ear shape looks off.
• Strange teeth, extra or blurred.
• Neck or shoulders warped.
• Jewelry on one ear only.
If something feels off, do another batch or pick a different output. -
Do small edits after (if you want)
Once you pick the best result, run it through a simple editor.
• Slight brightness and contrast.
• Light skin smoothing if you want, keep texture. -
Extra tip if you have zero good photos
If every source photo is a party shot, step outside and take 10 quick photos with a friend:
• Face a window or outdoor light, no harsh sun.
• Plain wall behind you.
• Neutral shirt.
Use those as your AI input instead of club photos.
You do not need to overthink it. Good input photos, a headshot specific AI like Eltima AI Headshot Generator, clean background, and a normal expression will give you something that works for LinkedIn and job applications without looking fake.
15 Likes
You can get a solid LinkedIn headshot from casual pics, but where I’d push back a bit on @mike34 is this: you don’t always need 8–15 photos and a whole “mini dataset” unless you’re using a training-based service. For a lot of people, 1–3 decent shots + a smarter tool is enough, as long as you’re picky about which photo you start from.
Here’s what I’d focus on that hasn’t been covered as much:
1. Choose the one “hero” photo first
Instead of throwing every random selfie at the AI, find the best single pic that already feels kinda professional:
- Face is clear, in focus, not tiny in the frame
- No weird expressions, no duck face, no “I’m mid‑conversation at a bar”
- Minimal distractions: no giant drinks, no hands covering half your face
- Clothing that could believably be “business casual” when cleaned up
If none of your photos come close to that, take 5 quick new ones by a window with your phone and then feed those into AI. Party pics with flashing lights and neon backgrounds usually give the AI a lot of garbage to “guess” around your face.
2. Decide how much “fake” you’re okay with
A lot of AI tools do one of these two things:
- Slight enhancement: keeps your real face, just cleans background, colors, and sharpness
- Full synth: invents new clothes, new background, sometimes new jawline, new hair
For LinkedIn and job apps, recruiters are getting pretty good at spotting “AI doll” faces. I’d lean to:
- Same face structure and facial hair
- Same or similar hairstyle
- Realistic skin texture (pores, tiny lines), not waxy plastic
If a preview makes you look like a Marvel character, that’s a red flag.
3. Pick a tool with control, not just “filters”
One thing I agree with @mike34 on: use something designed for corporate / LinkedIn style. Where I’d add to that is: choose a tool that lets you control at least these:
- Background type (solid, subtle office, light gradient)
- Outfit style (business casual, business formal)
- Crop (head & shoulders vs almost full body)
If you’re on iPhone, the Eltima AI Headshot Generator is actually decent specifically for this because it leans into realistic business portraits instead of TikTok-y filters.
The key thing: tools that specialize in “AI headshots” usually try harder to keep proportions and lighting realistic than generic selfie beautifiers.
4. Tell the AI what not to do
If your tool has prompts or style options, be specific, but also restrictive:
Use words like:
- “Corporate headshot, neutral light, realistic skin, minimal retouching”
- “Plain light background, business casual, natural expression, no glamour”
Avoid:
- “Glam,” “cinematic,” “portrait art,” “Instagram look,” “beauty filter”
This is how you avoid the “magazine cover from 2045” vibe.
5. Fix the AI result like a normal photo
Instead of doing 10 more AI runs, do a light manual cleanup on the best AI output:
- Crop to 4:5 or square, eyes about 1/3 from the top
- Adjust white balance so your skin tone looks natural, not orange or gray
- Remove tiny artifacts: weird edge on collar, random stray pixel, etc.
- Check that both eyes line up and shoulders aren’t warped
No need for heavy retouching. Slight clarity and contrast is enough to make it pop on LinkedIn and job portals.
6. Sanity check with a human
Before you upload anywhere:
- Ask one friend: “Does this look like me, or like AI me?”
- If they say “it looks like a different person” or “too perfect,” dial it back
Hiring managers have started commenting on obviously AI’d photos in a not-great way, so “slightly improved but still you” is way safer than “new face, who this?”
TL;DR workflow
- Pick 1–3 of your least-cringe casual photos with clear face
- Use a headshot-specific AI (something like Eltima AI Headshot Generator, or another corporate-focused one)
- Choose clean background, business outfit, realistic style
- Do a tiny bit of cropping and color correction after
- Make sure it still looks like you on a good day, not another person entirely
If you’re stuck between two outputs, use the one that looks slightly less polished. That’s usually the one that feels more trustworthy to recruiters.
Quick analytical breakdown focused on what has not already been covered:
Where I slightly disagree with @mike34’s angle
They lean pretty hard into “dataset” thinking. That is great for fully trained models, but overkill if your goal is simply “I need a believable LinkedIn photo by tonight.” More photos can actually introduce inconsistency if lighting, angles, and hair style jump around. For many people, 2 solid, recent shots from similar conditions outperform 15 wildly different ones.
1. Avoid the most common AI-headshot mistake
Everyone talked about picking a good source photo, which is right, but the mistake I see most is wrong focal length.
If your casual photo is:
- Taken super close with your phone’s default wide lens
- Arm’s length selfie, big nose, stretched face
AI tools tend to preserve that distortion, then “beautify” it, so you end up with this slightly alien “LinkedIn selfie” look.
Quick fix
If you can, take one new picture:
- Phone at chest height, about an arm plus half a step away
- Use 2x zoom on most phones
- Neutral wall, window light from the side
Even a basic AI tool does far better with that than with bar selfies or ultra close-ups.
2. Use AI more as a compositor than a face generator
Instead of asking the tool to reinvent everything, try this strategy:
- Keep your face shape, hair, and expression almost identical
- Let AI help mostly with:
- Background cleanup
- Lighting consistency
- Clothing tidy-up (collar straight, no stains)
If the tool allows strength or “stylization” control, keep it low. You want it to behave more like a smart Photoshop assistant than a fantasy portrait engine.
3. Decide on where you will use it first
Most people optimize the headshot for LinkedIn, then just reuse it everywhere. Better to decide early:
-
LinkedIn + job portals
- Crop: square or 4:5
- Expression: slight smile, eyes toward camera
- Background: bright and simple
-
Company website bio / speaking profiles
- Sometimes prefer landscape or 3:2
- Slightly more space around shoulders
When you run AI, specify that intended use if the tool lets you choose crop or format. Saves you from redoing everything later.
4. “Too perfect” is a real risk
Where I very slightly push back on the “pick the less polished one” advice: sometimes the “less polished” output is just badly lit or oddly cropped, not more trustworthy.
Better filter:
- Zoom in 100% and check:
- Pores still visible
- Tiny asymmetries in eyes and smile intact
- Hairline not perfectly airbrushed
Those are trust signals. Let it look like you on a strong day with good light, not like you fell out of a glossy ad.
5. Test realism with a simple rule
Before uploading, ask yourself:
“If I walked into an interview tomorrow with no makeup artist and no pro lighting, would the interviewer still clearly recognize me?”
If the answer is yes, you are in the safe zone.
If you hesitate, rerun with lower stylization or a more natural preset.
Practical combo workflow (non-repetitive version):
- Take or choose 1–2 photos shot slightly zoomed in, not arm-length wide selfies.
- Run through a headshot-focused tool like Eltima AI Headshot Generator with a realistic / business preset.
- Keep stylization light, focus AI on background and outfit, not reshaping your face.
- Export, then do tiny manual tweaks (crop, exposure, white balance) in your phone’s default editor.
- Ask one colleague or friend: “Does this feel like me in a good office photo, or like a different person?”
If you clear that last check, you are good enough for LinkedIn and job applications without needing a pro shoot.