I have a regular daylight photo that I’d like to transform into a realistic sunset scene using AI tools. I tried a couple of apps, but the colors looked fake and the lighting on the subject didn’t match the new sky. Can anyone recommend specific AI tools or workflows that can convincingly add a sunset to an existing photo, while keeping shadows and reflections looking natural for social media use?
Adding sunset vibes with AI has turned into one of those things I end up doing way more than I expected. I shoot a lot during the wrong time of day, then fix it later instead of waiting for good light like a patient person.
Here is roughly how I’ve been doing it and what worked or failed for me.
Adding a sunset look to a photo
I tested it first on a couple of random shots from my camera roll:
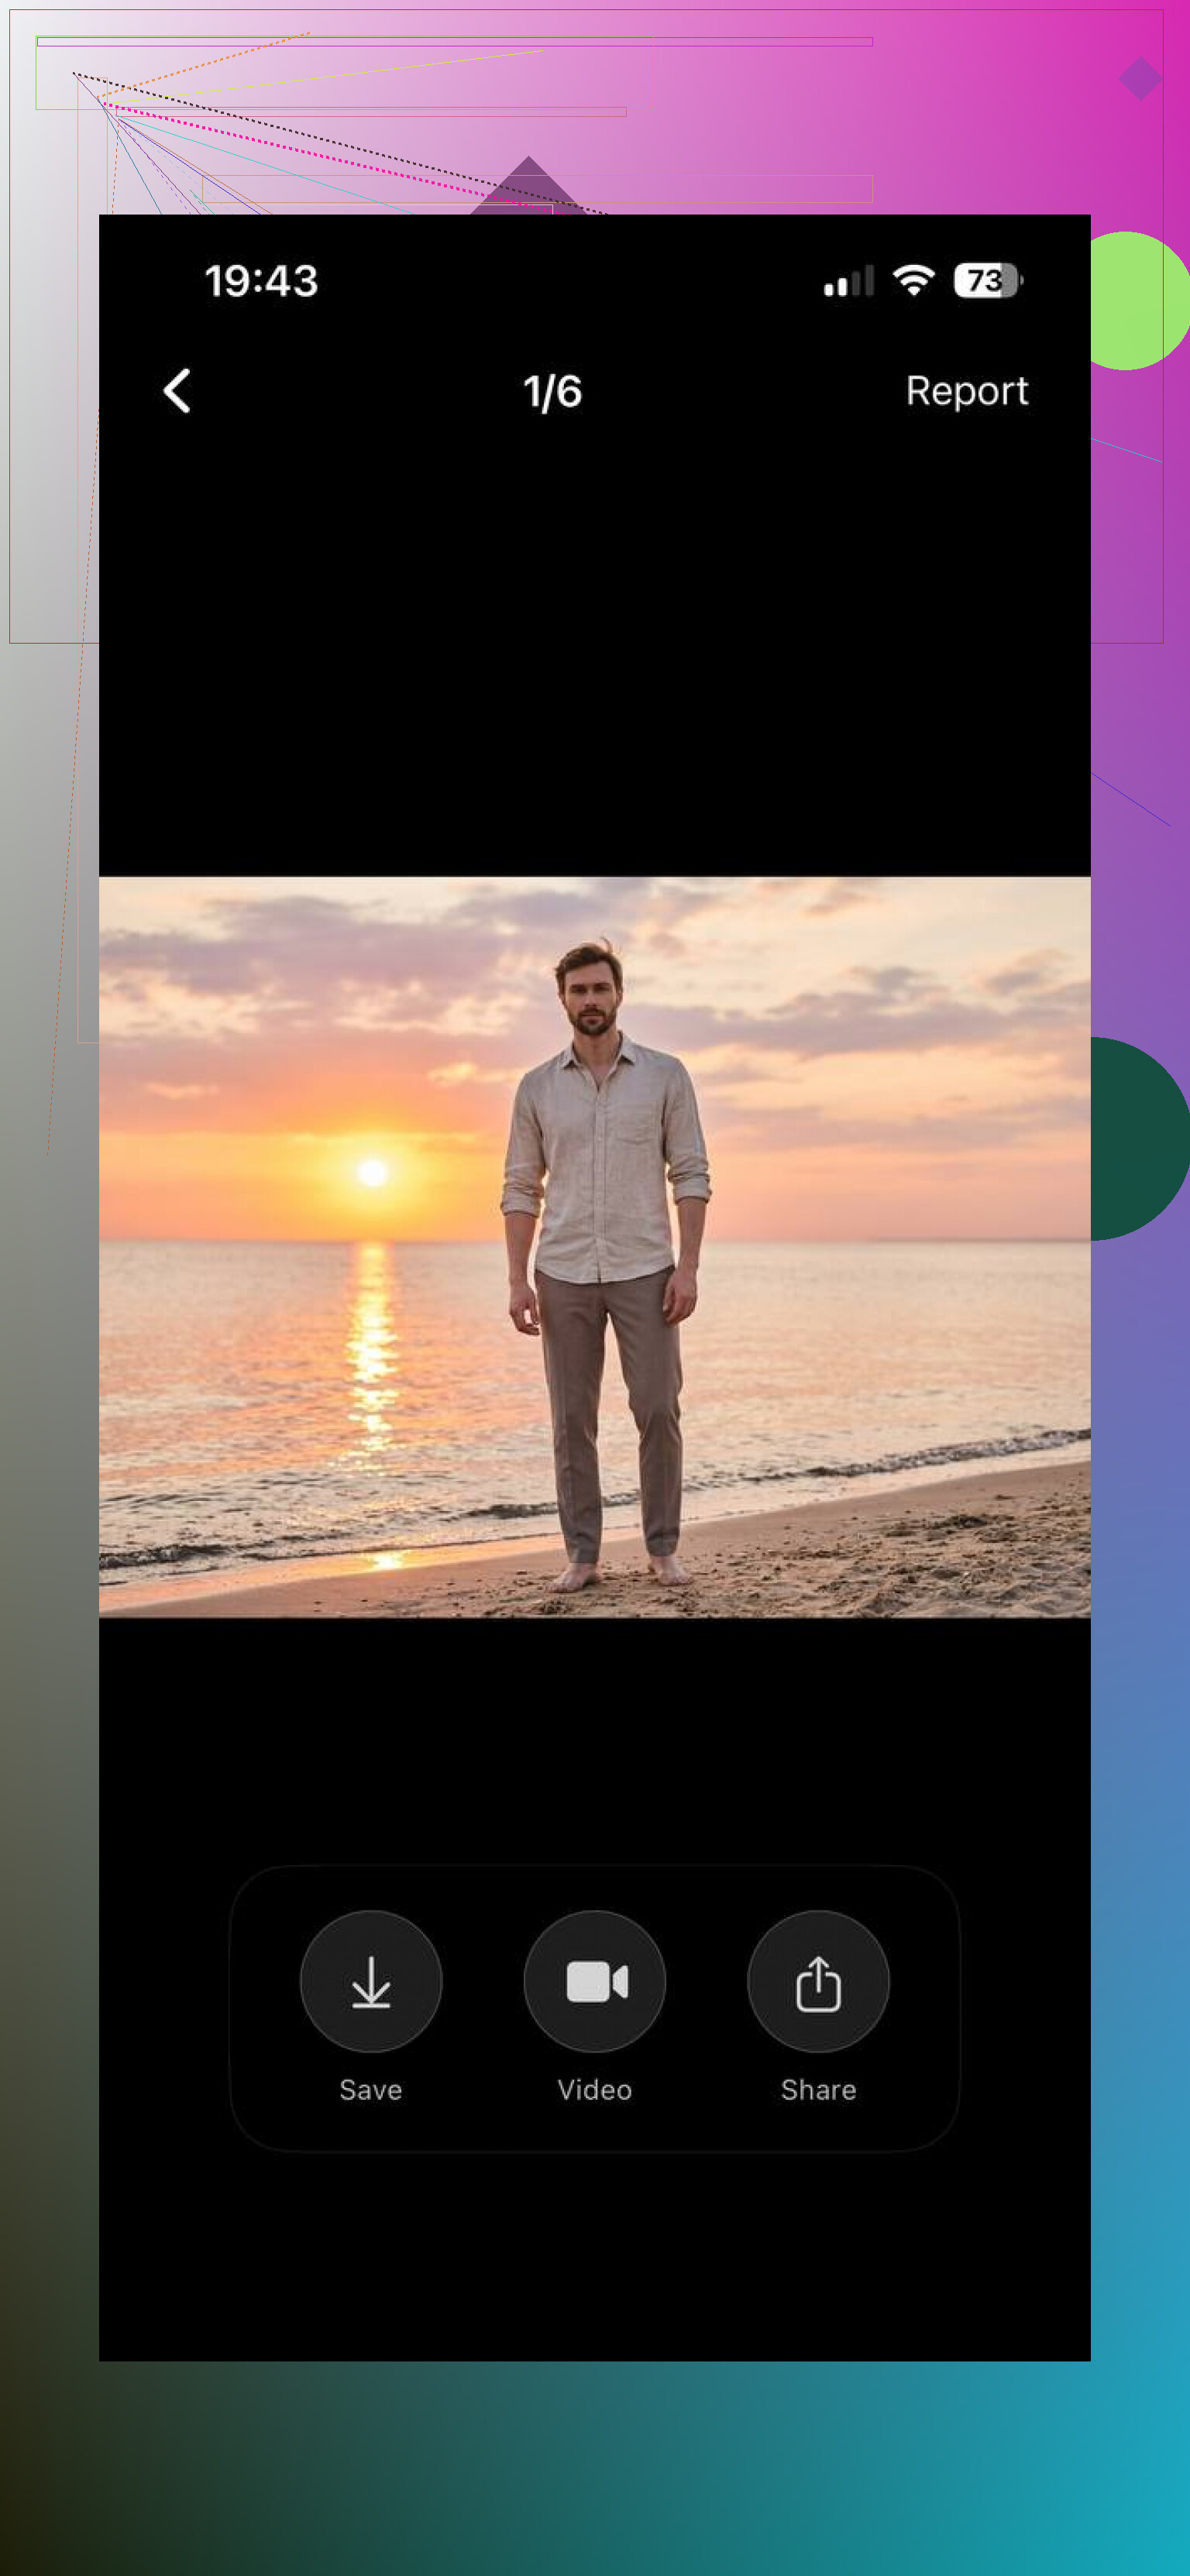
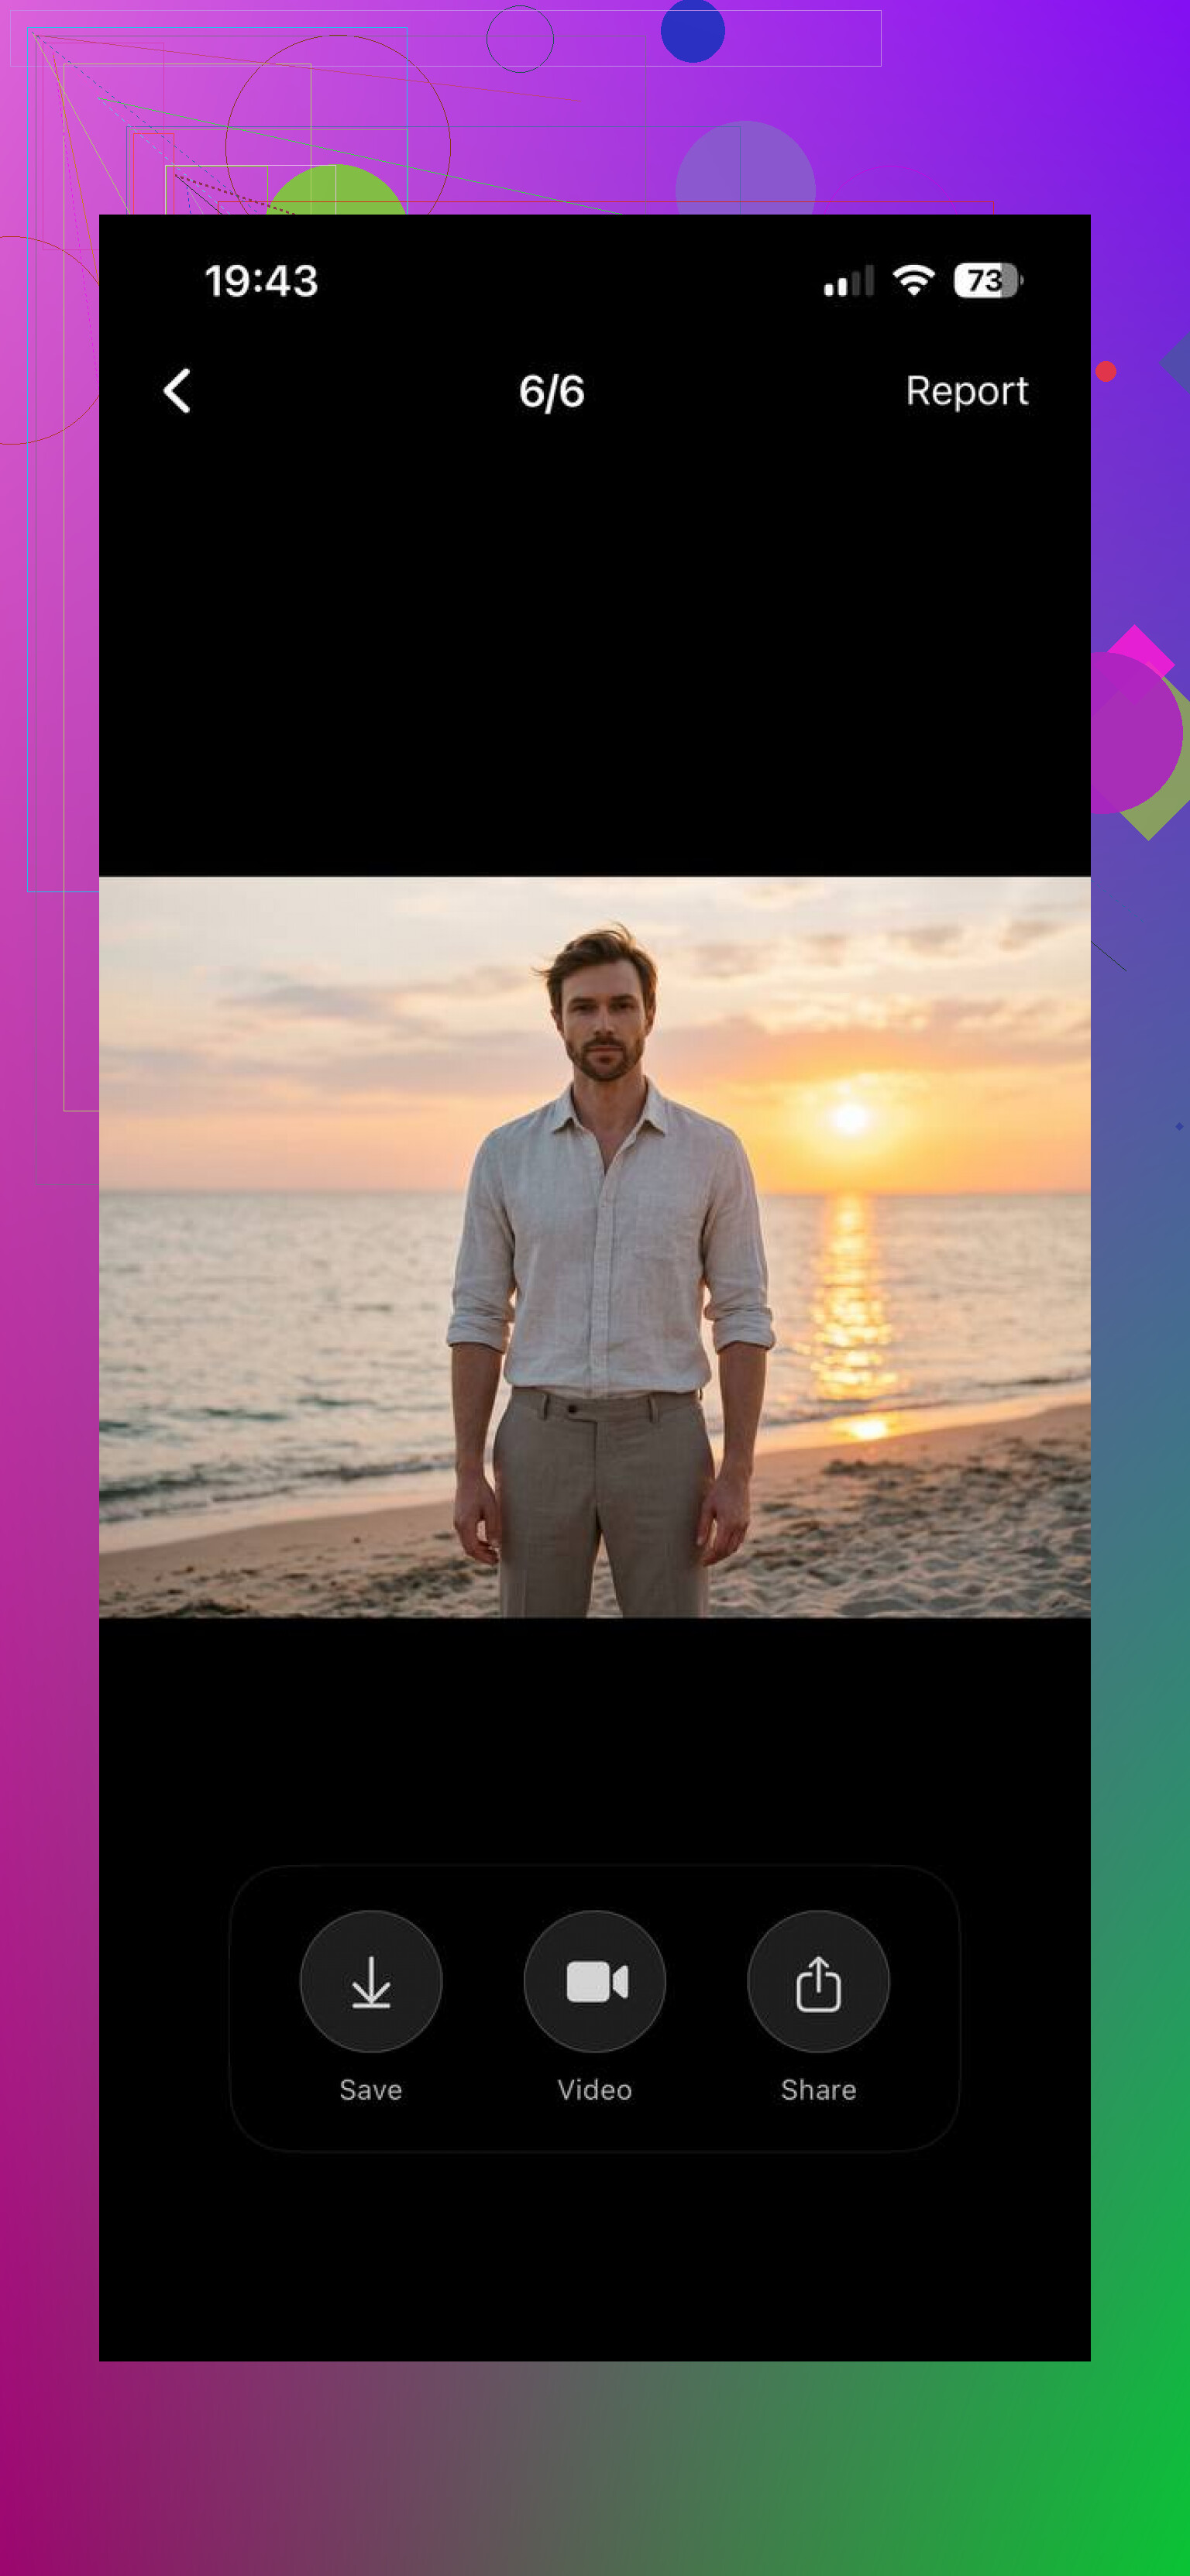
The original ones were flat and kind of boring. Midday sun. Harsh shadows. Nothing interesting. After AI edits, they look like I timed them for golden hour, but I absolutely did not.
From what I’ve tried, there are two main approaches.
- Use built‑in “sunset” or “golden hour” effects
Most AI photo editors and phone apps have ready presets. Stuff like:
- “Sunset glow”
- “Golden hour”
- “Beach sunset”
These usually do a few things at once:
• Shift the white balance toward warm tones
• Drop highlights a bit so the image feels softer
• Add orange or pink tint to the sky and skin
• Slight vignette sometimes
What works:
• Fast if you want a batch of photos to look similar
• Good enough for casual social posts
• Skin tones often look better than raw midday shots
What breaks:
• Strong presets can destroy white clothing and turn it orange
• Blues, like jeans or oceans, turn into weird teal if pushed too far
• If your original sky is blown out, the effect looks fake
What I usually do:
• Apply the preset at 40–70 percent strength, not full
• Pull back saturation a bit manually
• Check skin and whites, if they look off, I lower warmth or opacity
- Generate an entirely new sunset scene
This is where the tools stop simply recoloring and start rebuilding the image.
Some AI tools let you keep the subject, but replace most of the background. So your boring balcony becomes a city rooftop at sunset, or a gray park becomes a beach.
Typical options I’ve used:
• “Outdoor city sunset”
• “Rooftop golden light”
• “Beach at sunset”
• “Warm backlit portrait”
What usually happens:
• The sky is replaced with a believable gradient
• Reflections and highlights on your face match the new light direction
• Background objects get swapped for new scenery
When this looks better than filters:
• When your original background is cluttered, ugly, or indoors
• When artificial lighting in the original shot fights with the look you want
• When you want a full scene change, not light correction
Where it fails:
• Accessories vanish or change shape, earrings, necklaces, glasses
• Hands merge weirdly with backgrounds
• Hair edges sometimes look blurry
I use this approach when I do not care about the original place and only need a nice portrait with sunset light.
Tool I tested for sunset‑style portraits
Video that got me to try it:

The app from that video is here:
Eltima AI Headshot Generator:
I used it for a batch of LinkedIn style headshots, but pushed the “warmer / outdoor” type looks to fake evening light.
What I noticed using it:
• It has packs that look like city streets, outdoor terraces, corporate rooftops, etc, with warm late‑day lighting
• I did not have to mask the sky or background by hand
• I uploaded 5–10 source photos, then generated a lot of variants in one go
• Compared to basic phone filters, the light on skin and hair looked more believable
This is not a full editor. It does not let you tweak every little thing. It feels more like “upload your face, pick a vibe, get ready‑made portraits.”
If you want a direct link for the app version:
iOS:
How I’d use AI sunset tools in practice
If you want to try this without wasting time, here is a short path.
- For quick social media
• Use your regular AI editor
• Pick “sunset” or “golden hour” preset
• Lower effect strength, then fix skin tone and whites
• Export and stop tweaking
- For more realistic portraits
• Use tools that regenerate the full scene, like Eltima AI Headshot Generator
• Upload a small set of clear photos of your face with neutral lighting
• Try a few packs, “outdoor city / terrace / warm office window” usually give a sunset feel
• Select only the ones where hands, ears, and hairlines look normal
- For consistent profile photos
If you need headshots that look like they were taken in one session:
• Use one tool, not a mix
• Stick with one or two lighting styles across all generations
• Download a larger batch, 20–30 images, then narrow down to 3–5 good ones
What I would avoid
From trial and error:
• Avoid heavy sunset filters on photos that already have strong warm light, they end up orange and muddy
• Do not mix multiple AI apps on the same photo, artifacts pile up fast
• Do not rely on them for official ID photos, the edits are often too strong or change small face details
If you have a pile of flat midday shots and no interest in learning full editors, the combo of presets for quick stuff and a generator like Eltima for portraits gave me usable “sunset” results without much manual work.
16 Likes
You are bumping into the two hard parts: light direction and color balance. Most apps only tint the photo, so you get orange skies with daylight on the subject. Looks fake every time.
Since @mikeappsreviewer covered presets and full-scene generators, here is a different route that keeps more control and fixes the “subject vs sky” problem.
- Use an AI sky replacer that respects light direction
Look for tools with “relight” or “context aware sky replacement” in the description. Examples are Luminar Neo, Photoshop’s Generative Fill, or mobile apps that have a dedicated “sky AI” module, not only filters.
Workflow idea:
• Pick a sunset sky with the sun in a spot that matches your existing light direction on the subject
• Replace only the sky region
• Turn off or lower any “global” warm filter at first
If the sun ends up on the wrong side compared to the shadows on your subject, the edit will never look right.
- Use AI relighting instead of only changing the sky
This is where I slightly disagree with the “preset first” approach from @mikeappsreviewer. Presets often nuke contrast and colors.
Look for a “relight subject” or “AI relight” option:
• Warm up the light on the subject
• Shift the main light source toward the sky side you picked
• Reduce contrast in the shadows a bit, sunset light is softer than noon
You want the brightest side of your subject facing the sunset side of the frame.
- Use regional edits, not global
Global sunset filters blow out whites and make jeans teal. You saw that.
Instead:
• Use a brush or subject mask
• Warm the subject less than the sky
• Add a soft gradient over the sky area with stronger color and slight dehaze
• Leave neutral objects (white shirts, concrete walls) closer to natural
Think of it like two photos blended: a warm sky and a slightly warm subject, not one orange mess.
- Use text prompts as “corrections,” not as “do everything”
If you use an AI editor with prompts and your results look fake, try shorter and more specific prompts.
Bad:
“Make it a dramatic sunset with magical colors”
Good:
“Subtle warm sunset. Soft orange light from the right. Natural skin tone. No surreal colors.”
Then:
• If skin goes too orange, lower saturation on oranges only
• If blues look weird, pull down saturation on aquas and blues
- Watch for these realism checks
After your edit, zoom in and check:
• Shadows point the same way across the frame
• No strong rim light on the wrong side of the subject
• Edges of hair and trees do not have a bright halo from the old sky
• Reflections in glasses or windows roughly match the new sky color
If one of these is off, fix it with a small local adjustment or try a different sky.
- If nothing looks right, simplify
Some photos fight sunset edits. Harsh overhead light, deep eye sockets, strong flash, mixed lighting indoors.
For those:
• Skip full “sunset”
• Apply a light warm tone curve
• Add a subtle gradient from the top with warmer color
• Slight vignette
You get a “late afternoon” feel instead of a full fake sunset, and it often looks more believable.
You do not need to stack ten apps. One editor with sky replacement, subject masking, and some AI relight is usually enough if you respect light direction and work locally instead of global orange filters.
You’re already ahead of most people because you noticed the core issue: the light on the subject does not match the fake sunset sky. That’s exactly why a lot of “sunset filters” look like cheap stickers.
Since @mikeappsreviewer covered presets and full-scene generators and @nachtschatten drilled into sky replacement + relight, here’s another angle: treat it like a mini VFX shot instead of a filter job.
1. Start by locking in a “target look” reference
Before touching AI:
- Grab 2–3 real sunset photos with similar framing and subject distance to yours.
- Look at:
- Where the brightest area of the sky sits in the frame
- How strong the contrast is on the subject
- How saturated the colors actually are (real sunsets are usually less neon than what apps spit out)
Keep these open while editing. If your edit looks more intense than the reference, it’s probably fake.
2. Use AI for structure, not for final color
I slightly disagree with both of them on relying on presets / auto relight for color. They overcook stuff a lot. What I like instead:
- Use AI to:
- Replace the sky
- Nudge light direction / shadow softness
- Then do color grading manually with basic sliders:
- Temp / Tint
- HSL panel
- Simple curves
So AI handles geometry and light, you handle taste.
3. Let the AI build a “sunset base,” then tone it down
Take whatever tool you have that lets you prompt or choose a style, and intentionally overask but underuse:
- Prompt something like:
“Photo at subtle golden hour, warm sunset sky, natural colors, realistic lighting on subject” - When it generates:
- Do not accept it at 100% strength
- Use a blend/opacity slider if available, and keep it around 40–60%
- If it cannot blend, export that version and layer it manually in another editor, then reduce opacity
The AI result becomes a “grading layer,” not the final image.
4. Match the subject by faking a sun side and a shadow side
To avoid the mismatch you described:
- Identify which side of the subject is already brighter in your original.
- When you add a sunset sky, make sure the fictive sun is on that same side.
- Then:
- Create a rough “subject” mask (AI subject select is fine)
- Add a soft radial gradient on the bright side of the subject:
- Slightly warmer
- Slightly brighter
- Add another very faint cooler / darker gradient on the opposite side
This sounds nerdy, but visually it tricks the eye into thinking there is a real sun in the sky you just added.
5. Use AI to create a better starting sky, not necessarily in the same app
If your apps only give cartoony skies:
- Use an image generator to make a separate sunset sky:
- Prompt: “natural subtle sunset sky, soft orange and blue, no surreal colors, no sunburst, no stars, high resolution”
- Pick a sky that:
- Has a believable gradient
- Is not insanely saturated
- Then feed that sky into your sky-replacement tool instead of using its built in packs.
This avoids the typical candy-colored nonsense.
6. Micro-fix the color lies that give it away
Quick realism checks and fixes:
- If white shirts look orange:
- Use a color range or HSL to reduce saturation on oranges/yellows only
- If the ocean, jeans, or shadows look teal:
- Pull aqua and blue saturation down slightly, then bump luminance up a bit
- If skin looks fake:
- Lower saturation on oranges
- Slightly increase luminance on reds to avoid muddy cheeks
Most fake “AI sunset” looks are just bad HSL choices, not bad tech.
7. Accept that some shots just won’t sell as sunset
Harsh noon top light, on-camera flash, or mixed indoor light fighting a bright window will always look weird as “sunset,” no matter what. For those:
- Aim for “late afternoon warm” instead of full sunset:
- Mild warm temp
- Slightly lifted shadows
- Soft gradient from top with a bit of orange
- Keep the sky edit very subtle, maybe even just desaturate and warm it.
In other words: use AI like a lighting assistant, not a magic filter. Let it help with sky and general direction, then do small, boring manual steps to make it actually believable.